Brief Update: Fabric On Demand Weirdness and Tutorial Progress

So, as promised, I’m trying to keep it brief while I push through costume prep and–soon–costume sewing.

Fabric On Demand Weirdness

The night before last, my girlfriend checked the mail and brought me a package. I wasn’t expecting a package. It turned out to be a duplicate printing of my custom costume fabric from Fabric On Demand.

This was obviously a mistake, but I was like, y’know, it would be nice to have a backup copy of the fabric. I made sure they didn’t charge me, and emailed them to tell them about it, figuring there was a good chance they would just say to keep it. I mean, what were they going to do with it? And if they said return it, oh well. No harm, no foul.

What they did was “invite” me to purchase the mistaken duplicate printing at about 2/3 the cost of the original. I found this rather insulting, the idea of them charging me that much for their mistake, and said I would just return it. But then I figured it couldn’t hurt to ask for a steeper discount, thinking surely they would want to recoup their loss to some extent, right? So I offered something closer to 1/3 cost. But no, they said they couldn’t give more of a discount because it wasn’t a “defective printing.”

Now, I might argue that it kind of was a defective printing in that it should have never been printed, and I still wasn’t sure why I should pay anything for their mistake. I mean, again, what are they going to do with it? But I’m returning it. They certainly have every right to ask for it back, I suppose. I just found the whole thing rather odd and slightly off-putting. They did great work on the original, and got it sent to me in very timely fashion. My experience with them has been positive, and I do want to order future custom work from them.

I’m just honestly not sure what to think of the duplicate printing situation. It’s a moot point now, but…thoughts, anyone?

Tutorial Progress:

I am very nearly done with the text/image tutorials for all the portions of the costume sewing process. I think I am down to the steps for adding zippers to back of the mask and the sides/under the back of the belt area. Woo hoo!

After that, I plan to lay out a rough schedule regarding what order I will do the steps and on what days. Roughly, because I don’t really know how long it will take. But dividing it up will help me resist my tendency to want to keep at a task obsessively to the neglect of all else.

And that’s it for today! A brief post, by my definitions anyway. Thanks for listening!

Up Next: Final Prep Stages

Pros & Cons & Getting Started On the Suit for Gosh Sakes

So, I mentioned last time the two possible ways of moving forward with the DIY suit:

A) Continue to refine my patterns and strive to more precisely transfer the patterns–including seam allowances, guides, and measured marks–to the fabric.

B) Create a precise, fully marked template using my patterns and the patterns I modified from others for the shirt, mask, gloves, and boots and have that template professionally printed onto fabric (by the company that did the bodysuit template printing).

There are pros and cons to each.

A Pro for Option A is that it continues down a much more DIY path, but the accompanying Con lies with difficulty in achieving the marking and guides needed for ease of precise sewing, and ultimately in getting a satisfyingly precise web pattern on the suit.

Option B’s Pro is that it makes getting both the precise sewing guides and web pattern much easier and more exact, but the Con, of course, is that it does take more of the DIY aspect out of the equation.

Cost…well, it could go either way whether that’s a Pro or Con for either. The printed fabric costs a bit more than unprinted, but without a precise pattern with guides, I could continue burning through a lot of unprinted fabric. Plus, any method that I use to get the web pattern on the fabric myself will cost something (in addition to not looking as good). So we’ll see.

For now, I have decided to not decide, and to go into Full Steam mode with getting the professionally printed Ditko suit prepped and sewn together.

The Comic-Dotted Ditko Suit

About twice a day, I think “Man, I am just going to cut out the pieces of that suit and start sewing. What could go wrong?” And then I remind myself of all the things that could go wrong if I don’t properly educate myself on how to properly size and sew the thing, and I make myself slow down. Luckily, I don’t have many large blocks of free time available anytime soon, so that helps too.

But I do have a definite plan to prep and get started:

1) A Customized Tutorial: I am making a text and image tutorial based on the video shared by SaiTurtlesNinjaNX about how to sew a (similar) Spidey Suit template. Watching the video a number of times in order to make the tutorial helps get techniques in my mind (modified from the serger techniques in the video and accounting for the slight differences in the costume templates involved), but ultimately it will be easier to follow a text and image based guide at my own pace.

maskBack2

Screenshot from “Making Your Own Spidey Suit: sewing the Pattern” -> http://youtu.be/BJvSxyEkWTE?list=PLvrj78qLT6EyAm0wV9UBkgKjD3ZFK8dAt

(I will also need to get around to practicing at least a little with installing an invisible zipper, but that will be the last step of the sewing.)

2) Guide Image with My Measurements: I am also preparing an image of the template design overlain with my measurements translated to the layout of the costume, basically how wide each part of the costume should ideally be for my size. That will make it easier to mark the fabric with chalk so that I can cut it with a proper seam allowance and ultimately sew along the right lines.

memeasure

90% measurements that I will distribute evenly across the marked areas of the suit for sizing.

3) Pace Myself and Sew in Manageable Chunks: I tend to want to dive in and sew a project all at once, to go at it until its done. I am aware that I cannot do that with the costume, not only because I need to approach it carefully, but because that would probably be, like, 48 straight hours of sewing or something. So I will approach the sewing in parts: torso/mask (not including the zipper yet); legs and feet; gloves; arms/arms to torso; install zipper, or something like that.

And anyone who sincerely tries to digest all my blogging verbosity will be glad to hear…

4) Minimize my blog posts during the process: I love to talk, be it verbally or in writing. As I’ve mentioned, it barely matters whether I have anything to say or whether anyone is listening, I’ll talk/type anyway. But I could actually do a lot of sewing in the time I spend typing about sewing, so that seems like a good approach to getting this costume done, eh?

And on that note, I will wrap this up for today and get back to my tutorials and guides for sewing the suit!

Up Next: Fewer Words… I hope… (It’s not easy for me. See? This “up next” thing should’ve been a lot shorter than this, but I’m still typing! Okay. I’m stopping now…)

Spidey Shirt Take 2: New & Marginally Improved

wpid-img_20140720_034820.jpg

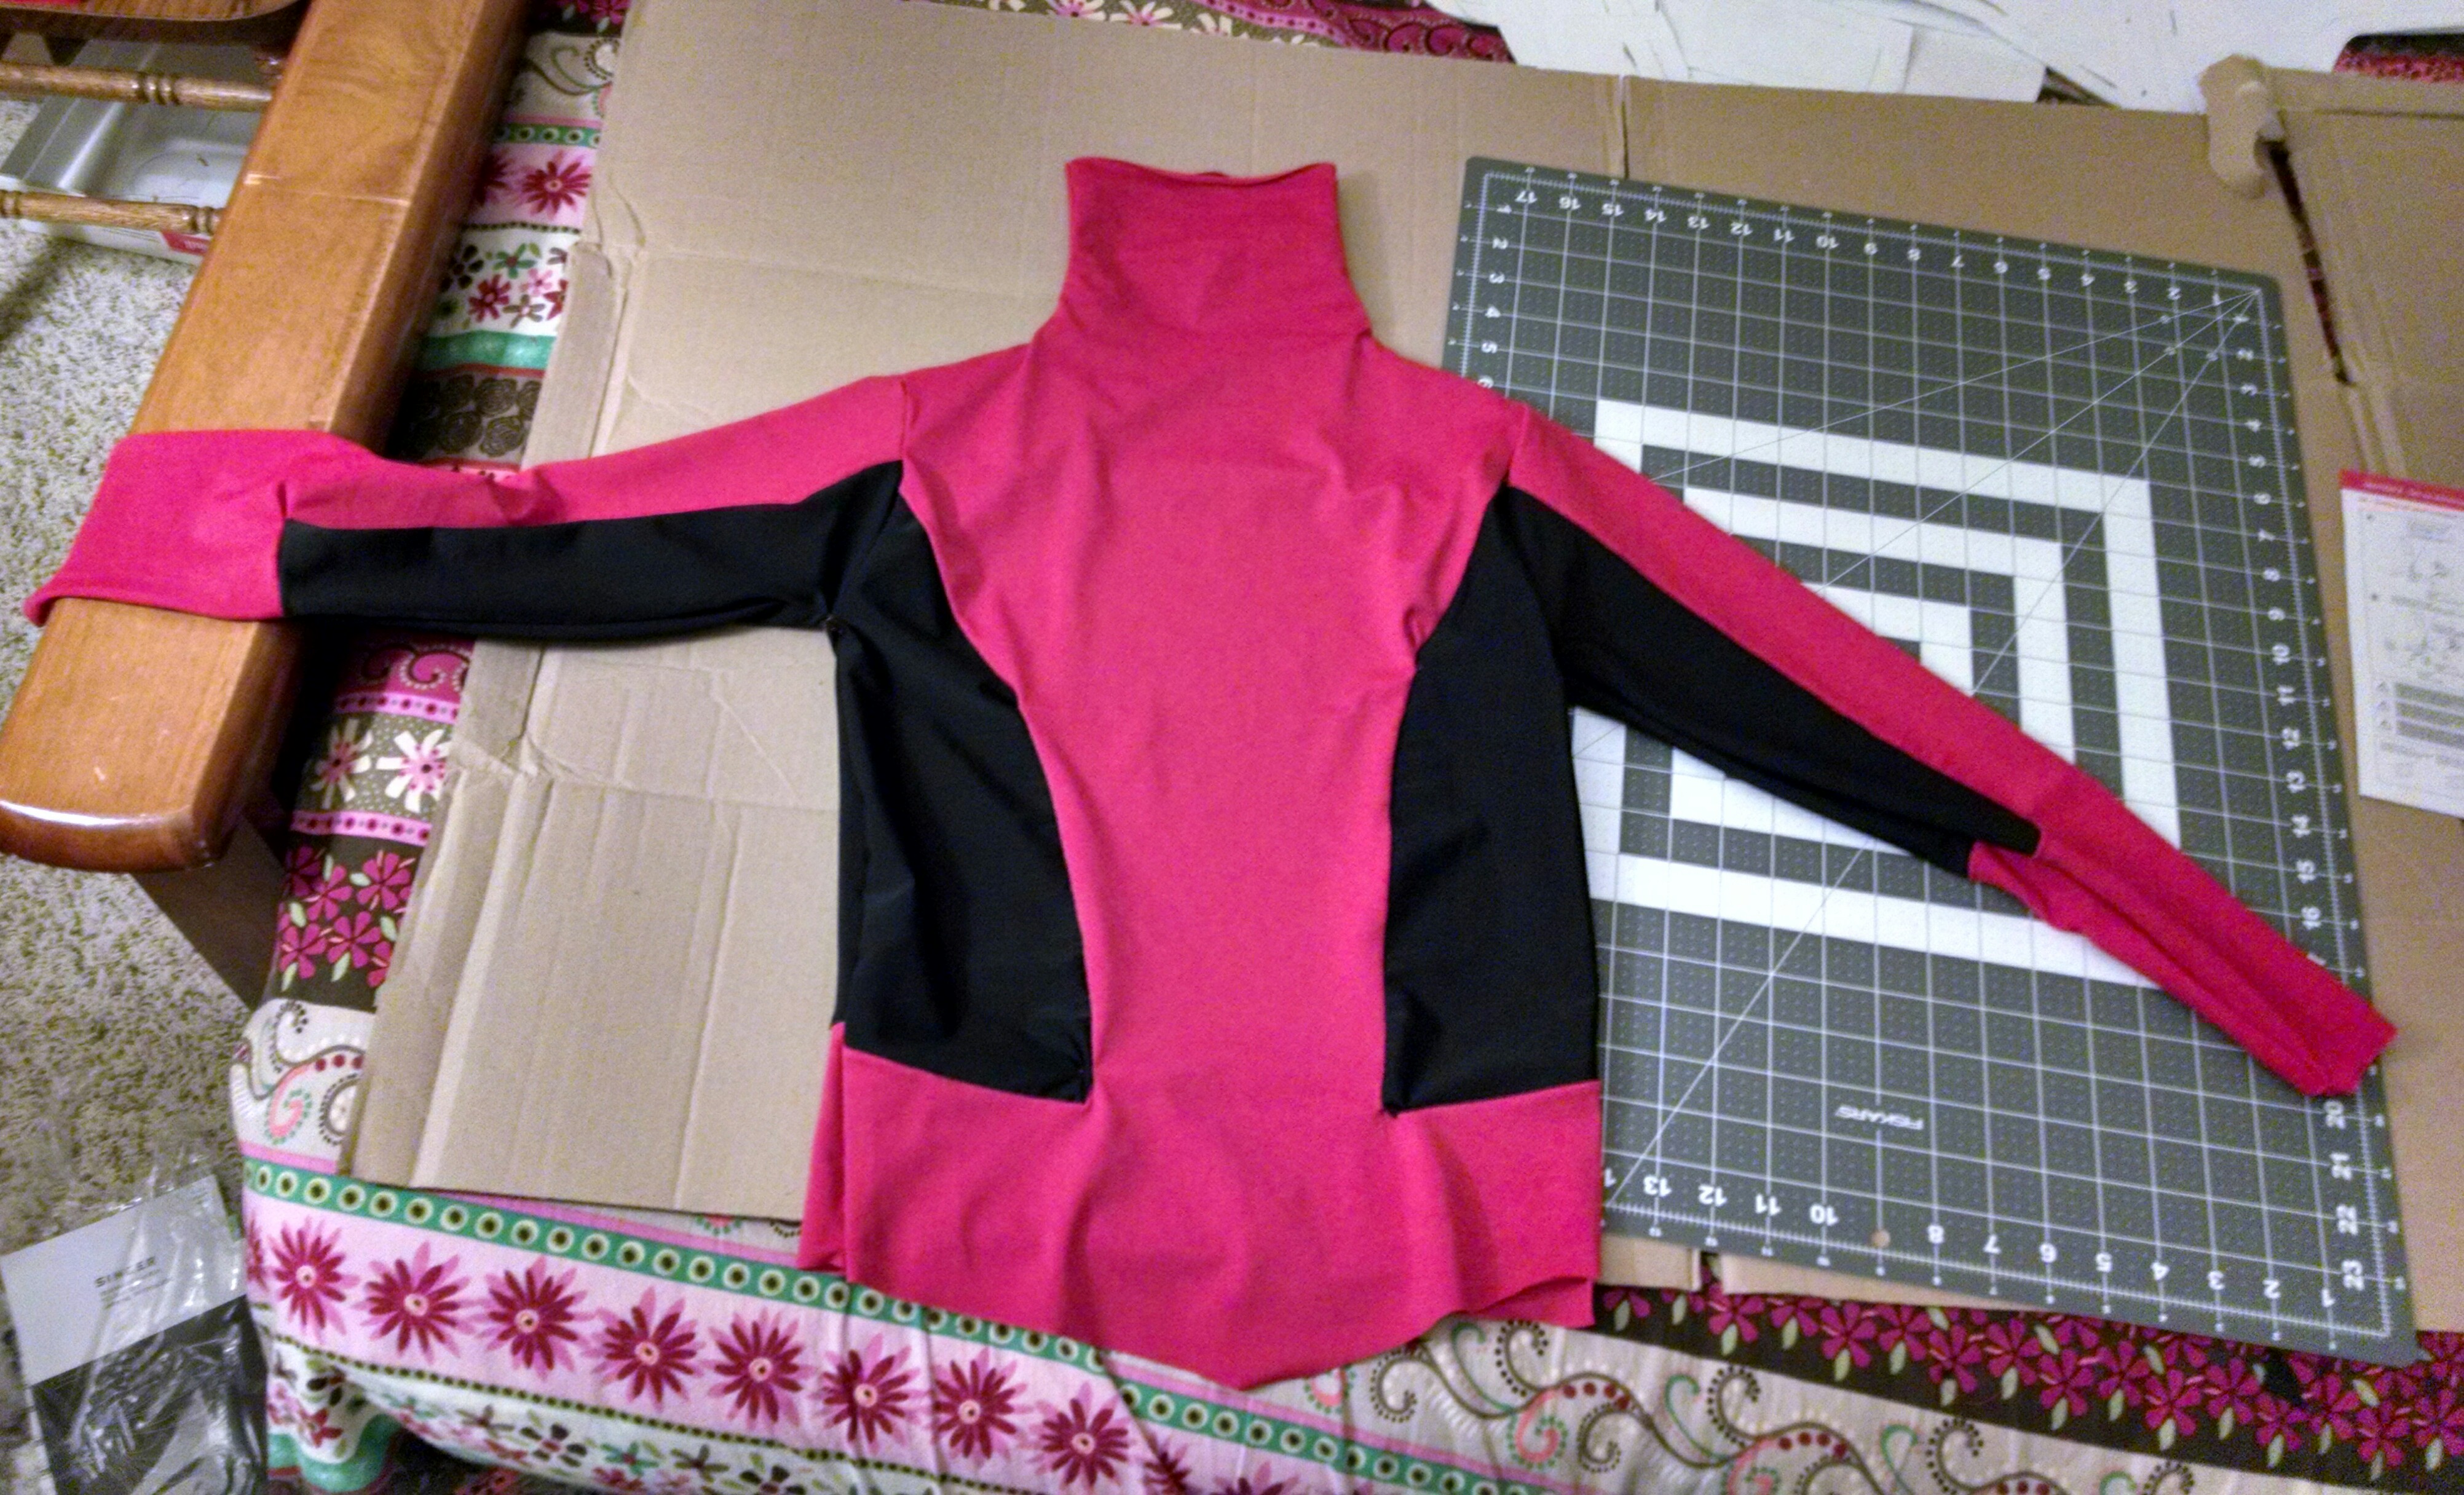
May I start out by saying that after all the patterning, measuring, tracing, cursing, cutting, assembling, cursing, pinning, basting, seaming, cursing, seam-ripping, cursing, re-seaming–and cursing, did I mention cursing?– that goes into a garment like this, I am just happy that it is in the shape of a shirt at all!

But really, I feel overall pretty good about this, whether or not I feel like it is a “final product.” Here are a few glamour shots of me wearing it so we can look at the pros and cons:
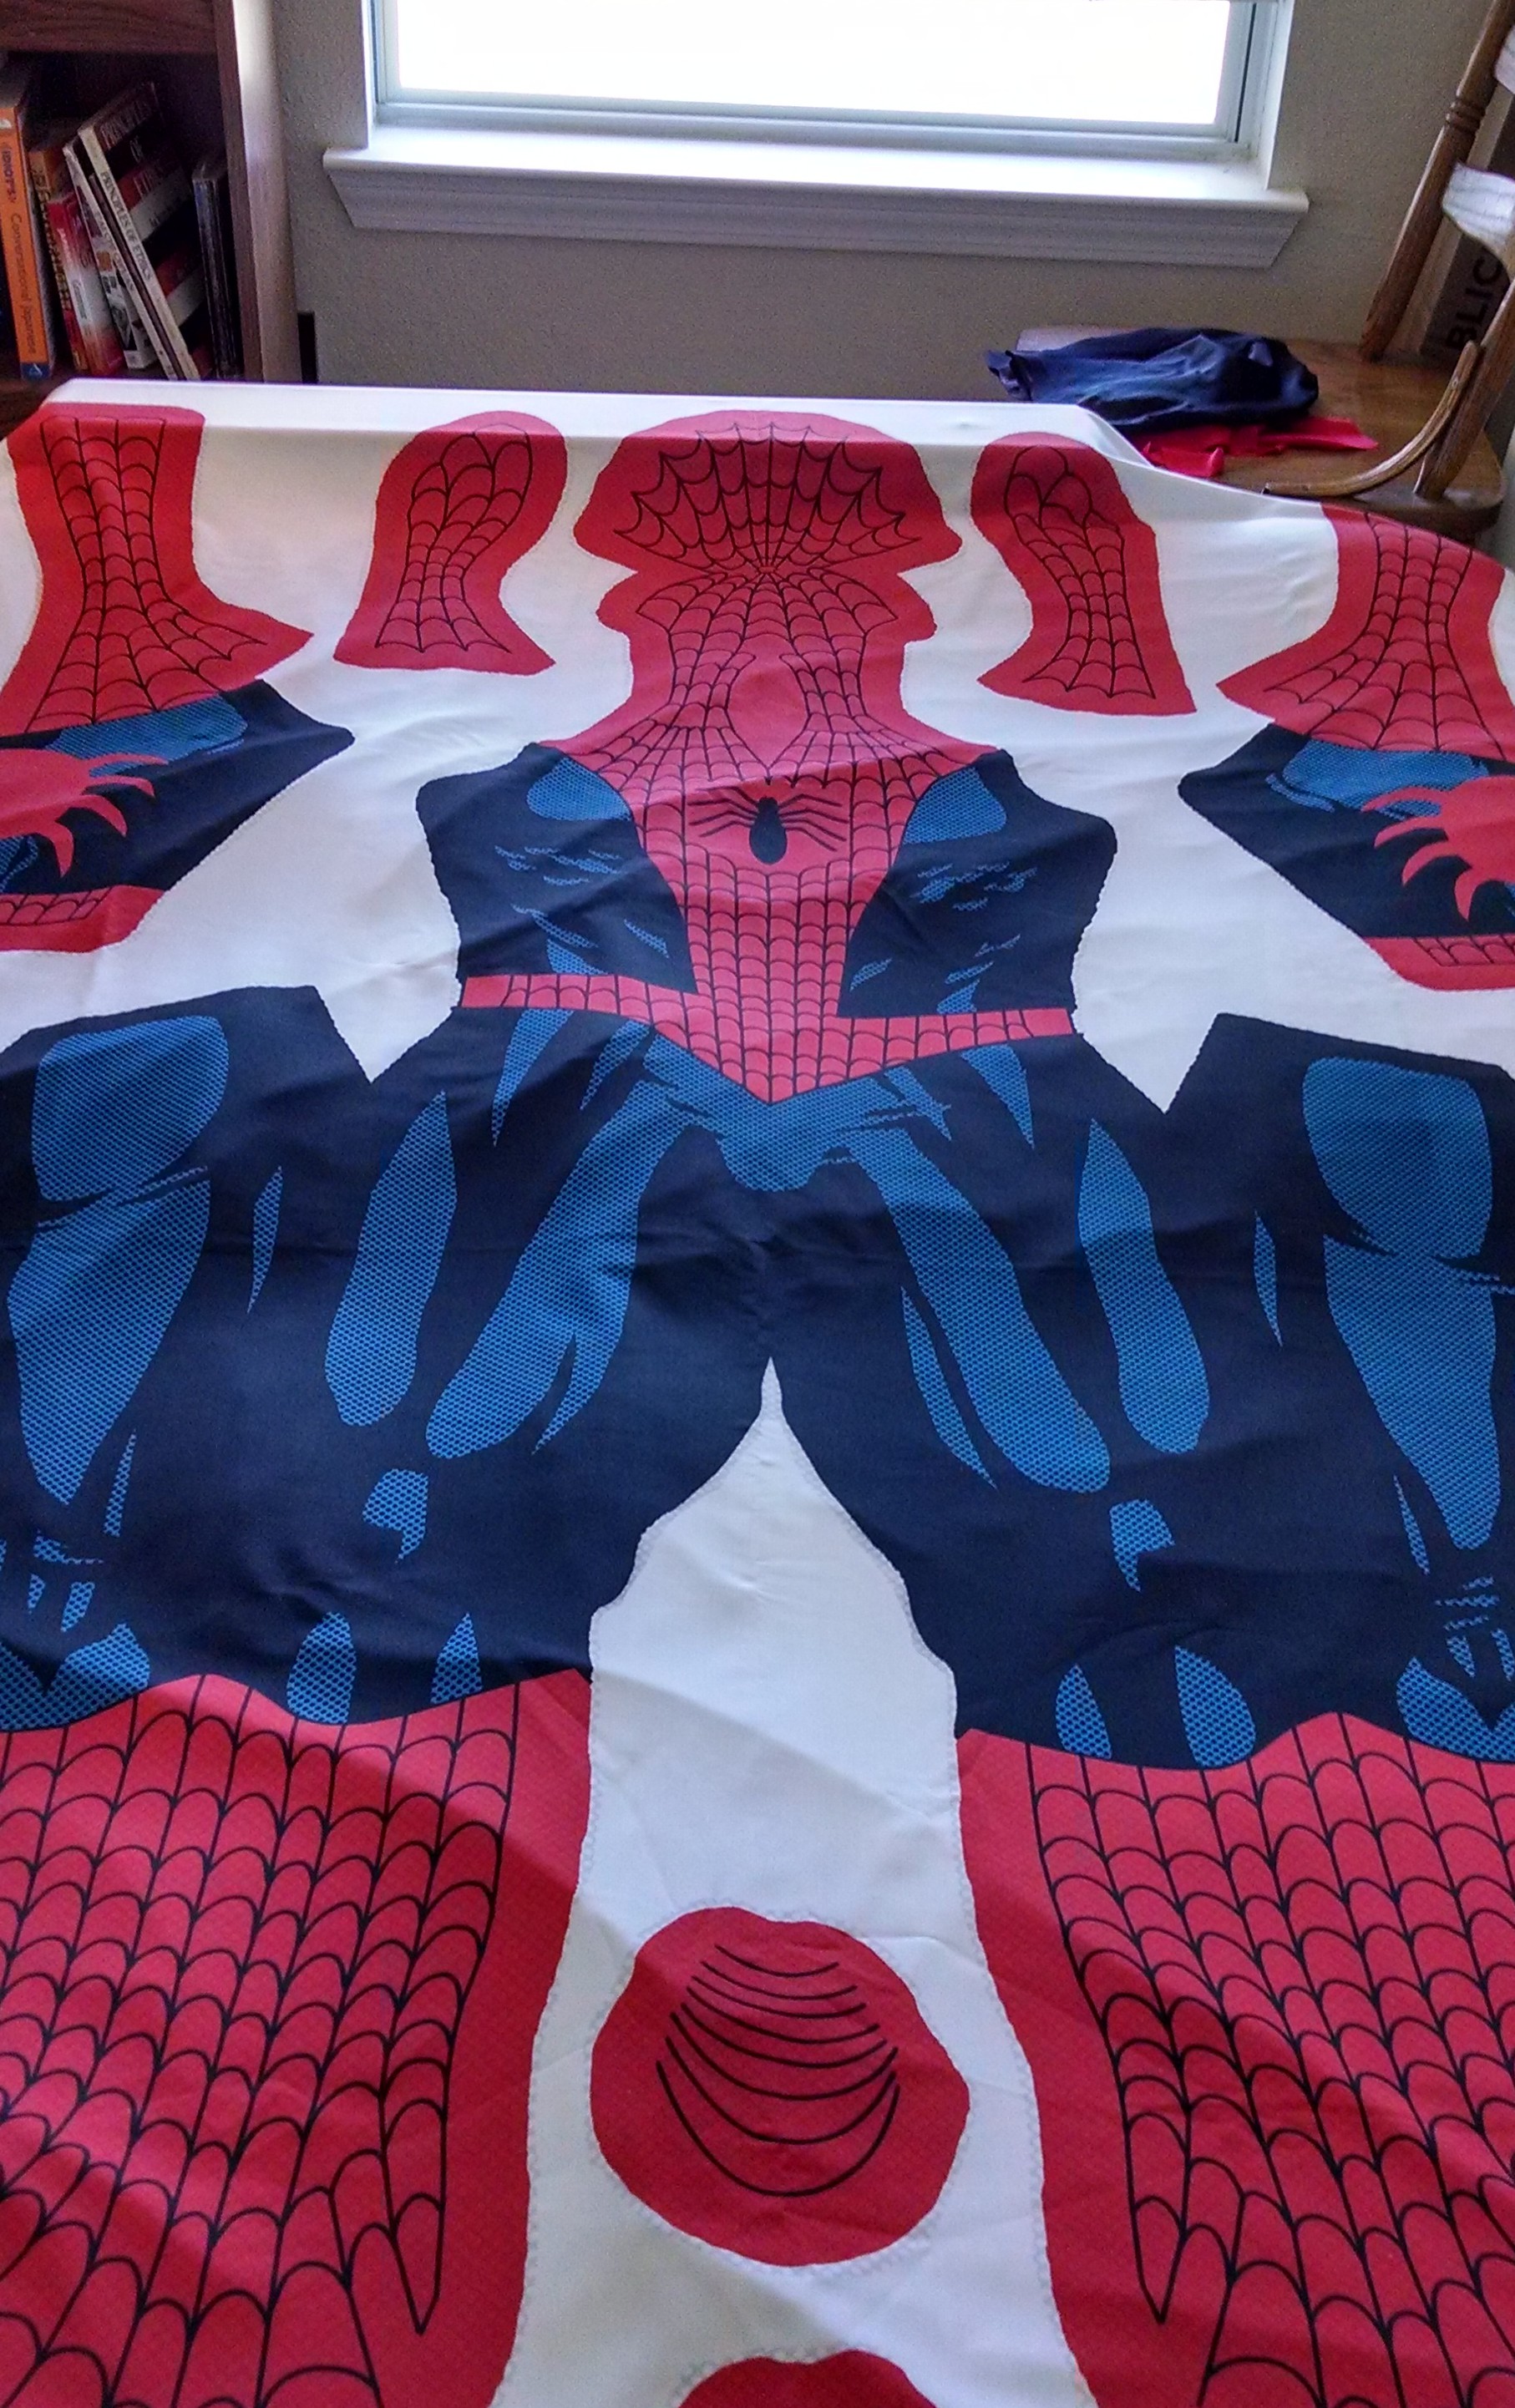
Front View:

Not too bad from this angle. Some mild pinching at the corners of the black, but much better than last time. Some puckering near the armpits. I got the high collar I wanted (it actually has excess height to trim!).

I really need to clean that mirror.
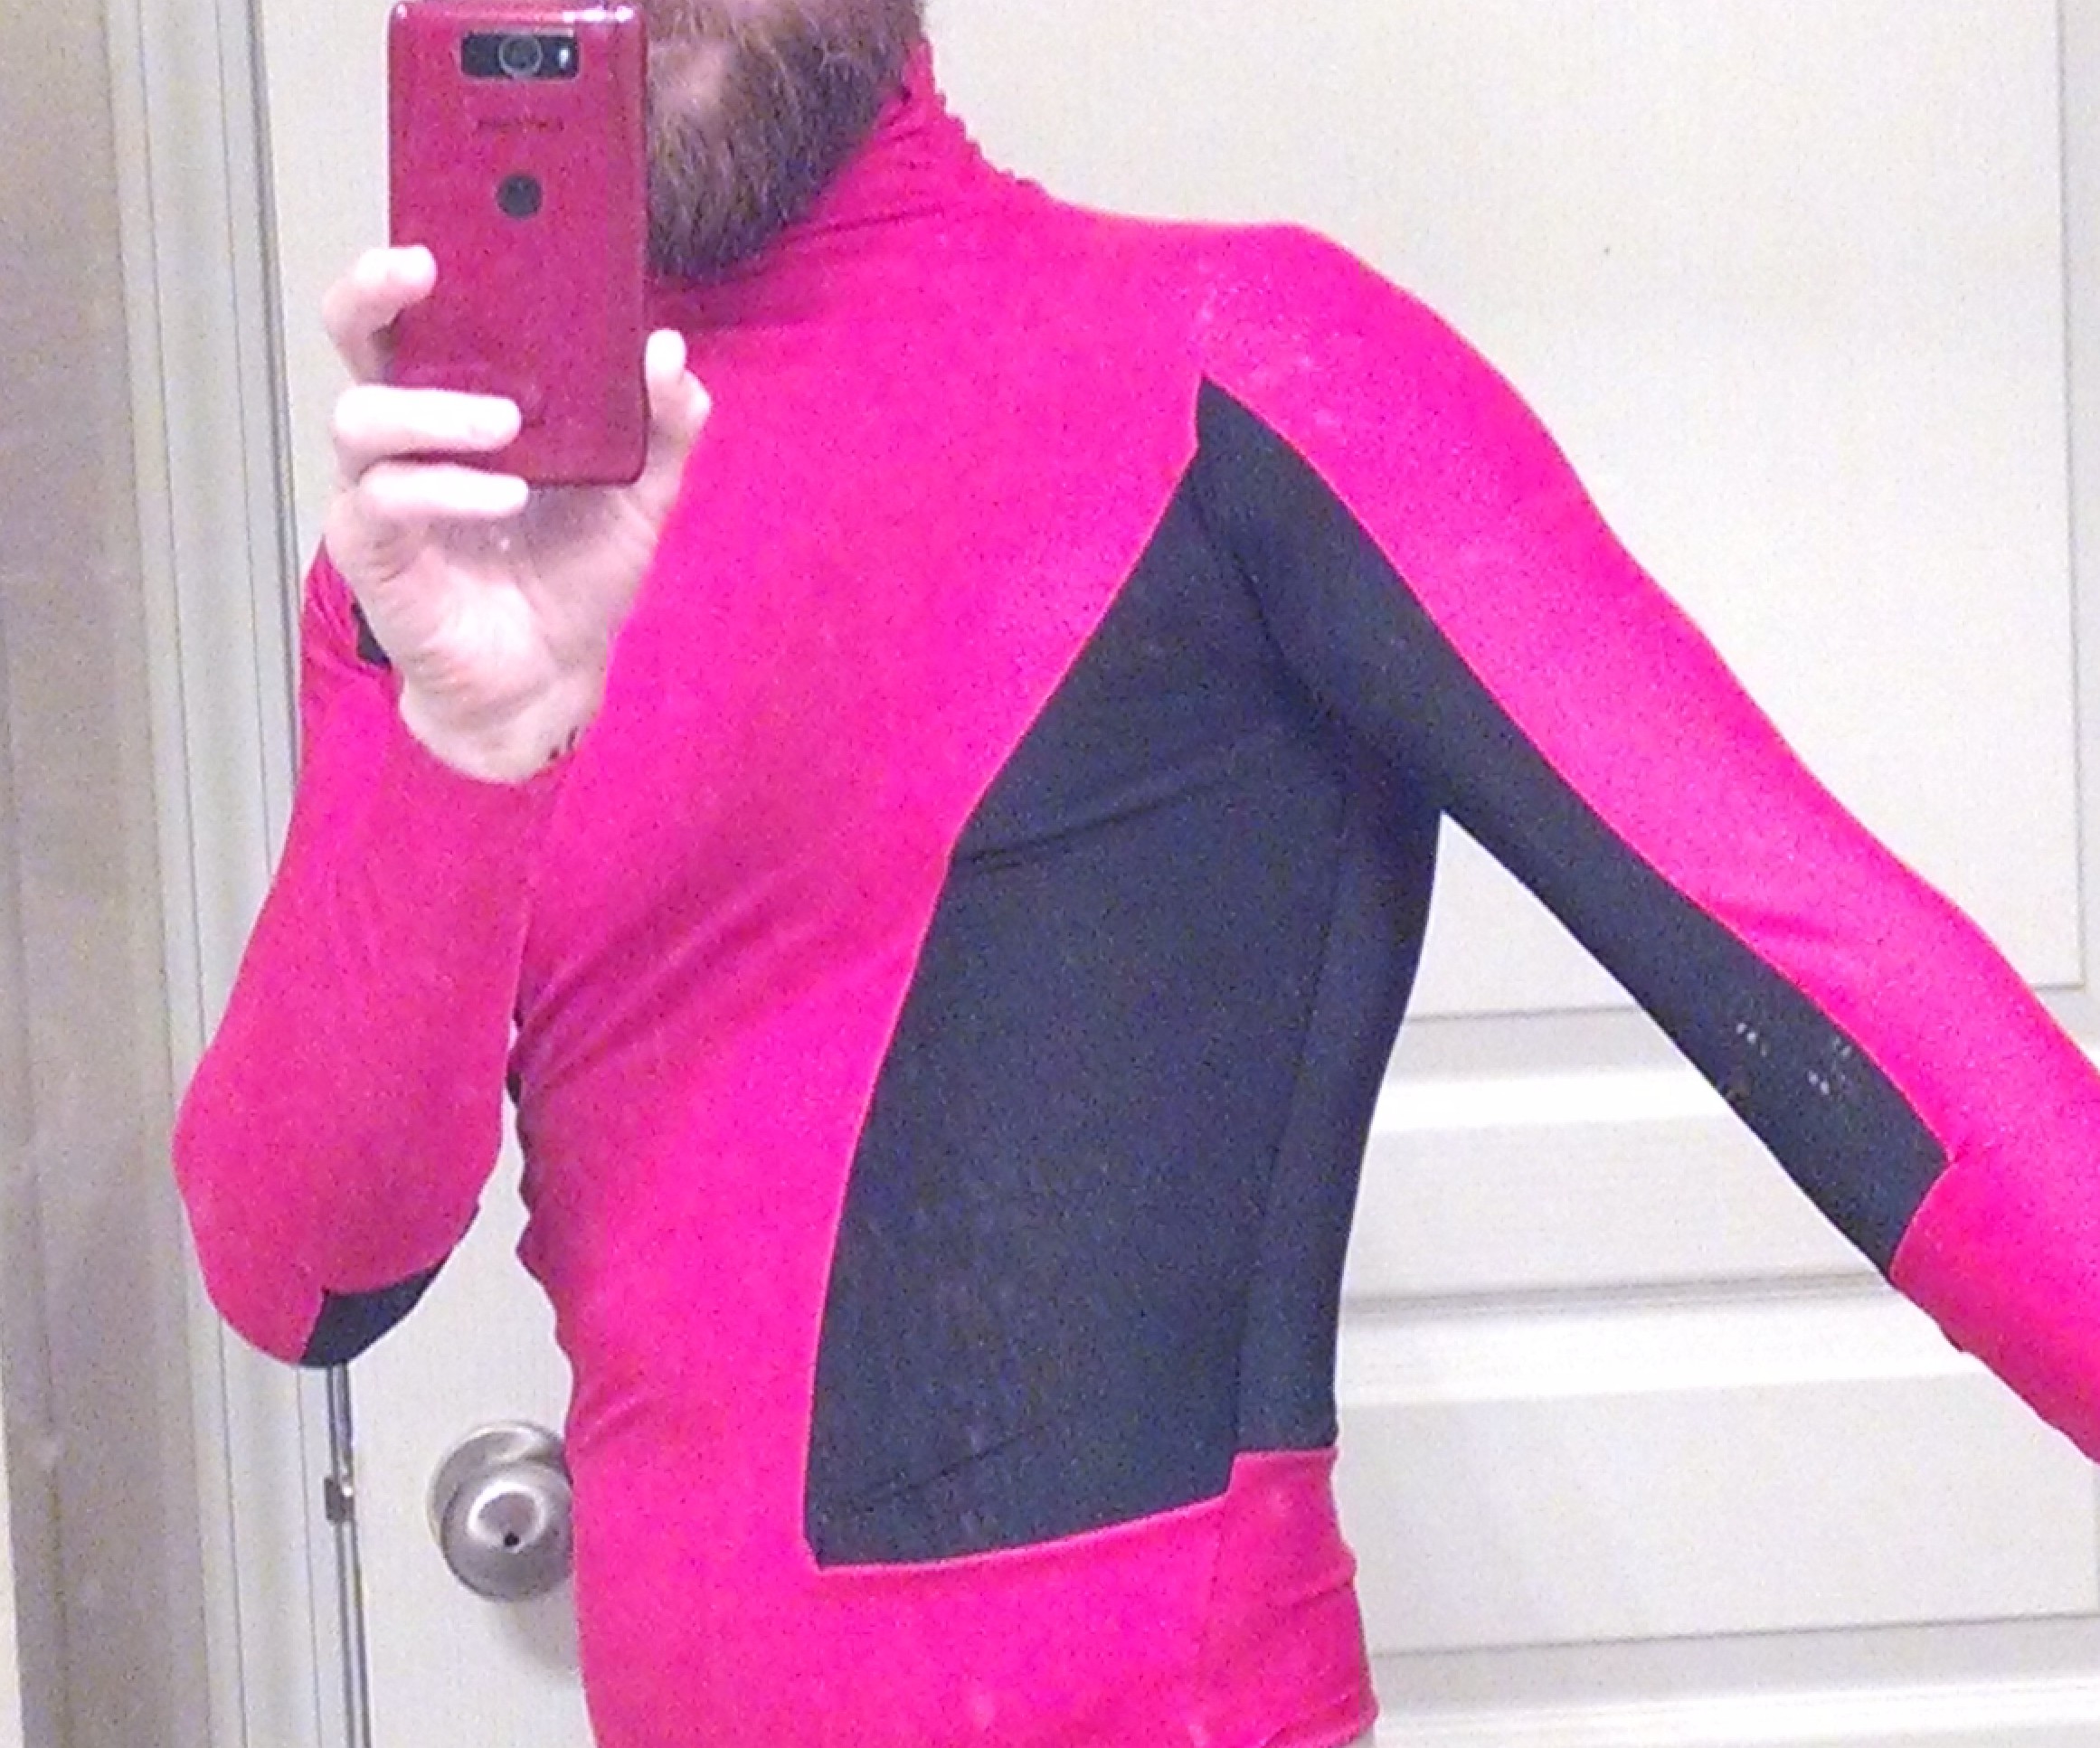
Angled 1:

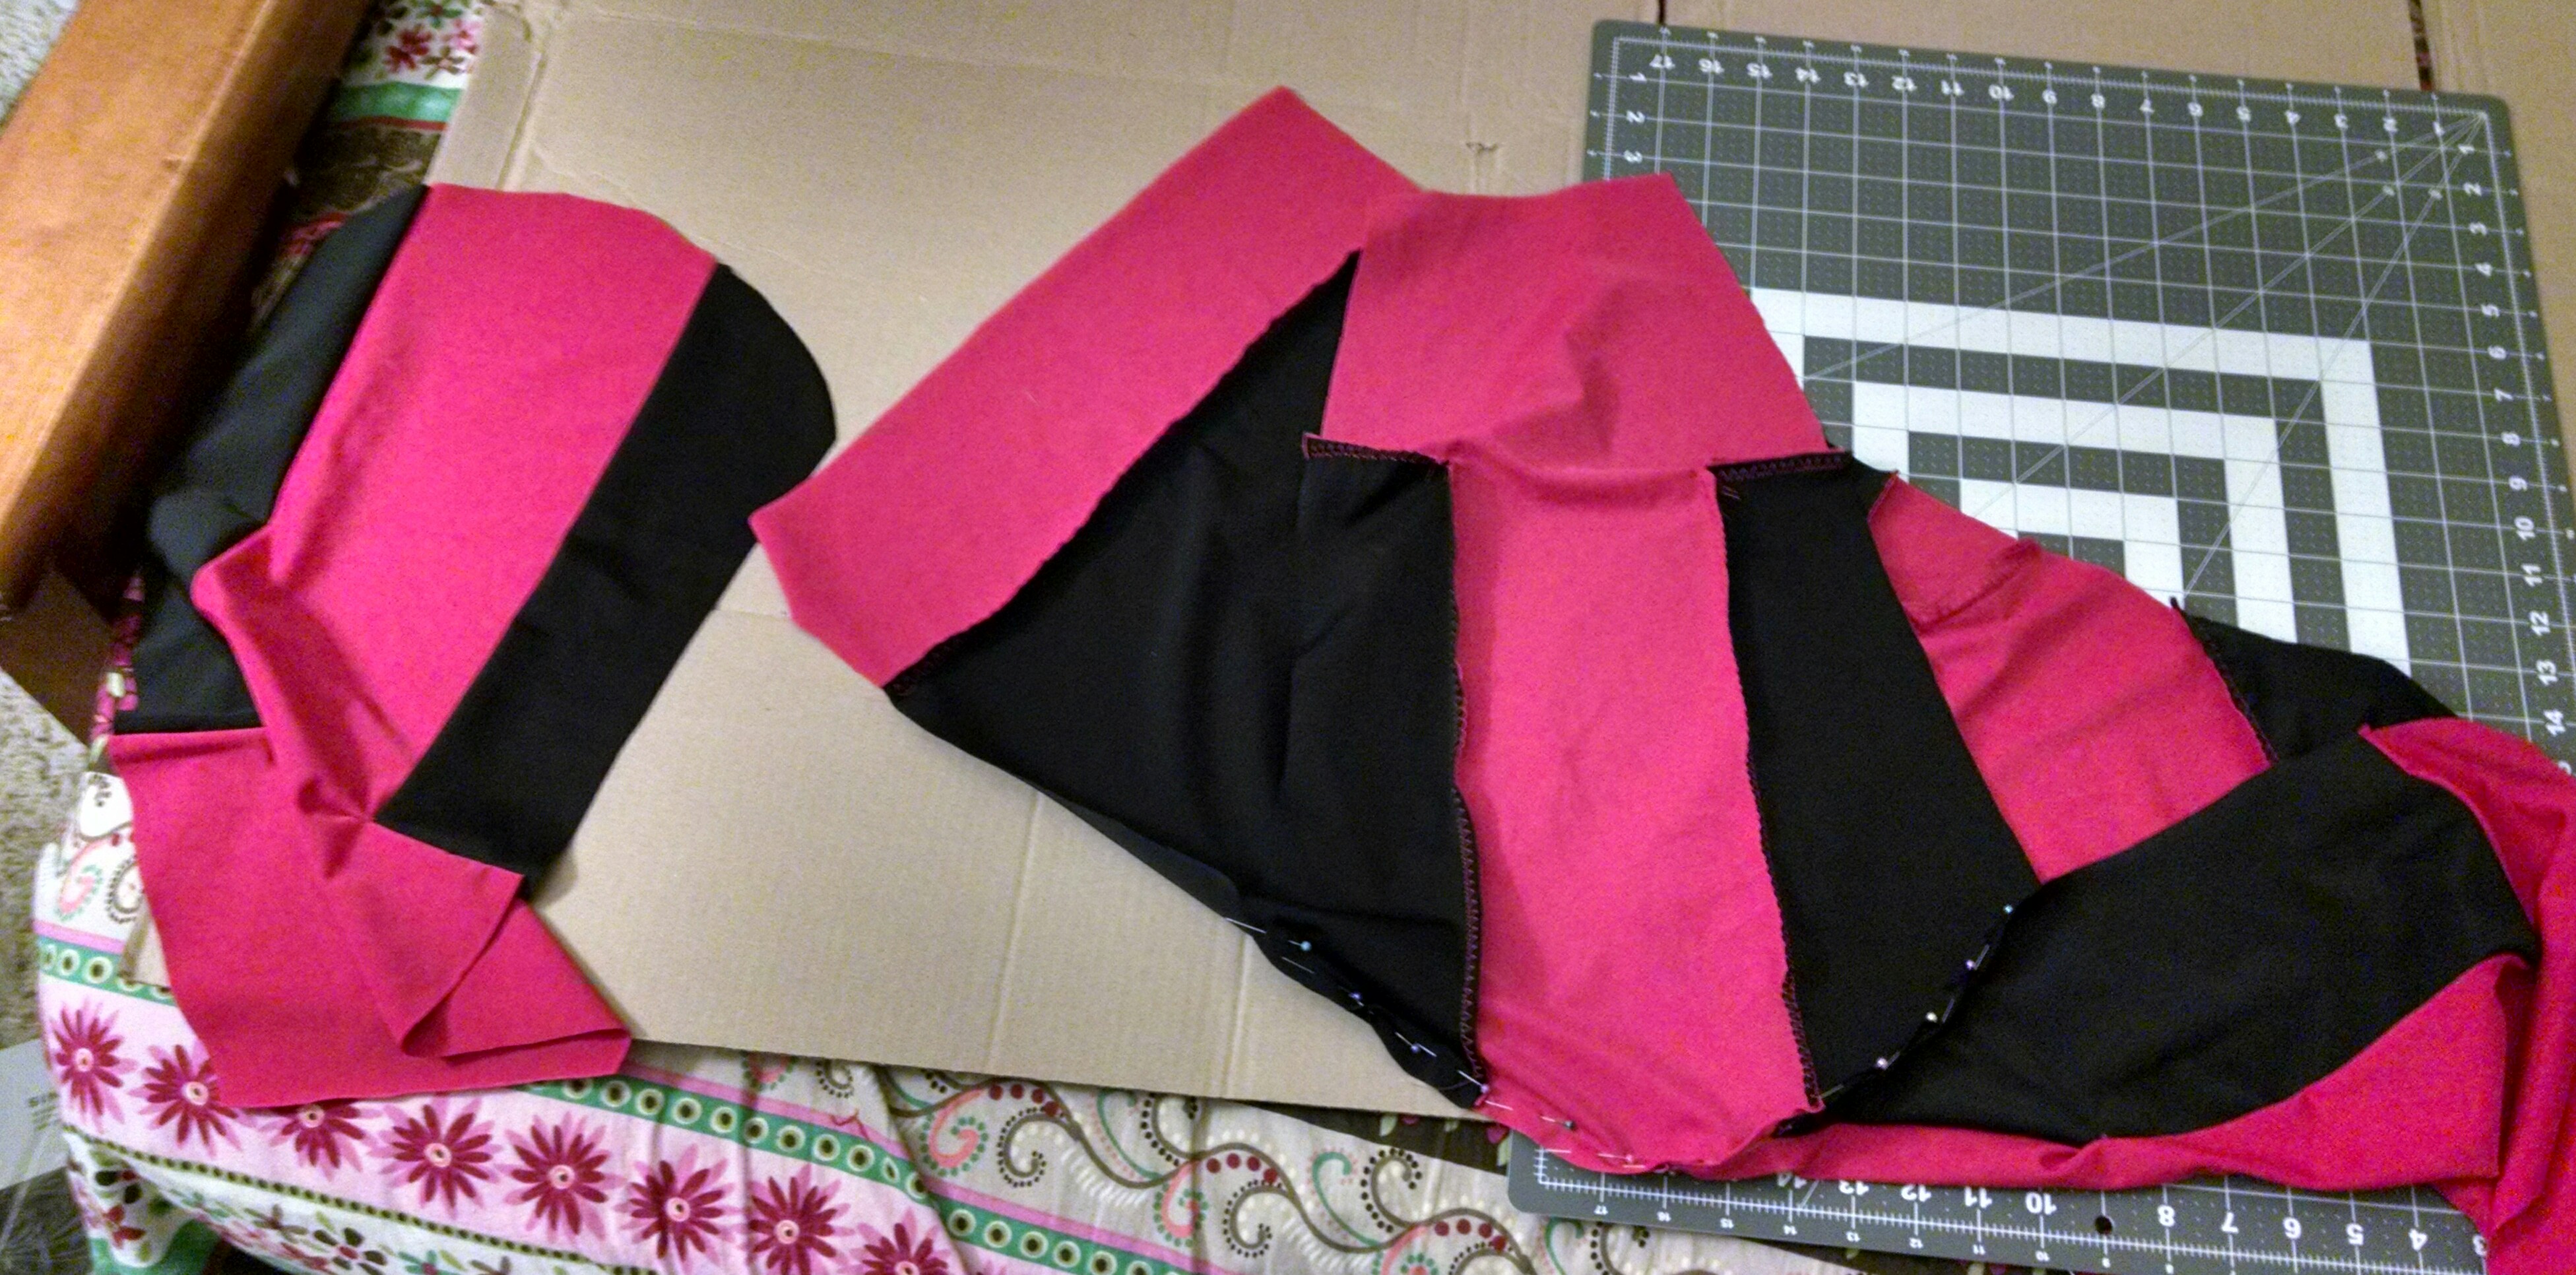
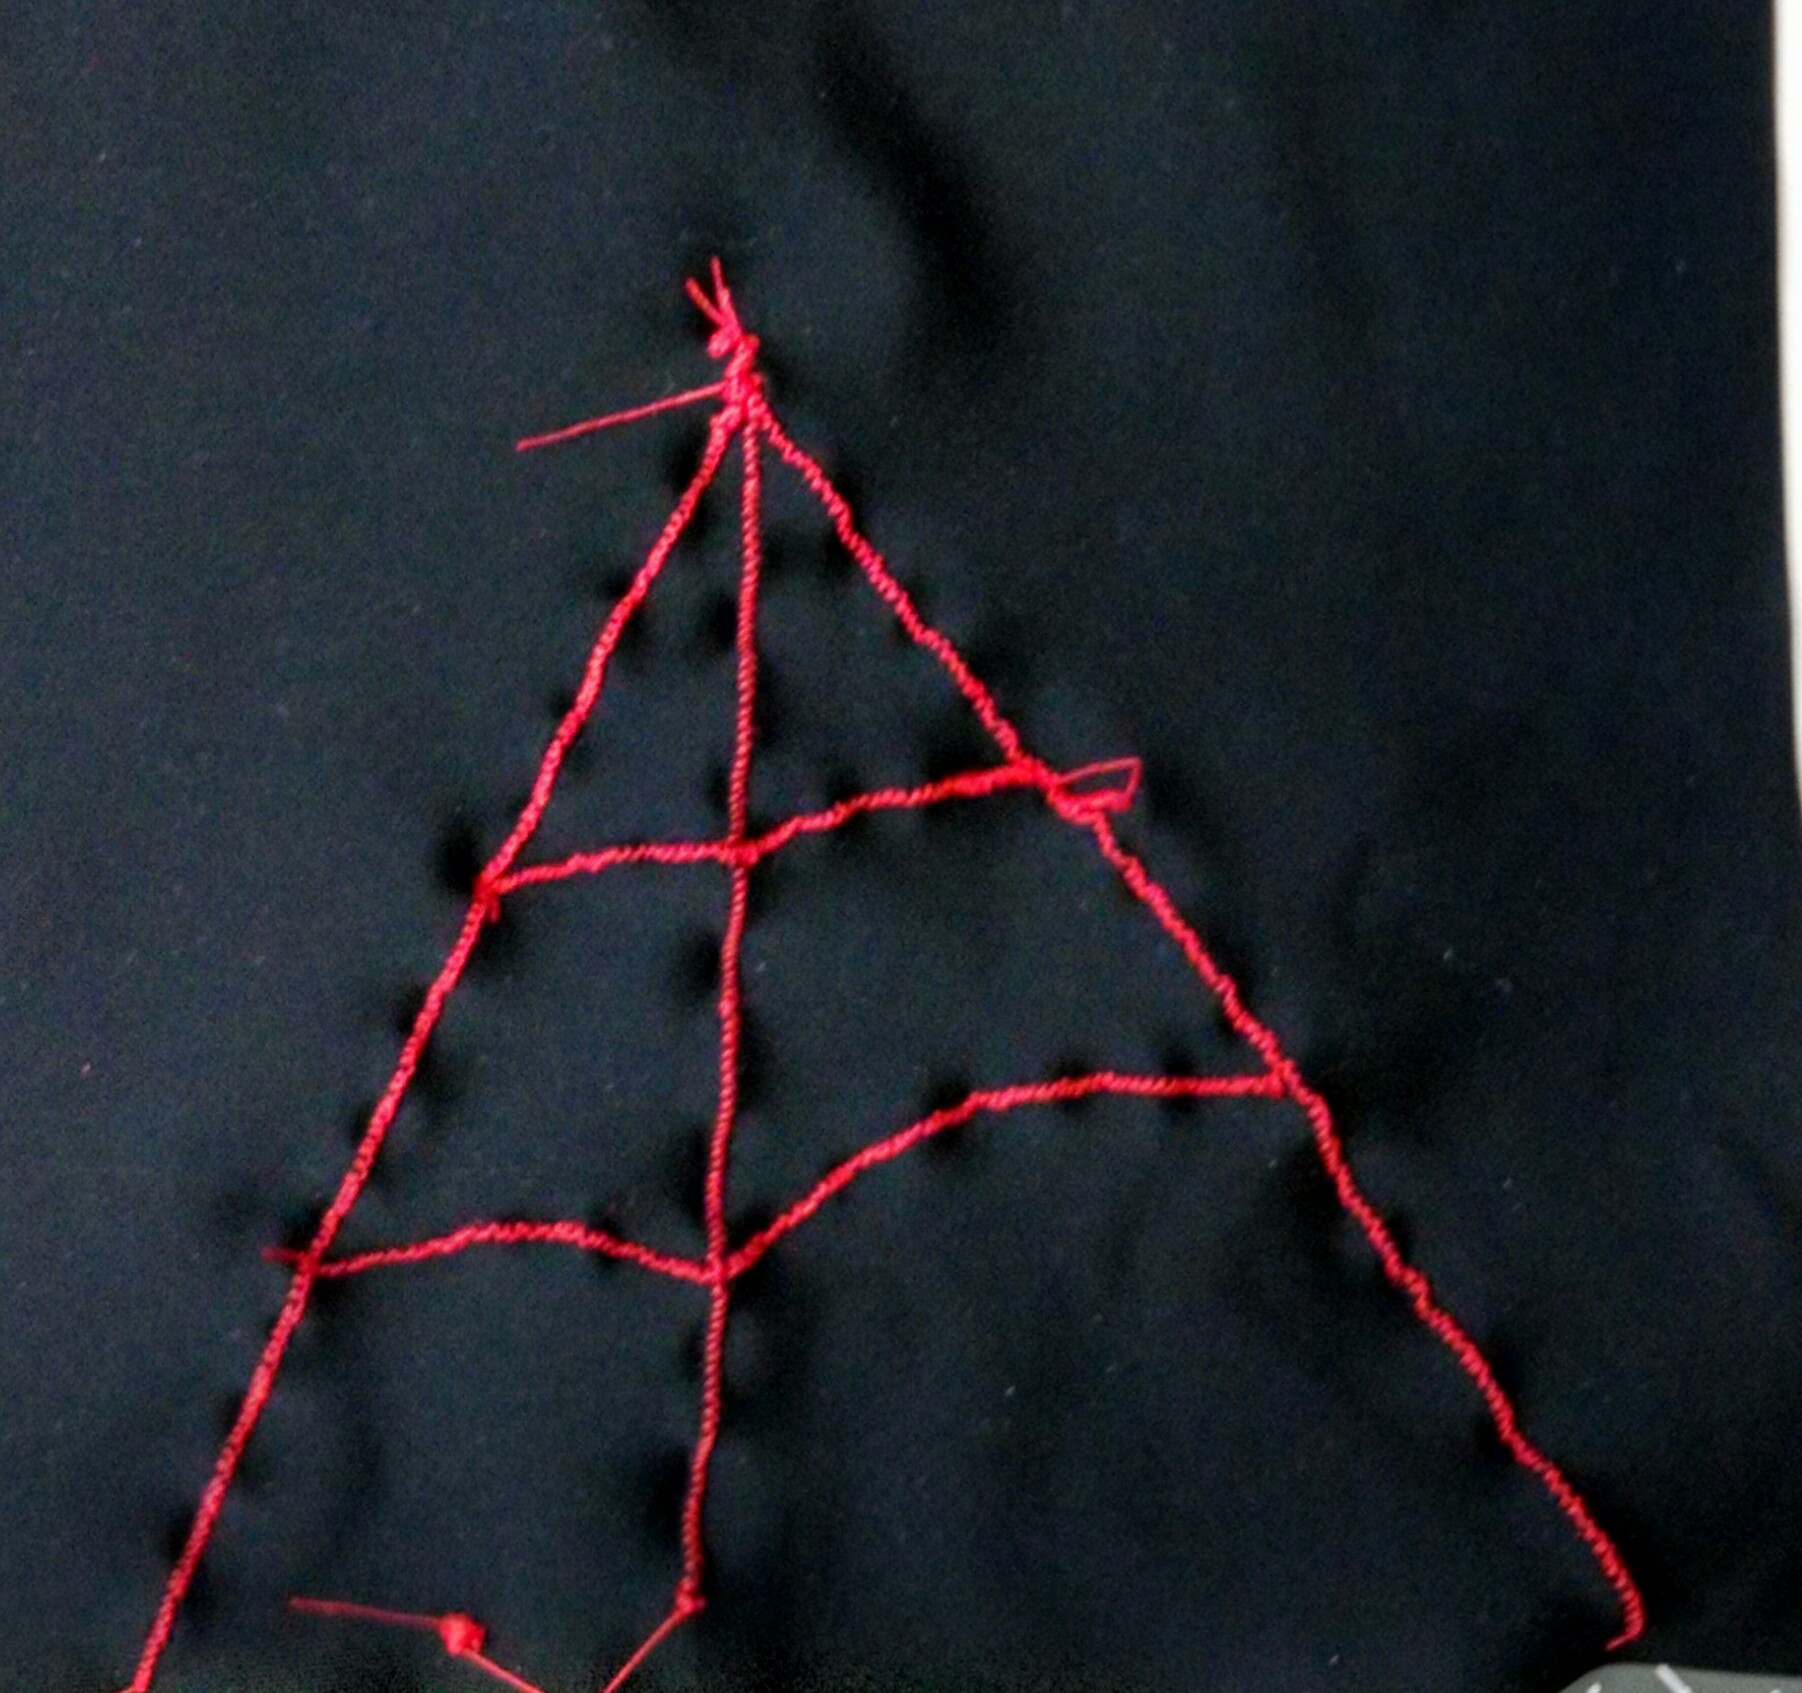
Mismatch between the front and back black at the waist. Same for the sleeve meeting the torso, but it actually forms kind of a cool point, almost.
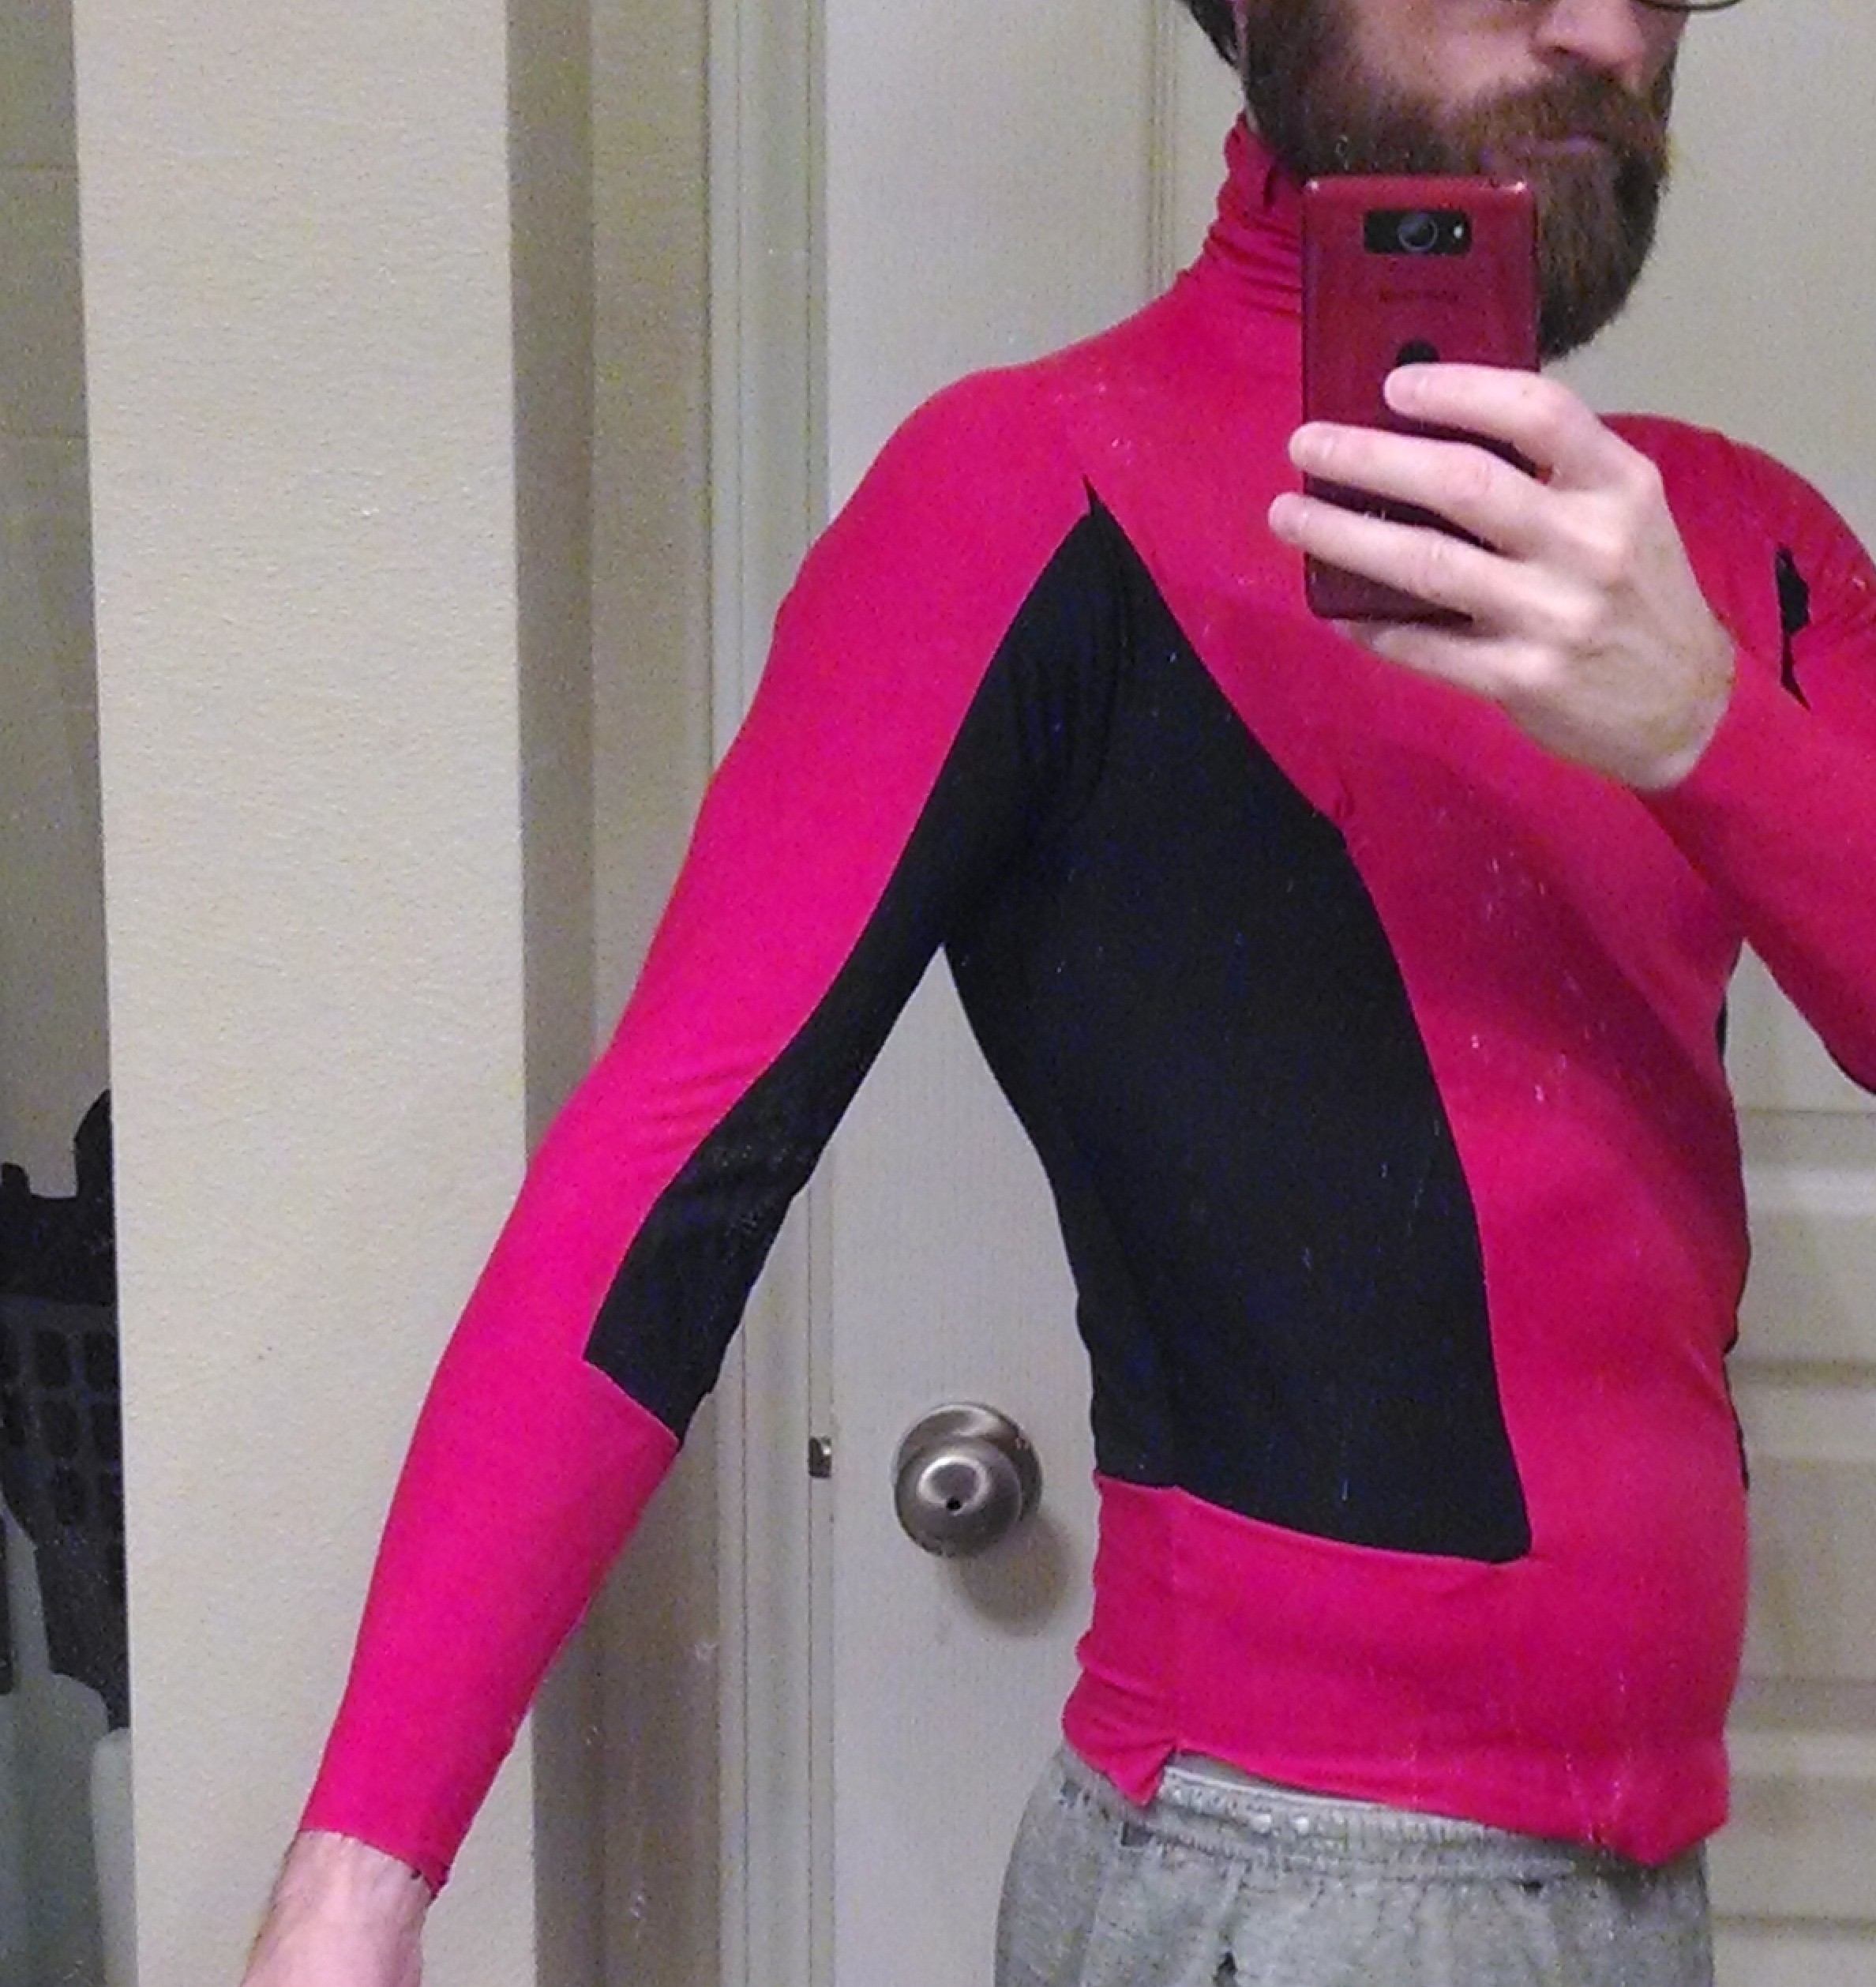
Angled 2:

Much better match between the front and back at the waist. Still not so great at the sleeve/torso, but not horrible. There’s a particularly rough puckered spot at the chest, where the black takes a corner that should have been a curve.

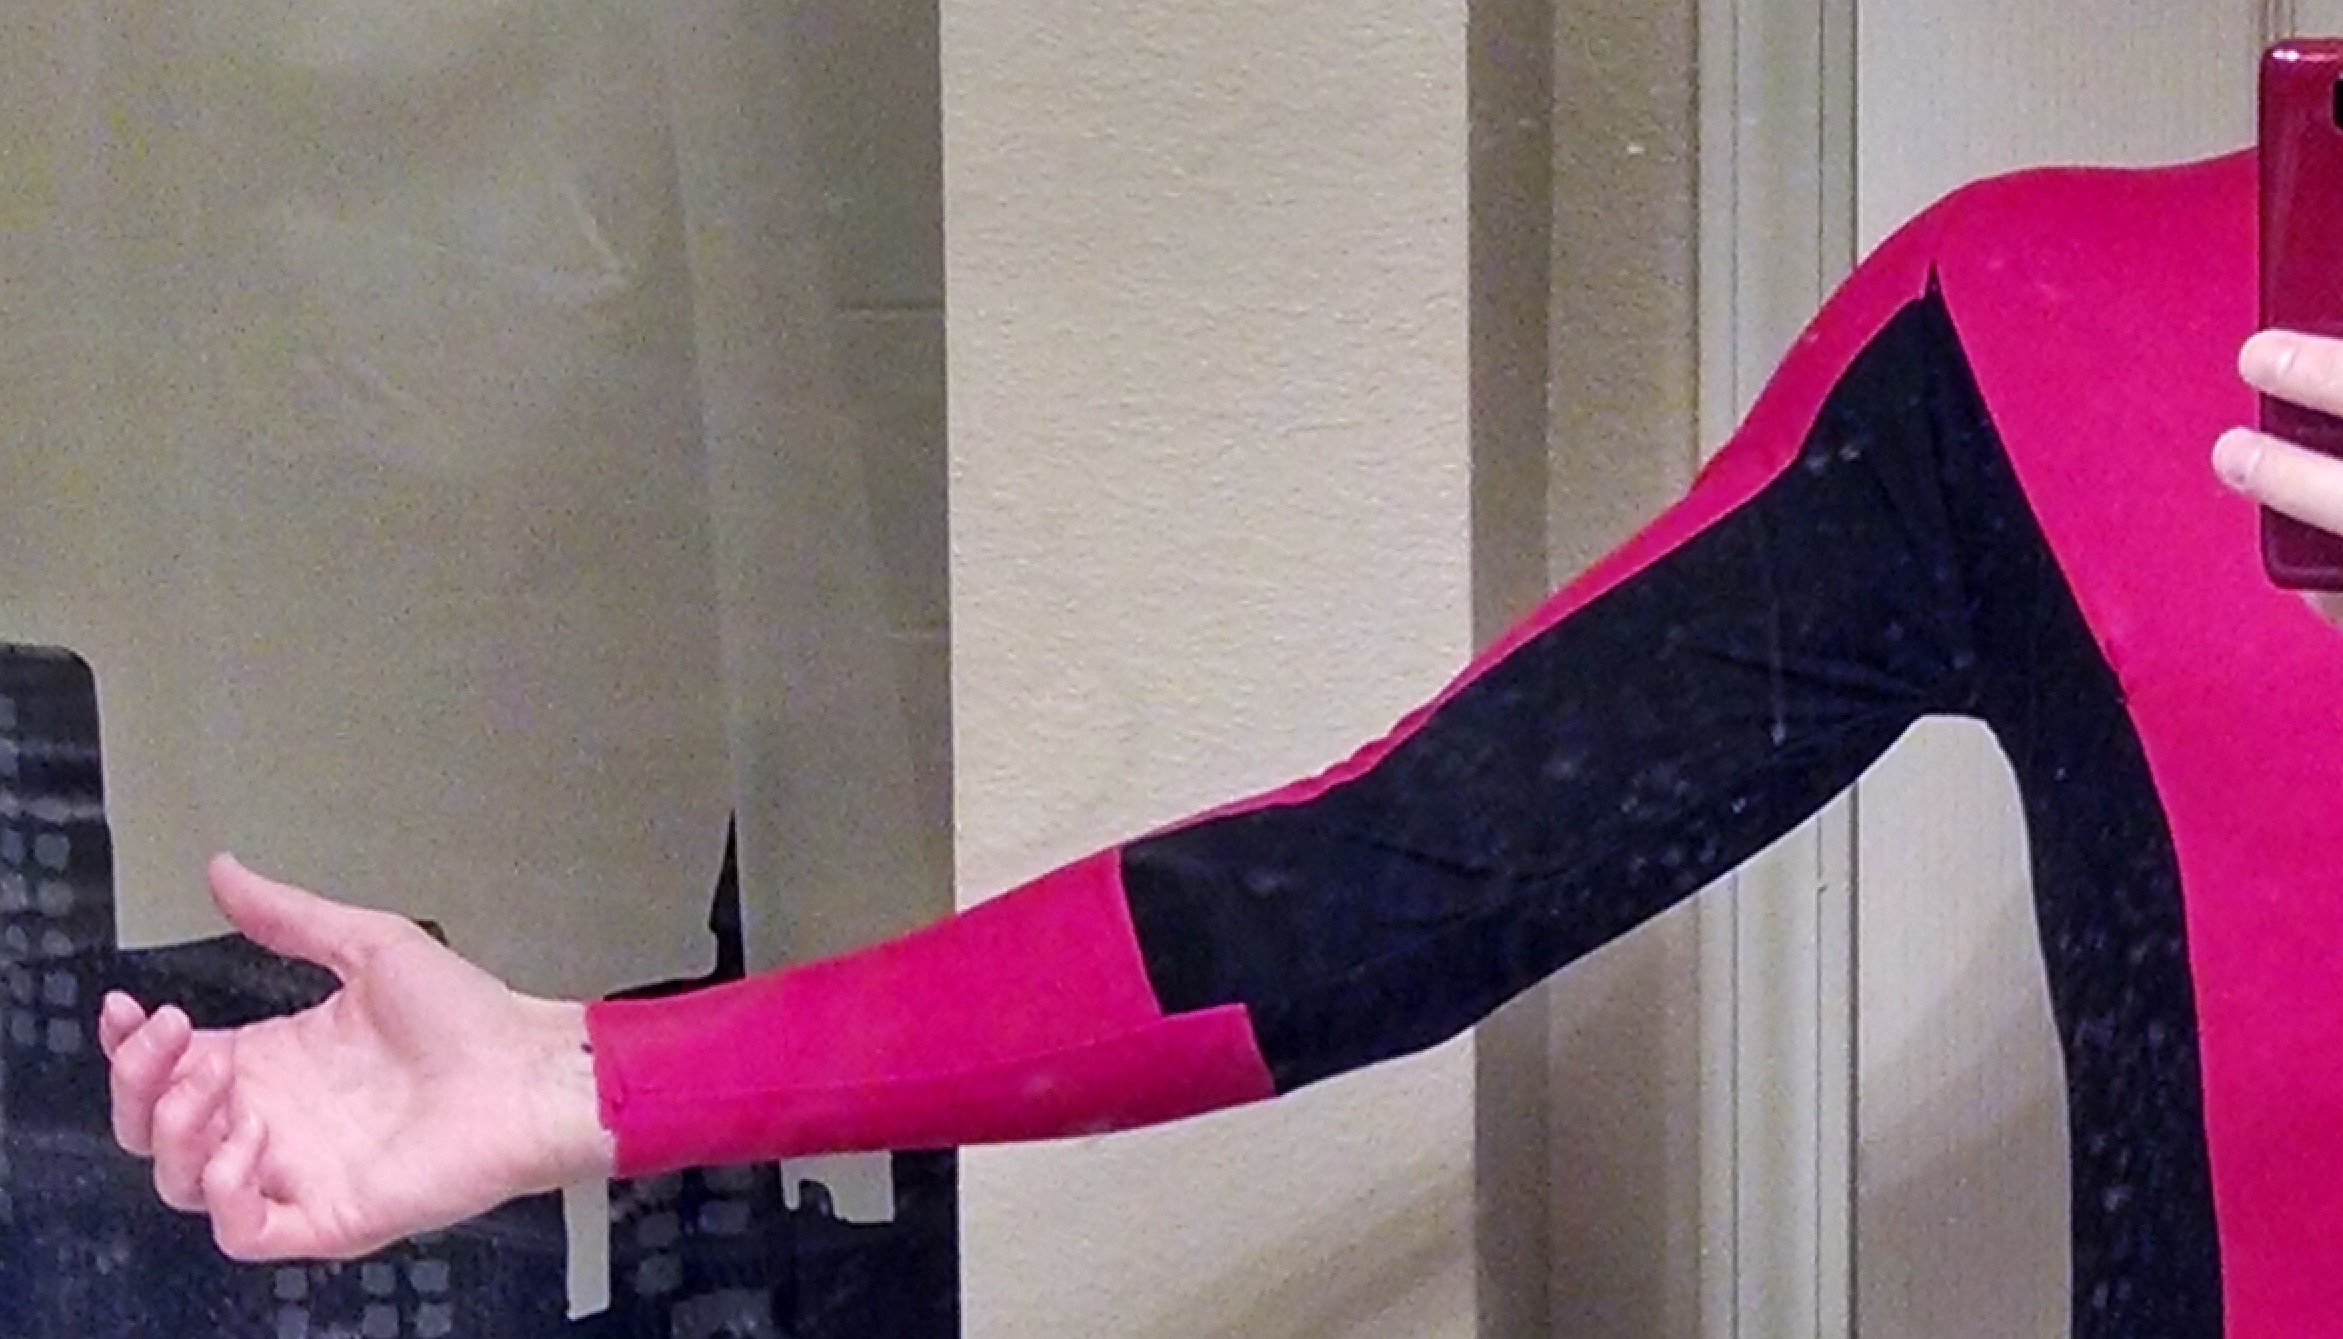
Arm Mismatch: Don’t know what the heck happened there. Sheesh.
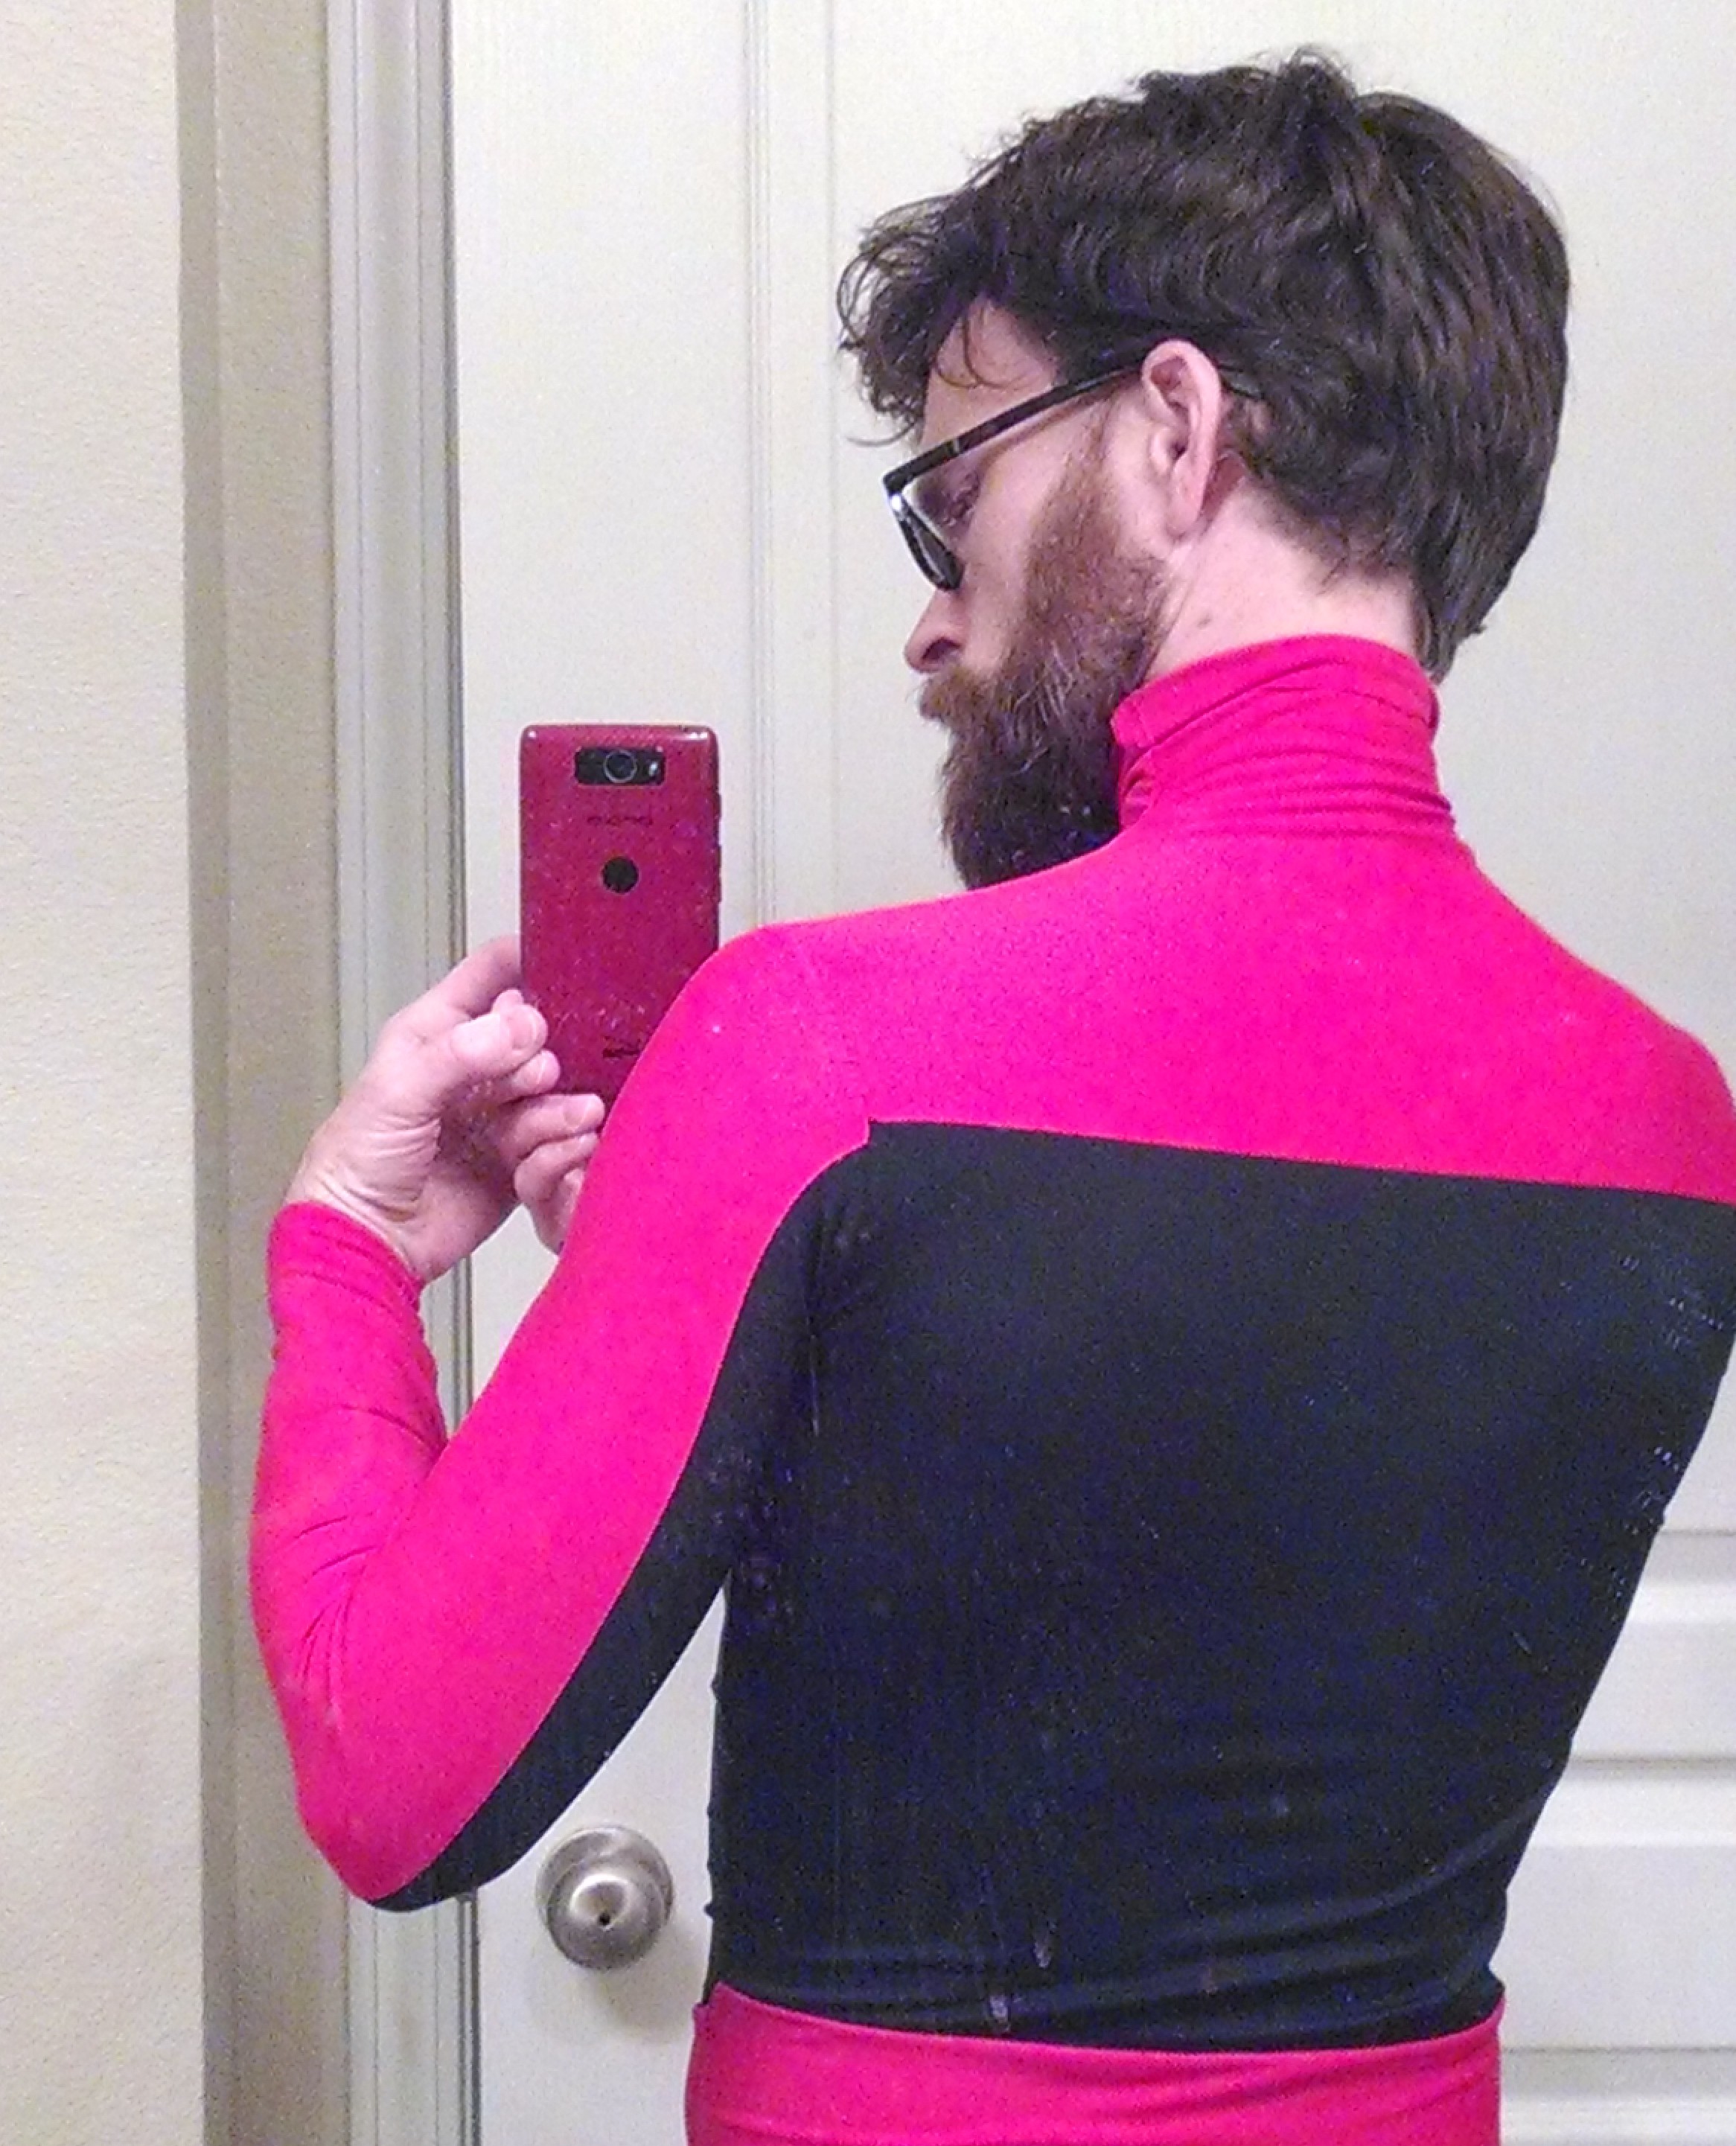
Back view:

So close with matching the black from the sleeve to the top of the back. But the seams across the top of the back and down the sleeve are pretty smooth, eh?

Lessons Learned & How to Apply Them

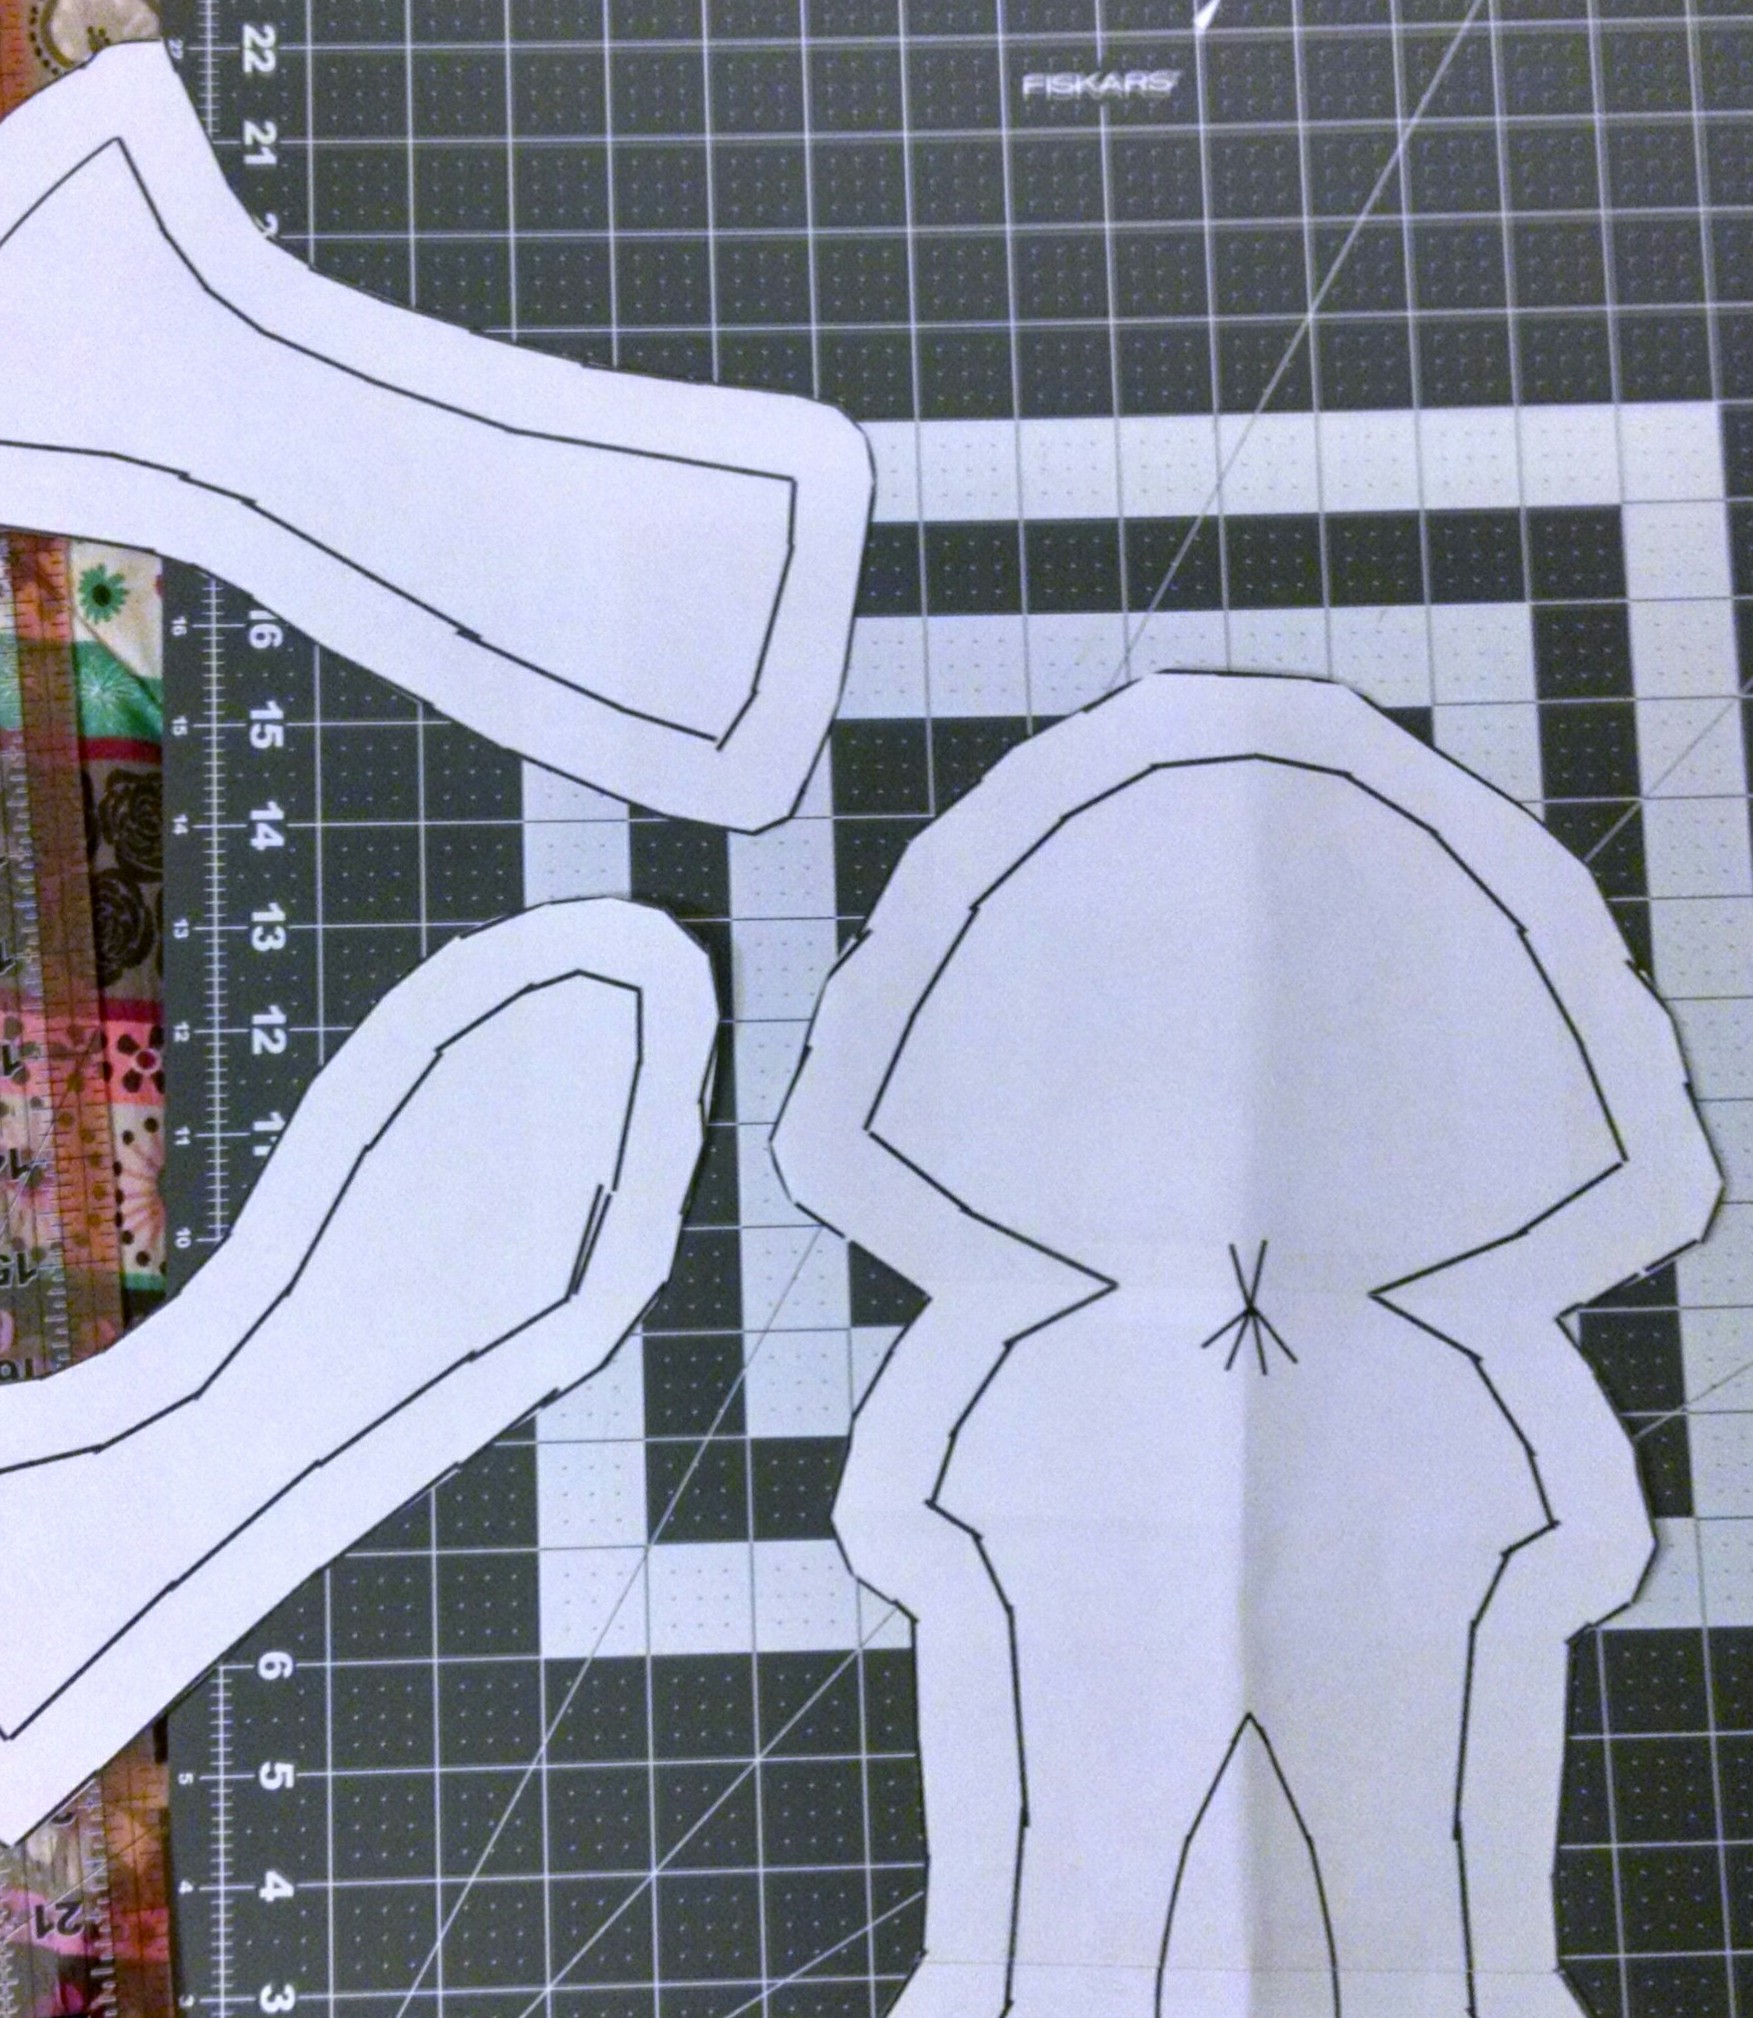
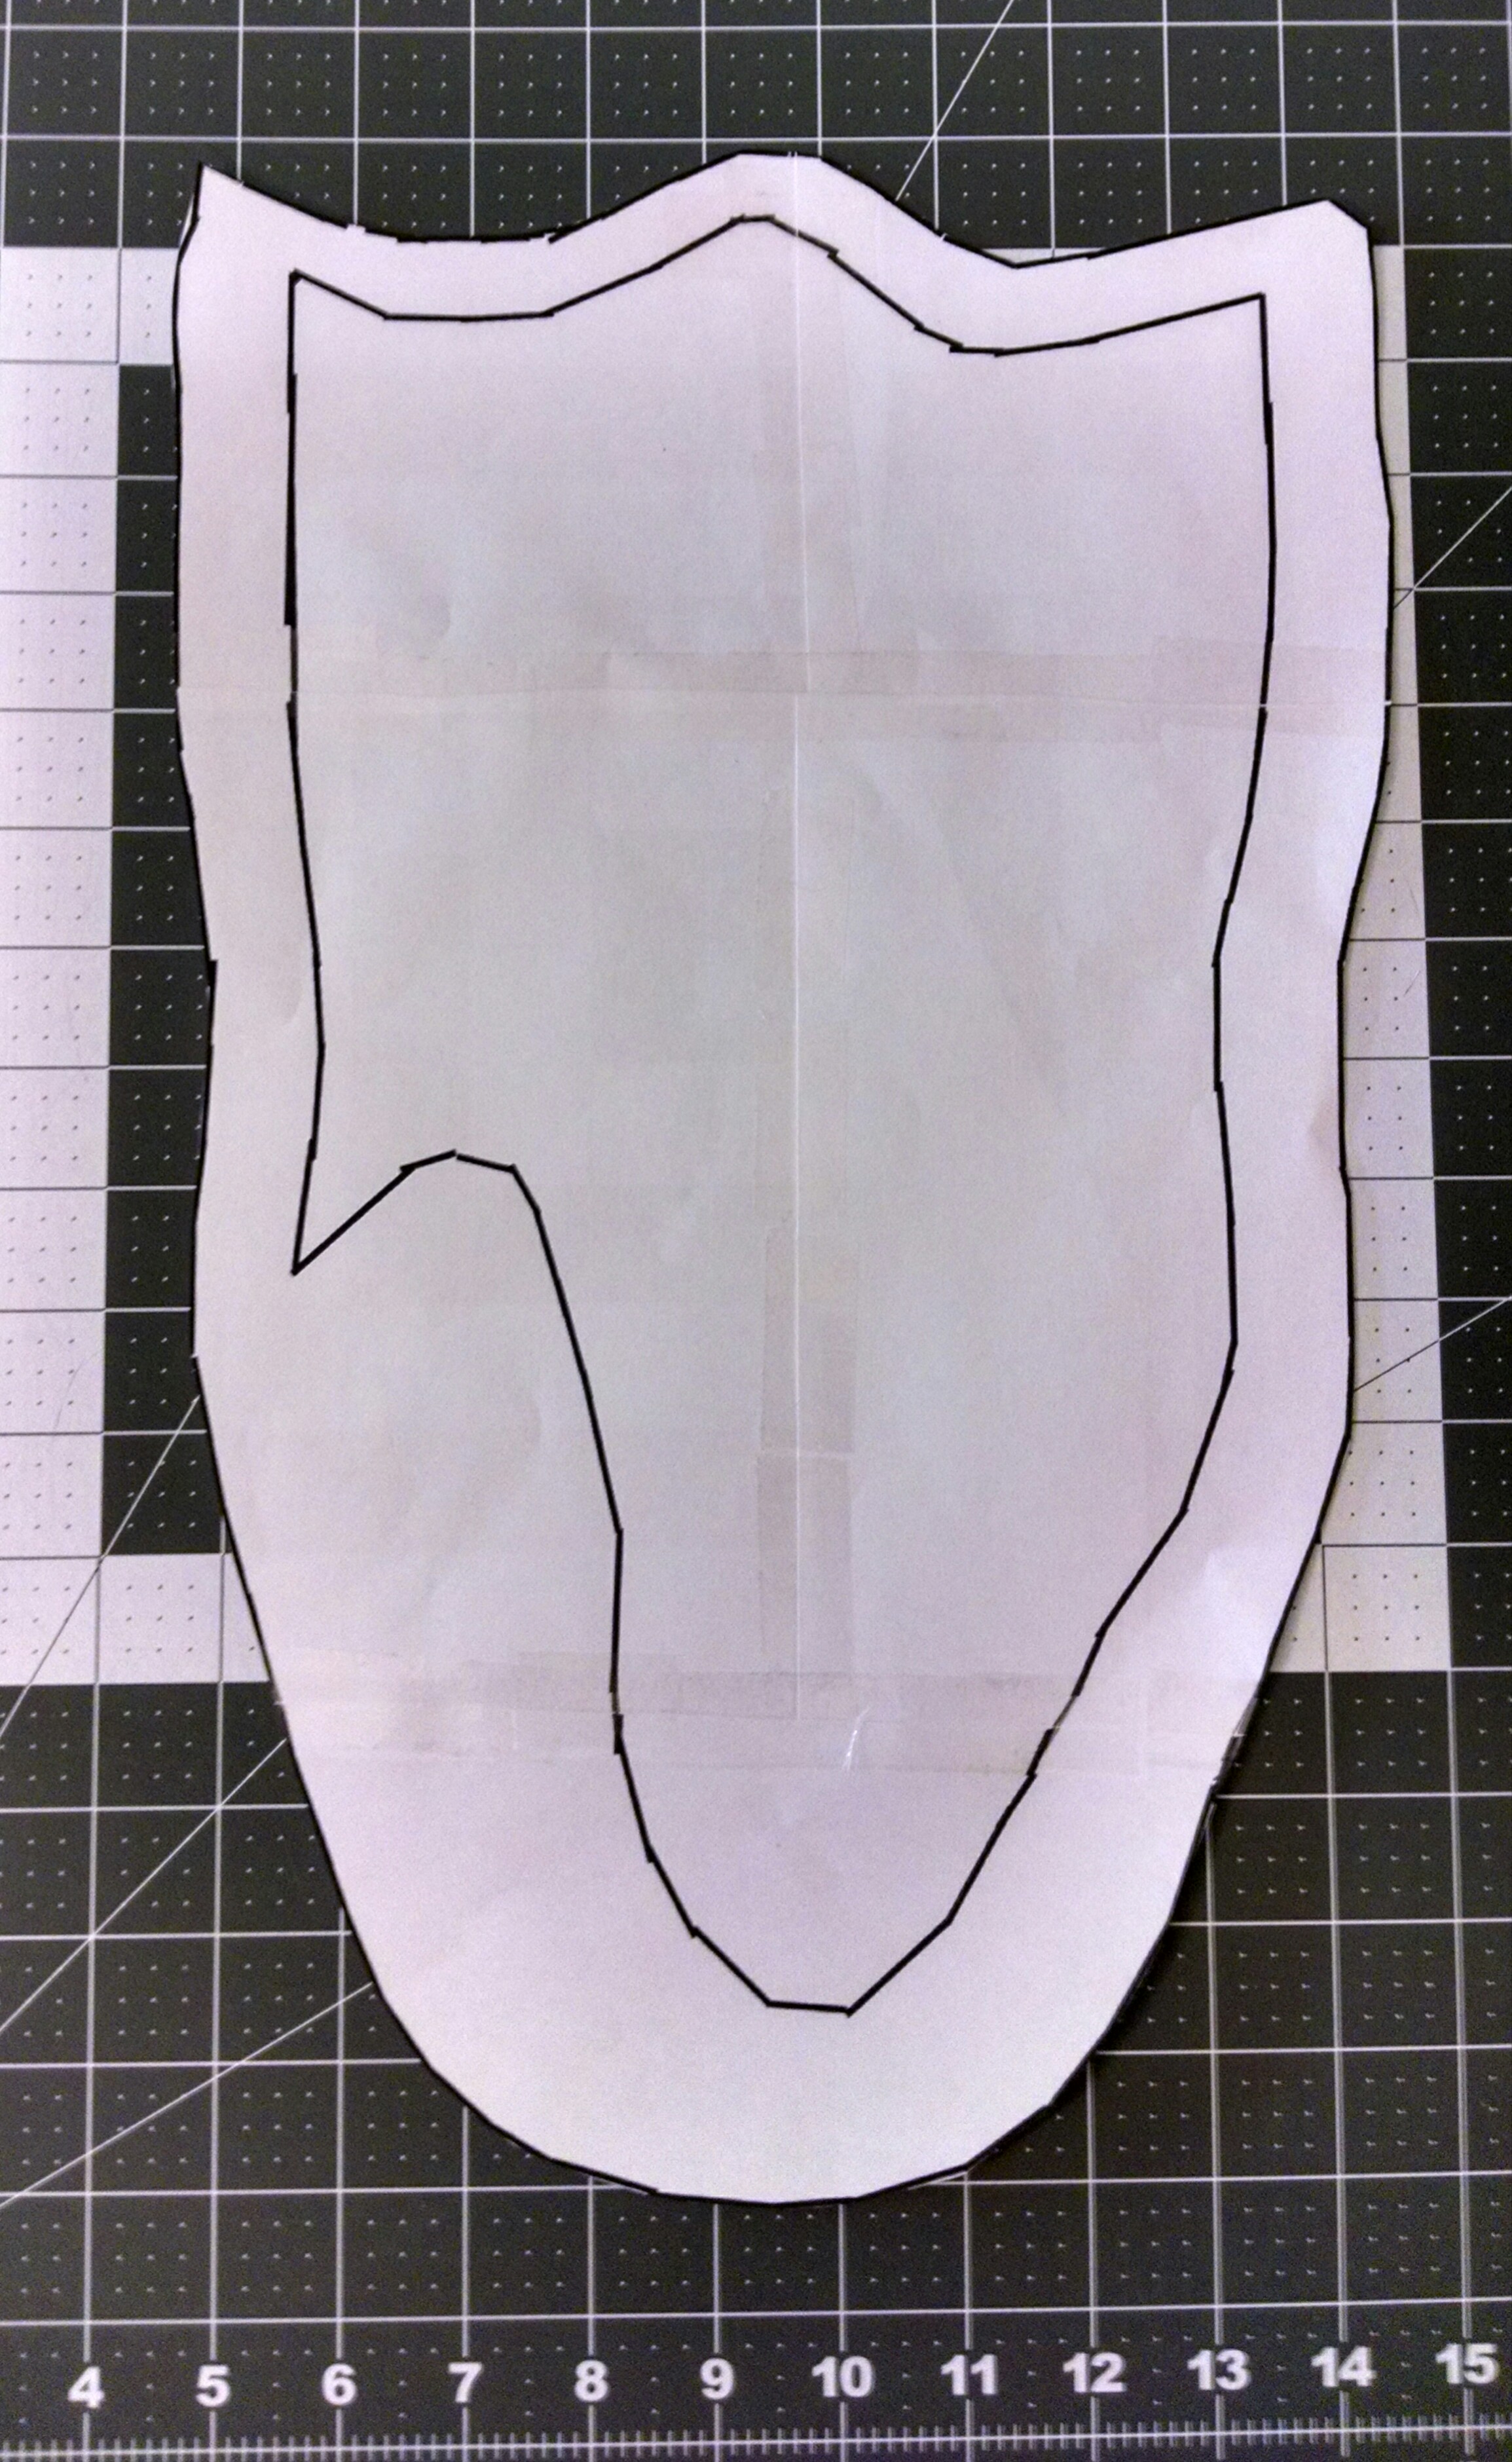
Lesson 1: Pattern Making, Marking, and Matching

In the course of this shirt remake, I think I discovered that a lot of my biggest sewing challenges have to do with the pattern I am starting with and translating it to the fabric. Part of that is getting more experienced at just planning and implementation, but even beyond that, making a good pattern, and then marking the important spots and measurements and transferring those markings and guides to the fabric pieces for better matching.

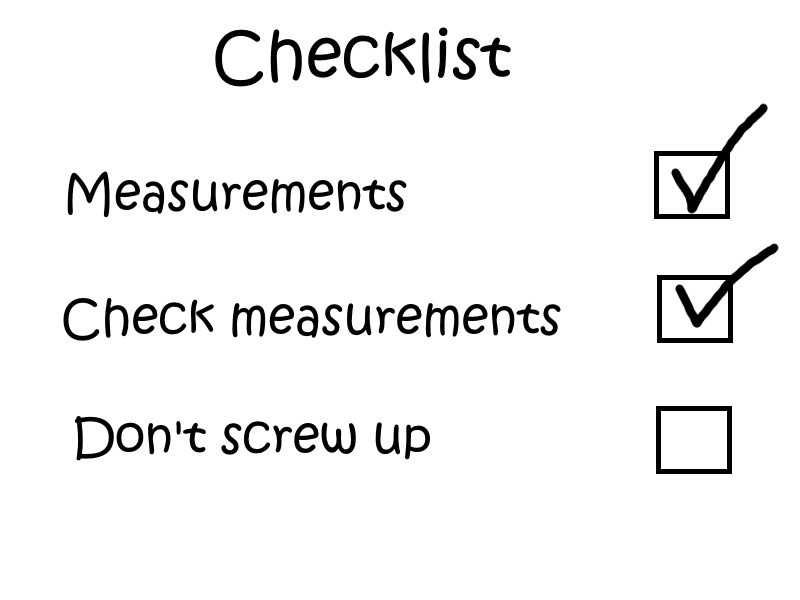
Lesson 2: Checklists for the Basics

checklist

I’ve read that one of the greatest and most important advances in medicine–surgery in particular, I believe–was the introduction of checklists. Many disciplines use checklists. Pilots, for example, have a pre-flight checklist. I worked in a residential treatment facility for teens where we used checklists for our important daily tasks.

Checklists are a simple form of genius. They allow us to package careful and deliberate thinking at an ideal time when we can focus on the big picture and the details. We organize and record those thoughts when we are not right in the middle of a situation, using the knowledge of others in addition to our own experience (and mistakes) as a guide. And then, when we are the midst of the situation or activity, if we have a good checklist, the only thing we really have to remember is to look at the checklist!

I am really good at making stupid mistakes. Over and over. I am the “don’t let this happen to you” motivational example for why one should use checklists.

I was making Spidey Shirt 2.o, and it came time to baste and sew the first sleeve onto the torso. I carefully laid it out, pinned and baste-stitched. I examined my work, pleased with how I had distributed the fabric of each piece smoothly along the curve. And then I proceeded to tensely stitch the seam on the machine, again careful of the curve. I really wanted that curve to turn out well! I pulled the shirt off the machine and took a look. What a beautiful seam!

It was really too bad that I had sewed the sleeve on wrong side out. (Insert cursing here.)

Luckily, I was able to rip out the seam (that beautiful seam…) and redo it. But something like that wrong side out sleeve, and things like the mismatched black portions on the shirt…those kinds of things could have been avoided if I had double checked some pretty simple issues, and a checklist is probably my best bet for doing that, especially while I am still learning. There are just so many details to worry about, and while you’re worrying about details A and B, detail C is escaping your attention!

Lesson 3: Slow Down

I know it’s a mite cliche, but like checklists, there is a simple genius in just taking your time. And–also like checklists–this is a lesson that I very much need to apply. I get very–I guess driven is the word. And sometimes frustrated. And when I am driven or frustrated, I just want to gloss over, i.e. skip, important steps. or I just rush through something because it’s not my favorite part and I want to get to the good part.

The longer I sew (I mean, I’ve been doing it for, like, weeks now), the more I make myself slow down, partly because I am tired of seeing things turn out like crap because I got into a rush. But I also find that if I push, I don’t enjoy the activity as much, and if the point of all this time and investment in my Costume Quest isn’t enjoyment, then I’m not sure what the point is.

A big part of slowing down is taking breaks. Sometimes it’s just setting down the sewing project to go eat, or work out, or watch TV, or do neglected housework. And sometimes it’s going for an overnight trip for my girlfriend’s birthday. Which is what we are going to do later this morning.

I could probably take the sewing machine, but somehow I think that would be a bad idea, relationship-wise.

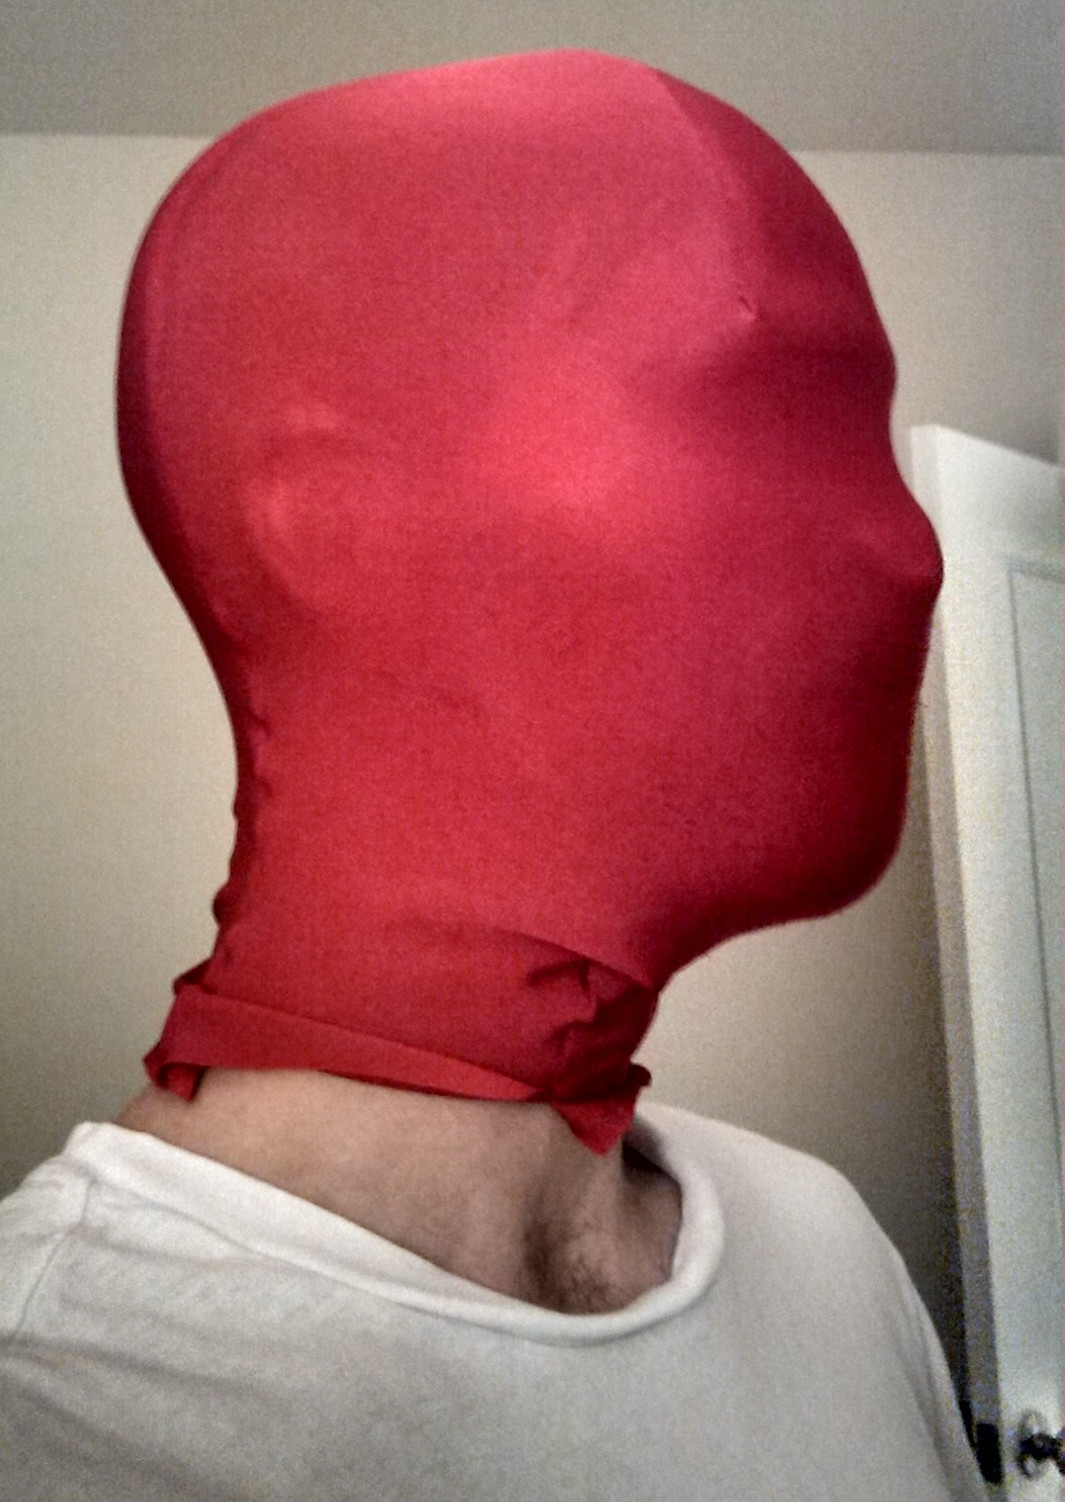
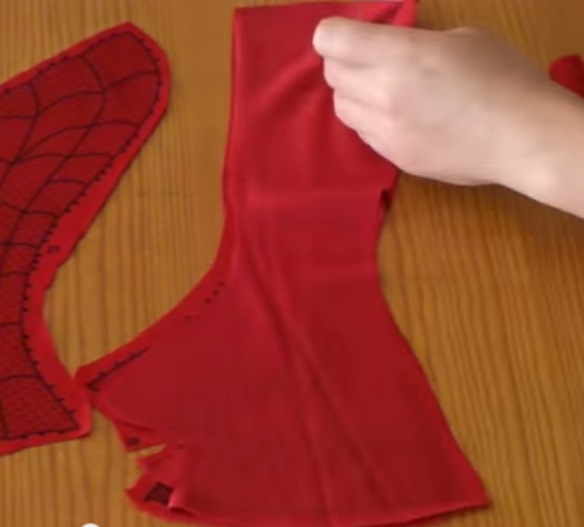
Up Next: First, the Beach! Then, applying recent lessons and experience to making a mask.

Stitching Witchcraft & DIY Spidey Shirt, Take 2

wpid-img_20140718_133324.jpg

The first test stitch on my new machine. This was the “out of the box” straight stitch setting.  And yes, the curve was on purpose. This thing handles very well!

And–if those more experienced with sewing machines will allow this newbie some moments of amazement–check this out…

So, I did some playing around with the stitches. Tried a pre-set, special zigzag:

wpid-img_20140718_133248.jpg

Fun! Like a heart monitor.

Then I played with adjusting the width and length of a standard zigzag:

wpid-img_20140718_133222.jpg

Nice.

And then I just had to try one of the decorative stitches.

wpid-img_20140718_133159.jpg

It’s witchcraft!!

Now, I knew the machine could do stuff like this, in theory. I saw the little diagrams on the stitching guide. But actually watching it do it, having the machine basically take the fabric out of my “guiding” hand to start jauntily stitching in complex patterns… Well, let me just say, this was quite a leap from the basic borrowed machine.

We’ll get back to that old girl in an upcoming post…{sniff}

Getting Down to Business

I actually didn’t get the new machine out of the box until after noon on Friday, as I had decided I was first going to cut out every piece of fabric for my second attempt at the black and red Spidey shirt, just to have my least favorite part of the process done.

wpid-img_20140718_112602.jpg

This time, I used fabric chalk to trace the shapes onto the fabric and then cut them out with my fabric shears. Overall, I think I liked this better, especially for the large pieces. But that method had its frustrations too.

Once I had gotten my feet wet with the new machine’s basic configuration, I attached the walking presser foot and inserted a stretch needle. (As an aside, let me say that the machine did a pretty darn good job sewing the spandex even without these attachments, but I think every advantage helps, especially when you get to the larger, longer pieces that want to get away from you and pull your seams crooked.)

Having determined to start hand basting, I tried some out on scrap fabric first:

wpid-img_20140718_150449.jpg

To be honest, I felt not good about it at first, and looked to see if the machine could do a basting stitch. It doesn’t seem to have a setting for that, and even the loosest straight stitch setting did not seem very likely to pull out (which is pretty impressive in its own way, actually).

So I stuck to the hand basting. And now, yeah, I get it. I don’t think I’m good at it yet, but it is worth the effort so far. Thanks again for nudging me in that direction MachineGunMama, and for the video that happened to show that process in action SaiTurtlesNinjaNX!

Anyway, I dug into doing the shirt again, and had some success and some continued frustration. I am getting closer to understanding the 90 degree corners (also in the the video shared by SaiTurtlesNinjaNX), but I got maybe one good corner out of 6! And sewing on extreme curves is something I’m working on. But I have gotten front and back and sleeves done as complete components, have the shoulders sewn together, and hope to get the sleeves attaches, and sleeves and sides closed up this morning and/or tonight (have to work today).

wpid-wp-1405711120114.jpeg


This is more than a random pile of fabric. Mostly.

Despite appearances, this is more than a random pile of fabric. Mostly.

I think it will probably turn out mostly wearable, but I think perfecting the DIY shirt should probably be put on hold in favor of working on the mask, gloves, and boots as more specific practice for assembling and sewing the pro printed costume. Even still, this shirt is good practice in general, and I am learning a ton!

And now I will see what I can finish on this shirt before I inevitably have to go to work.

Up Next: Something vaguely resembling a Spidey shirt, maybe? And moving on to other practice tasks (but not until after my girlfriend and I are back from her birthday trip)

My Baby has arrived!

Isn’t she beautiful?

wpid-img_20140718_042855.jpg

I know, I know… But I had to work my evening shift last night, and then my GF sucked me into watching more Supernatural (first season–we’re latecomers but slightly addicted), so I haven’t even gotten it out of the box yet. But I’m off work today so once it’s a reasonable time of day to start making noise, this sewin’ party’ll be gettin’ started.

Note the tiny invisible zipper foot (pointed out by the red arrow) and the walking presser foot. I mean, really, it’s almost too much excitement for a single UPS delivery. (Oh, and thanks to my GF for lugging the unwieldy box from the office and up the stairs to our apartment while I was finishing my shift at work!)

So,  I am certainly not sitting idly by while I wait to break open the new toy.

Mask Pattern Printing: Annoyance to Victory:

I made some attempts last night to print out the mask pattern pieces while watching Supernatural, but multitasking often eludes me, even when one of the tasks is just watching TV. I was having trouble getting the pieces to print out at the right size. But when I actually paid attention to the issue this morning, it was simple. Mask pattern printed and cut, and there we go.

Template Based Boot Pattern:

wpid-wp-1405680495381.jpeg

It remains to be seen whether this approach to the boot pattern is necessarily better than what I came up with in terms of ease of sewing and appearance, but there is a definite advantage in that it will give me some practice sewing an area of the custom template whose assembly and seaming are not immediately apparent to me. This will give me a chance to play around with piecing the foot area together with relatively low risk.

I will also do a glove pattern based on the template, also for familiarity and practice.

But for now, I think it is high time I actually got this new sewing machine out of the box!

Up Next: Actual sewing progress, I hope!

DIY Costume Pattern Tweaks & the Printed Costume Fabric is Here!

I can’t help but start with the most exciting part:

It’s here! I wasn’t expecting it until next week, really, but–there it is. It turned out great! I was pretty confident it would be fine. I had mild concerns about the depth of the black printed on white, but it is really printed exactly like the template image. Thank you Fabric On Demand! (They totally deserve a plug here.)

Of course, as I said before, the only down side of it arriving so soon is that I really don’t want to get started on it before I put in some practice time with specific sewing tasks and skills on the new machine.

Speaking of the new machine…


DELIVERY ESTIMATE Thursday, July 17, 2014 by 8:00pm

Shipped


So, I’ve got the custom fabric and my new supply of red and black fabric, but no machine yet!

But that’s okay. I don’t have time to play with my new toys until tomorrow anyway. 🙂

DIY Costume: A New Old Shirt Pattern

In the course of working on my original DIY costume components, I had started with a fairly basic long-sleeve shirt pattern that I threw together, but then I got it in my head that I didn’t like the sleeve seams, and proceeded to go out of my way to come up with an alternative, with sleeve seams that angled inward toward the collar.

Incidentally, I have since learned that this is called a Raglan Sleeve. It has one of the shortest Wikipedia entries I have ever seen, but then again, the fact that a subset of shirt sleeve has a Wikipedia entry at all is a sign that we truly live in an Information Age. I guess.

Anyway… I have made two shirts using that pattern now–the original black one, and the experiment in using the red and black fabric–and in both cases adding the higher collar was a pain in the butt, to the extent that in the first case it almost ruined the shirt and in the second case it did end up ruining the shirt (but that shirt had other issues).

But even the successful addition of the add-on high collar adds a seam in a very undesirable place for what should be as streamlined a costume as possible.

So, long story short (too late?) I have decided to revert back to the traditional sleeve seam pattern, which allows a high collar that is not a separate piece. I made some tweaks to the way the sleeves attach, but otherwise it is much like the original pattern I used.

You’ll also see that I made patterns for the separate pieces that will be black in contrast to the red of the main components. I have yet to cut out the portions of the main component that will be comprised of black. I want to duplicate those portions in case I want to use them for single color tunics in the future.

wpid-img_20140716_204210329_hdr.jpg

The main torso red part is folded in half on the left, the front and back black portion half-patterns in the middle, and the sleeve red and black portions on the right.

So, that’s the shirt. With this pattern, I will end up with a nice shirt and not have to add on a high collar. I would like to try my hand at properly doing collars on more traditional long sleeve shirts (i.e. not spandex costume shirts) down the road, but that’s for later.

Today, I hope to print out the modified mask pattern as well, and–when I get the chance–go ahead and cut out the fabric for shirt, mask, gloves, and boots all at once, so I can then focus on hand-basting and sewing it all together.

I am considering making glove and boot patterns based on the costume template as well. The more practice I get with assembling and sewing seams like those on the costume, the better!

And just so it doesn’t feel left out of the picture-sharing…my new stock of red and black spandex:

Yep. That is fabric all right…

Now, just need to get a sewing machine up in here and we’re in business!

Up Next: Is it time to actually do some sewing yet?


Making a List (of Sewing Needs) & Checking It Twice (at least)

Heh. I didn’t even realize until now that there was a common theme in my post titles for yesterday and today (or I should say a common “thread,” this blog being so much about sewing and all). “Christmas in July” and “Making a List…checking it twice…”

Except that for that part about me giving the gifts to myself. But then again, some of my favorite gifts are the ones from myself. I always seem to know just what I want.

Thanks! I shouldn’t have!
Source: http://blog.altec-inc.com/

Anyway… Have you ever had those times in life where you feel like you’re waiting and waiting and waiting and then…bam! Everything just seems to happen at once? I mean, not bad things, but several good things you were waiting for?

Yeah, I can’t think of any times like that either. But this week seems kind of close to that in terms of this whole sewing and costume-making adventure.

I thought I had the arrival of the various “components” of this Costume Quest plot spaced out pretty well over this week and the next. The new machine and some practice fabric would come in time for me to spend some time getting used to the new machine by working on the DIY costume (using proper basting techniques!) and installing invisible zippers in scrap costume components, and then next week the professionally printed fabric would arrive after I had time for careful practice and planning…

But now it’s looking like there’s a really good chance that everything will be here by Friday (if not Thursday) including the professionally printed costume fabric!!

Screenshot (55)

That doesn’t change the plan, really. It just means I have to discipline myself not to cut into the pro printed stuff before I’m comfortable with the new machine and installing invisible zippers, and basting, etc. It’s like how a pilot has to put in so many hours on a simulator and flying with an instructor before going solo. (It’s exactly like that, I’m sure. Flying and sewing, just two sides of the same coin, really.)

But really, it’s awesome and exciting that everything is converging, surrounding me in a good way. It’ll be like swimming in money, except instead of money it’s sewing supplies and fabric. And, of course, it’s kind of the opposite of swimming in money in that the stuff I’m swimming in represents a loss of money rather than an accumulation of such… Wow. My analogy generator is even more off than usual today…

So, you said something about making a list…?

Yes, the list…Lists, actually. These are by no means exhaustive and certainly not in any particular order:

Stuff I have/stuff that’s on the way

  • Black and Red Fabric for practice costume (arriving today)
  • Black and Red Thread for practice costume
  • Fabric marking chalk for light and dark fabrics
  • Extra pins (finally got some)
  • Sundry sewing supplies that I’ve had all along (shears, cutting board, rotary cutter, pin cushion, etc.)
  • Sewing machine (arriving tomorrow) — delivery includes: walking presser foot; invisible zipper foot
  • Invisible zipper for practice
  • Professionally printed fabric (arriving tomorrow or Friday)
  • Styrofoam head model thingy (needs padding to add a couple of inches of circumference)
  • Other stuff I can’t remember right now

Stuff I still need/should get

  •  More invisible zippers (for practice and for the final pro printed costume)
  • More black, red, and possibly blue thread (once I examine the final color and placement of the seams for the pro-printed costume)
  • Worbla and black paint (for eye frames on practice and pro masks)
  • Mirrored material for lenses
  • An extra/better pin cushion (I like the idea of this long pin cushion)
  • Somethin’ somethin’ for making the soles of the boots for practice and pro costumes
  • Final plan/materials for eventual improved sewing work surface (a la my “futon mounted work table” idea)
  • Ideas/plans/purchases of a good webbing material for the practice costume.
  • Other stuff I can’t remember right now

Obviously, I need to take a bit of an inventory of my more immediate needs, and of course several of these needs can be put off until after the foundational work of making the actual costumes. But yeah, things are really coming together, as I said.

The funny thing is that this is all coming to a head right as I will not have very much time to do anything with it. I have Friday off, but that’s because I work Saturday, and then there will be the Sunday/Monday out of town trip, week of work, a long weekend out of town again.

But that’s probably good, since I mentioned a need to not rush the work on the final pro printed costume. And of course it is also good for me to get away from my projects and enjoy time with my GF and my family, maybe even spending some time in the wild world out of doors!

Pictured: The Legendary Land of “Outdoors.” I’ve heard tales of this place, but I thought they were only legends…
Source: http://site.recy-cal.com

Wrapping up with some moments of Gratitude:

Because my momma raised me to say please and thank you, I want to take a moment to thank some fellow bloggers/sewing enthusiasts/costume making enthusiasts. Again, not an exhaustive list, but some stuff from recent memory (the only part of my memory that is even slightly reliable)…

MachineGunMama: ALWAYS so supportive and excited with me and for me, and willing to share ideas and thoughts and opinions. Thanks! (Yay walking presser feet! And I am going to give that hand basting thing a try!)

Miss Leslie the Good Witch: She recently helped validate an idea that I was a bit dubious about. Even if she is just enabling my delusions, I appreciate it. 🙂

SaiTurtlesNinjaNX: A recent “arrival” here who jumped right in with encouragement and advice that is very specific to my needs because he underwent such a similar quest, trodding the path ahead of me, thus allowing him to share great wisdom. (Thanks again for the video that is uncovering the mystery of sewing 90 degree corners!)

And Everyone who actually reads and/or follows my little Costume Quest. Thanks!

Up Next: Tweaks to the Practice Costume Patterns and Plan, and maybe some pics of New Stuff

Christmas in July!

It’s been a long time since I got really excited about Christmas. For myself, I mean. Now, I get excited, but the excitement is for the sake of my daughter and my nieces and nephews.

I would like to say that my lack of excitement about Christmas for myself came about because I got older and more mature, and so on. But really, it started happening around the time I started wanting gifts that my loved ones can’t afford. This would be when my mom started buying me psuedo-gag gifts for Christmas, like Spider-Man Potato Head (I have two now, one from a Christmas and one from a birthday), or a Spider-Man poncho (which is probably child-sized, now that I think of it).

If you ask me, the web attachment should go on top of the wrist. Not that I’m being geekishly picky or anything… Source: http://www.coolest-toys.com

Anyway, my point is, I don’t lose sleep wondering what I’ll be unwrapping on Christmas anymore.

But that sort of excitement isn’t completely gone from my life! It’s just that it’s usually self-inflicted excitement. (That didn’t come out the way I meant for it to…)

Case in point: I just ordered the new sewing machine! Free two day shipping–one of the great inventions of the modern world (thank you Amazon)–will bring it into my loving arms by Thursday, along with a walking presser foot and an invisible zipper foot!

Ooohhh… Aaahhh…. Source: http://aromavita.net

The Singer 7258 Stylist. Check it out on Amazon if you’re curious.

I’ve also got some more fabric on the way, and an invisible zipper for practice. My plan is to practice with the new machine by taking another stab at the red and black fabric Spidey shirt, making the new mask pattern, and installing one or more invisible zippers in the first (disposable) red and black Spidey shirt attempt.

I plan to try basting this time around, as per my previous post, and will even try some hand basting at the suggestion of my blogging pal MachineGunMama, who reminded me that basting–as with so many things in life–is temporary (I may have paraphrased and added a smidge of melodrama there).

By then, I think I will be feeling comfortable digging in to the professionally printed project. I am super excited and eager to get started on that, and I think it is because I am so excited that I am being so careful and methodical.

There will be some other things going on too, which will be good. I do have a mild tendency toward obsessing over projects, so much credit goes to my daughter and my GF for pulling me out of my own little world of projects.

This coming weekend is my GF’s birthday, so we are going to a little town on the coast just a few hours away to stay overnight and take in the quaint main street shops, maybe do some canoeing, walking on the beach, and have some seafood. (I never knew I liked seafood until I ate seafood on the actual coast of the actual ocean; makes a big difference, as it turns out.)


Pictured: not where we are going. Source: http://www.visitnc.com

The weekend after that, my daughter and I are going to spend time with my sister and her family. My daughter always has a good time with her four cousins. They have a big yard where my handy brother-in-law has built a zip-line and a tree fort, and we usually cook hot dogs by the fire and do other things that we never do here, so it is a fun time for us all.

Smoky Mountains, the beautiful barrier I keep between me and my family.

So, those little mini-vacations will be a good breather before I dive too deeply back into my quest. And I’ll try not to spend the entire time talking to my GF and family about the new sewing machine’s 100 different pre-programmed stitches and large variety of presser feet.

Up Next: Making a List (of sewing needs) and Checking it Twice (at least)

A Small Experiment & a Brief Back to Basics Topic: Basting

I’ll start today by sharing a small experiment that might or might not come to anything.

The Experiment

At this stage in my Costume Quest, I am in the midst of two costumes. I thought that I had put my DIY Spidey costume pretty well on hold, but I keep thinking of ways to approach the issues involved in making it. Plus, it still serves a purpose as practice, in addition to its stated goal as an experiment in how practical it is or is not to make a DIY Spider-Man costume.

Yesterday, down to scraps of fabric that are too small to comprise any one piece of the costume, I decided to play around with what has turned out to be a real tricky aspect of the costume: the webbing patterns.

How to get the webs on a Spider-Man costume is a whole topic in itself, and a number of  methods have been used, from what I can see in the cosplay photos. But ever since the Raimi Spider-Man films, a popular approach has been what’s often called “raised webbing.” I’ve stated before that I’m not a huge fan of the raised webbing look. But it also seems really complicated to do it. So, would this be a case of me working really hard to achieve a look I don’t love? We’ll come back to that in a second.

Now, ideally, if you wanted to use clues from the early comics (and I am doing the early look for the DIY costume), the pattern on the costume is silkscreened (Spidey himself says so). But that method has proven to be an…interesting process to try with my at-home, DIY facilities. So I have been considering other options.

Now, let me preface this image with the admission that this approach would be (A) time-consuming (B) prone to “one screw up ruins the whole thing” issues and (C) rife with issues regarding stretch and durability, but it was a fun experiment:

wpid-img_20140713_102438.jpg


I did red on black mainly because I didn’t want to switch out the bobbin and the spool in the machine. But the idea comes across. It’s a mite messy, but considering that this was a quick, off the cuff experiment and this borrowed machine is somewhat limiting in just what stitches it will put into spandex (a tighter stitch than this tangled immediately), it was better than I thought.

Is it practical? I mean, assuming I could use some kind of embroidery-style stitch that was nonetheless able to withstand %10 stretch, and assuming I could successfully and neatly stitch all the lines into the material for the masks, gloves, boots, and shirt before sewing that material together… Ermm…probably not practical.

But it did get me thinking more about the advantages of–well, not raised webbing, but the webbing as a separate material affixed rather than being printed on. I’m sure this is a standard method of cosplayers out there, and I will do some digging. But for the sake of brevity–and because I haven’t looked into and have nothing to say about it at this point–I’ll save that topic for a separate post.

Back to Basics Brief Topic (Part 3 if you’re counting): Basting:

If you’re a sewist, you’ve likely thought of and/or encountered more than your share of the jokes regarding the sewing term “basting.” If you’re not a sewist–or are just getting started–you may not have encountered said jokes.

If you are not a sewist, and in addition are terribly unfamiliar with cooking terms, you might be wondering what sort of jokes these might be.

Regardless, let’s clear it up for anyone who doesn’t know: In sewing, basting (which I  just learned from Wikipedia can also be called “tacking”) basically refers to a method of temporarily holding pieces of fabric together, useful if you aren’t sure how the pieces are supposed to fit together, or if you want to be able to test and adjust fit before placing the final stitches.

Basting can be done using pins to pin the fabric together (this type of basting is pretty much a necessity), or by using easily removable–i.e. straight–stitches applied by hand or machine.

I’ve made references to the fact that my current borrowed machine, as much as it has served me very well these past weeks, is not worth much for stitch-basting when it comes to spandex. There is a narrow range of stitches it will put into the material. Too tight a zigzag will clog up the works immediately. But too loose/straight a stitch, and it will just refuse to even put in a single stitch.

I might have been able to resolve the basting issue by using a walking or rolling presser foot, but I didn’t really want to purchase attachments for a borrowed machine that might or might not fit the new machine I would eventually purchase.

And it might not even work. This is a perfectly serviceable but quite simple machine, great for standard sewing projects, but probably not ideally suited for the specialty world of stretch fabrics. (I gather than a serger would be the way to go for exclusively sewing stretch fabrics, but my GF and I want to be able to sew more than just superhero costumes. Well, I’d be fine with just costumes, but she has grander notions. :] )

Anyway, stitch-basting is a practice that I want to incorporate once I have a capable setup. There have been many times even in my brief sewing “career” when I believe I could have recovered from a major screw up by having basted ahead of the final stitching. And when it comes time to sew the professionally screen printed fabric–well, as I have said, I cannot afford to screw that up.

With that in mind, I will be ordering a compatible crawling presser foot to my order for the sewing machine (I will also order a Singer brand invisible zipper foot. The machine comes with 10 presser feet, and somehow those two types are not among them!) I will also be adding stitch-basting to my list of practice tasks to perform with the new machine ahead of starting in on the professionally printed fabric.

I am learning–albeit slowly–that the devil is, indeed, in the details in the world of sewing. So here’s hoping the right equipment and good basic habits can go a long way toward an exorcism of the issues I have encountered in my beginning weeks as a sewist.

Up Next: Payday!


A Sidetracked Sort of Progress

I had good intentions for making a test mask for making test eye holes yesterday. In fact, I made two test masks–one red, one black. But what I mainly learned from making them is that the nice and simple mask pattern that I’ve been using is simple for a simple reason: it sucks. I might as well get a thick pair of red pantyhose and tug them over my head.


Actually, the second of the two masks I made was an attempt at modifying the mask pattern somewhat, as in, giving it a little more room around the middle of the head and face (to avoid nose-squishing) and less room around the neck (to avoid bagginess), and that was mildly successful, but it’s just not a good design for the mask overall.

That led me along an alternate path–a sidetrack, if you will (there we go, I worked in the title of the post)–that I had started down before: I could try to tease out the head portion of the bodysuit template I purchased from Gun Head Design to make a standalone mask.

It occurred to me that not only would this lead to a better design for the mask that is likely to end up in the eventual homemade 5 piece costume, it would also be a more accurate practice mask for testing the addition of the eye holes and serve as practice for sewing the actual professionally printed fabric when the time comes.

So, I made a copy of my Gun Head Design template file, cropped it down to the relevant area, and traced some basic lines around the mask-ish portions. I exported those into a smaller file to work with in the software I prefer for smaller, simpler files (PAINT.net, which sounds like a website, but is actually open source graphics software), and did a bit of tweaking.

I got a smidge hesitant at that point. I was pretty sure how the pieces were supposed to go together, but not 100% sure. I am starting to get much more careful about my initial designs the further I go in this whole adventure, because what seem like relatively small expenses (i.e. getting fabric) at first can start to add up fast!

Then I remembered the male muscle base package that I had originally acquired from another template design site, 4 Neo Designs. Now, both Gun Head and 4 Neo have their pros and cons, but one nice little addition to the file package you get from 4 Neo are the sewing guide files. The basic templates are pretty similar (I assume cosplayer designers have settled on somewhat of an “ideal” for bodysuit sewing templates), so I was able to take the tracing I had already done from the Gun Head template mask-ish portions and use the mask sewing guide portion of the 4 Neo file package to create a template/sewing guide for the proposed new mask.

Here is a cropped image of the final result. Understand that I am not being stingy when I include these cropped images of the templates; I am just trying to respect the creators of these designs, who would likely not appreciate people giving away the stuff they sell:

So, you can see the basic idea. This design takes a more sophisticated approach to wrapping around the noggin. In the parts you can’t see, it basically reaches down to where the neck meets the shoulders, and should hug the contours pretty well.

Also note the seam markings in the middle of the neck area of the front part. By sewing that area together, you get a better chin-hugging look. I had played around with this idea in the red mask attempt above, which you can probably see if you look close enough. But I understand if you don’t want to linger too much on that disturbing image of my pantyhose-squished face.

Where that does leave me? It leaves me with a plan, and not enough remaining fabric to do anything about it. And I have resolved not to spend anymore on this project until payday. Plus, I would like to save any further sewing for the new machine. I need to get used to it before I start on the professionally printed fabric.

I do want to make special mention of a fellow Spider-Man aficionado I heard from last night. He actually undertook a quest very similar to mine, probably before I ever thought of it, and created a classic Ditko-style Spider-Man costume from scratch. I’m sure he wouldn’t mind me sharing the link, because he’s understandably proud of his work.(Plus, he already shared the link in a publicly visible comment. :]  )

Check out his suit at his DeviantArt page!

This also seems like a good time to point out the truly amazing and kinda heartwarming nature of certain Internet communities–both formal and informal–that make projects like this possible for people like me. There are true innovators out there. I am not one of them. I merely partake of the fruit and try to share when I can (and respect intellectual property as appropriate, of course). Thank you Internets!

Up Next: I have no idea! But it’ll be somethin’