Limping toward the Finish Line…in Third Place…Hopefully…

Not much picture worthy to share in terms of progress. I did the other glove, and no, it did make much more sense this time than the first time. I feel like something is off about the pattern lines, so I will be looking into that for the next iteration, as well as searching for a clearer sewing guide for this particular glove pattern.

I am working on getting the arms attached at the shoulders, but that is not going smoothly. I am 90% sure that this has to do with a mistake I made early on in putting the mask together, the sides and bottom of which integrate into the shoulders. I believe a connection point(s) got off track, which is having a bit of a cascading effect. But I think I can cobble it together, more or less.

I have also been working on the new and improved template with built-in guides for matching up the right points, so as to make this process much easier the next time. I will also go ahead and give it more detailed custom sizing, for my circumference measurements in addition to my height.

So…{deep breath} here’s to seeing this “learning experience” through and being much better prepared for the next version!

How Not to Make a Spider-Man glove…

wpid-wp-1407068013374.jpeg

wpid-img_20140803_081257.jpg

It could be worse, to be sure. I got it to come together in a generally glove-like form, but I know for a fact that I did not do it the way the pattern intended. It was just really hard to get the “puzzle” to go together right, so I shoved some pieces where they didn’t belong. But I think that I learned a lot in the process, and the good news/bad news is that I have another glove to make and see if the intended method makes any more sense the second time through. 🙂

After that second glove is done, I attach the arms to the shoulders, close up the arm seams and the seams along the sides of the torso and we will have head to toe coverage.

Then–if that stage of the costume is worth it in terms of fit and non-shoddiness–it’s eye holes, eye frame shapes, and lenses of some kind. Then soles for the boots.

Meanwhile, I am taking what I am learning from this costume and modifying the basic template to make it easier next time by way of adding number/letter codes to match up what connects to what and so forth. Then I will decide whether to do this same design again, or move on to something new. New things are always so tempting…


Spidey from the Waist Down

wpid-img_20140801_123500.jpg

Well, I’m getting there. Slowly. Sort of.

I did actually fix those little nubbins on the hips in the pic above. Just needed to bring in those partial stitches a bit more in line with the seamless parts of the legs below them. And I am hoping that once the top is done, the saggy crotch will be pulled up a bit. May just be a matter of final adjustments after donning the suit.

I’m actually really happy with my design and how it looks IRL so far. But I hope to improve on sizing and details next time. I might have underestimated my height in sizing the costume (which is hard to do, as I am not what they call “tall” in the common parlance).

Since this pic, I have sewn the bottom of the back torso to the top of the back of the waist. That leaves it armless and with the sides unstitched. I will hopefully be able to get the gloves sewn, arms attached at the shoulders, and finish up the arm and side seams this weekend. We’ll see.

And I will probably have to forego more pics until I cut eye holes. I really cannot see through that mask fabric…


Definitely Not Perfect…

At this point, I have to keep reminding myself of two things:

A) I just started sewing a few months ago
B) Some things you just have to learn by experience (i.e. the “hard way” they always talk about)

The Mask:

 There is obviously a big difference between getting the mask pieces sewn into a mask shape and getting them sewn into a mask shape with the web lines matching up. After it was too late, I found a guide made by one of the creators of the templates I have been using that shows the proper correspondence of points from shape to shape. I am working on a much more detailed guide to make a much more sewing-friendly template for the next costume.

In the meantime, I will keep working on this costume, flaws and all, and see what I can make of it. Even if it just means learning all the things to do differently next time! 🙂

Foot #1:

wpid-img_20140731_160831834_hdr.jpg

Doing this part actually got me strangely excited and re-motivated. It is the first hint of what the halftone dot style will look like in practice (even though this leg is only sewn up to the top of the boot so far.

All right. Once more, into the breech(es)…


Some Progress with Minor-ish Issues

Invisible Zipper Practice using spare, unprinted costume material:


Adding Zipper to Back of Costume (decided to go with single vertical zipper)

wpid-img_20140730_173458937_hdr.jpg

wpid-img_20140731_042715053_hdr.jpg

The zipper itself wasn’t actually too bad. Had to tear out and re-do some stitches that were too close to the teeth and some that were too far from the teeth, but overall not bad. Closing the seams above and below (especially below) was rough. Got some puckering that I hope will be helped by the stretch of the final wearing.

And lining up the web lines…oy, the web lines.

I am prepared for this to be a rough project. I plan to do the best I can, but overall learn a lot (I already have) and try again if need be!

Patience is hard…

We made it back home last night after a leisurely thus long drive. This morning, I was pretty excited (after a couple of cups of coffee) to get back to the Costume Quest. I figured I would cut the smaller costume pieces out the rest of the way, do some measurements, and make some marks in prep to do some basting for size testing.

wpid-img_20140730_065438.jpg

Another exciting photo of a completely un-sewn costume…

But I quickly discovered–unsurprisingly–that the chalk is horrible on this fabric. It was horrible on my DIY spandex, and I don’t know why I thought this might be different. Anyway, my daughter and I will be going to the fabric store for thread and such, and I will grab some disappearing ink fabric markers. It seems like the best way to go.

So, for now, I have finished cutting out the rest of the costume. And it’s time to get up and do some other stuff around the house ahead of heading out for supplies and groceries, so it’s all for the best.

Today: get sewing supplies, including a good marker->mark fabric of mask area->hand baste to test (A) the measuring method and (B) the sizing -> adjust method if needed and keep going!

Spider-Man’s Amazing Egg Head

Today, my daughter and I will be heading home from the out of town portion of our week off of work and summer day camp, and I think we’re ready to get back to our own stuff, our own routines, and our own beds. And I will be ready to get back to the nitty gritty of working on the costume.

For today, though, we have another Spider-item for discussion: Spider-Man’s oddly ovular head.

We have several convenient, though unintentional, illustrations of what I am talking about straight from the comics. Here’s one example:

Of course, this little classic technique that has been around since the early Ditko Spidey comics is merely a symbolic representation of Peter’s dual identity, employed for various reasons. But for my purposes, it serves well to show the magical transformation that the shape of Peter’s head undergoes when he dons his Spider-Man mask. The degree of “head smoothing” depends on the artist, but generally his ears disappear, his hair is fully flattened out, and his nose and mouth become less apparent, even in profile.

This was surely just an easy, stylized way to draw him, and the shape of his head in-mask has become a rather integral part of his iconic look. The modern Spidey movies have even put special effort into achieving that magical Spidey egg-head, using an under the mask “shell” similar to the one pictured below (there are a number of folks who make them for cosplay costumes).

But in practice–that is, in the world of the story– the movies, like the comics, represent the mask as being just a mask:

Pictured: no mask shell

But I don’t mind this bit of comic and movie magic. After all, in real life, pulling a tight head mask over one’s head can result in something like this:

redmask

Somehow, that just doesn’t look as cool.

Up Next: Home!!

A Slow Beginning…but it’s a Beginning

Busy weekend out of town so far, but I was recently able to get at least a symbolic start on the costume before heading out:

wpid-img_20140725_064026.jpg

It is definitely in multiple pieces now, instead of one piece. And I can’t sew it together if it isn’t apart, so there you go.

The Breakdown

I have also decided on how I want to break the whole process down into manageable chunks that my obsessive brain can handle doing in stages:

  • Stage 1: Measurements & Marking
  • Stage 2: Mask section (includes back center seam) — includes inserting invisible zipper on back of mask
  • Stage 3: Gloves, lower arms
  • Stage 4:  lower body section
  • Stage 5: Insert invisible zipper for torso sides, rear belt, and close final seams on underarms and torso

The Practice

Since the second stage does include a small invisible zipper installation, I need to do a bit of practice on that between measuring and starting to sew.

The Supplies

I will need the following before I truly get going:

  • Darker red thread to more closely match the suit’s red than the red I’ve been using for my DIY stuff
  • Resupply of black thread (there will actually be no seams going over blue areas the way I’ve shaded the suit)
  • Two more short invisible zippers (for a total of three, two for practice and one for back of mask)
  • Two-three long invisible zippers (one-two for practice and one for suit)
  • Scissor sharpener

So, once I’m back in town, I’ll grab supplies, and let the marking of measurements begin!

Saying Goodbye & Plans to Measure Twice and Stitch Once

wpid-wp-1406288013176.jpeg

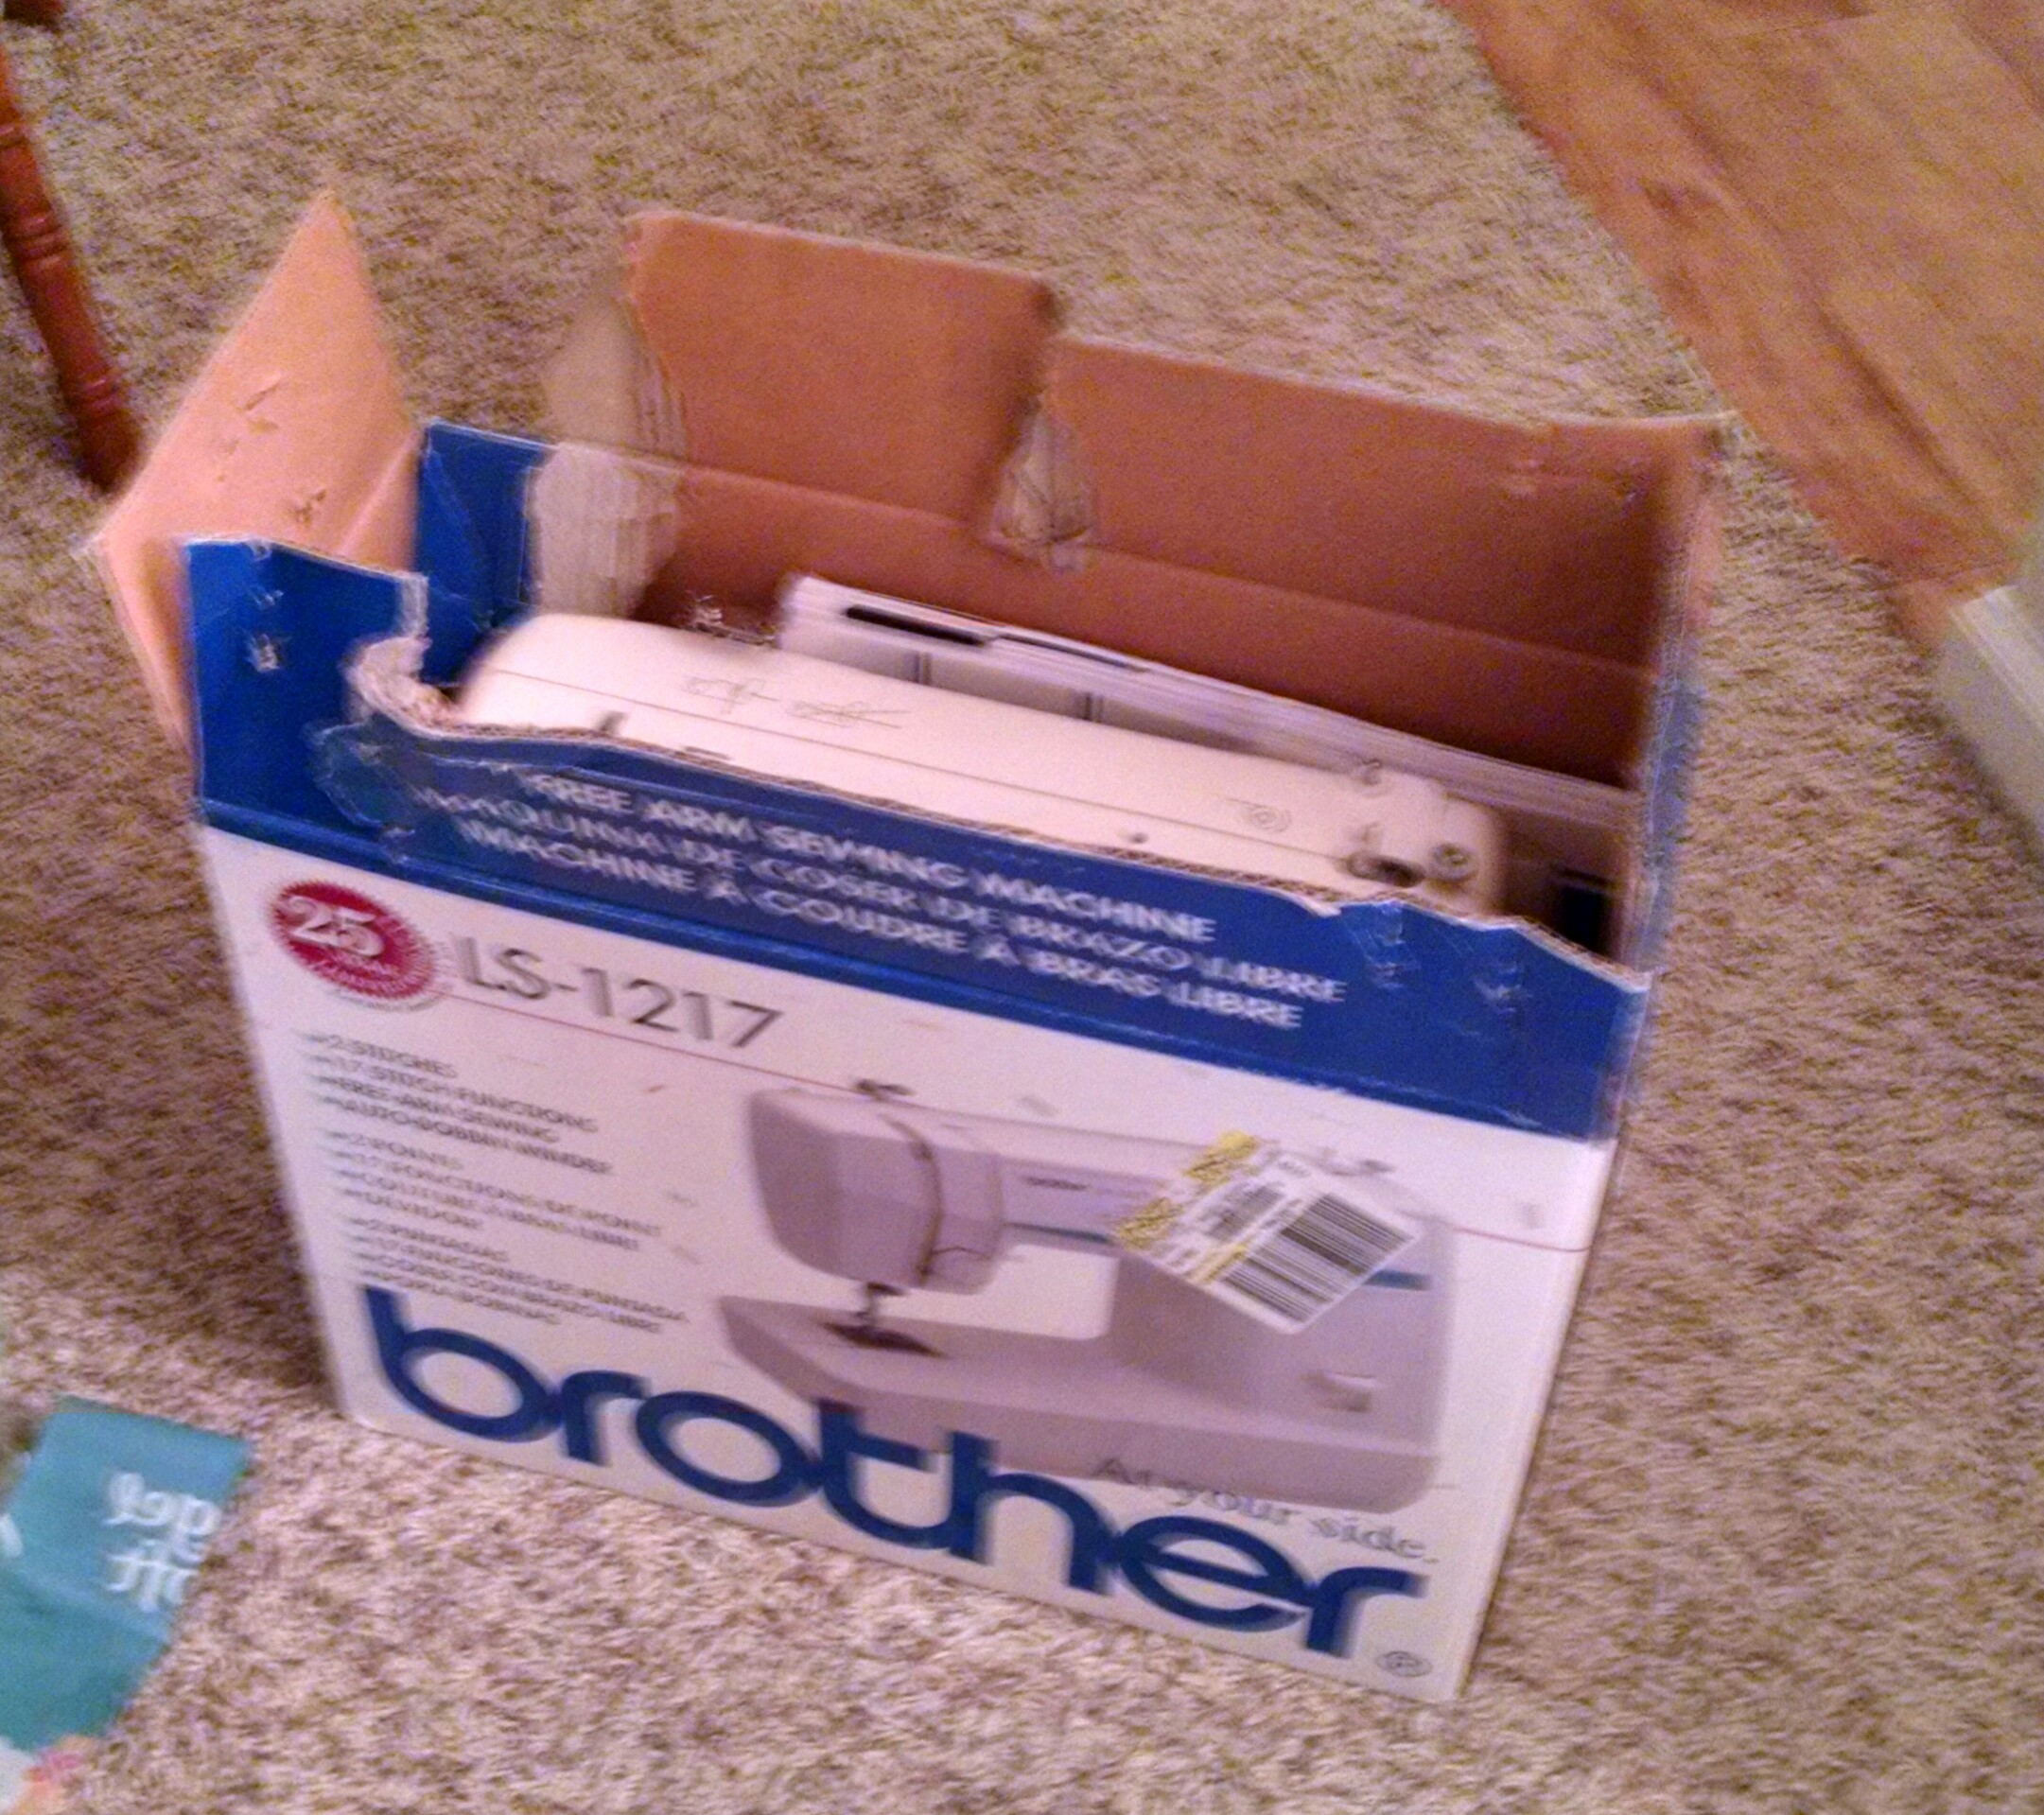
The Brother slogan reads: “At Your Side.” He really was.{sniff}

I knew it wouldn’t be forever. Like two young people having a summer camp fling, I knew that the LS-1217 and I would eventually have to go our separate ways. But in the process of that fling, I learned so much. (Is this analogy starting to get a little creepy, or is it just me?)

Anyway, I returned the borrowed sewing machine to my friend and co-worker yesterday, and bought her an Iced Soy Chai Latte (size Grande in case you’re interested) as a thank you, even though she insisted that, really, it only sits in its box unused until her mom comes to visit, but still…

As I think I’ve said before, I’m really glad I started on a basic machine without the bells and whistles. I think it made me appreciate the fundamentals a bit. I am still VERY much a beginner, so I don’t want to go too far with that point, but I think it did make me “work for it” a bit more.

So, goodbye Brother LS-1217. You taught me much, and served me well. And I know you would want me to be happy with the Singer Stylist, even if you might occasionally scoff at its new fangled, fancy ways.

Measure Twice & Stitch Once

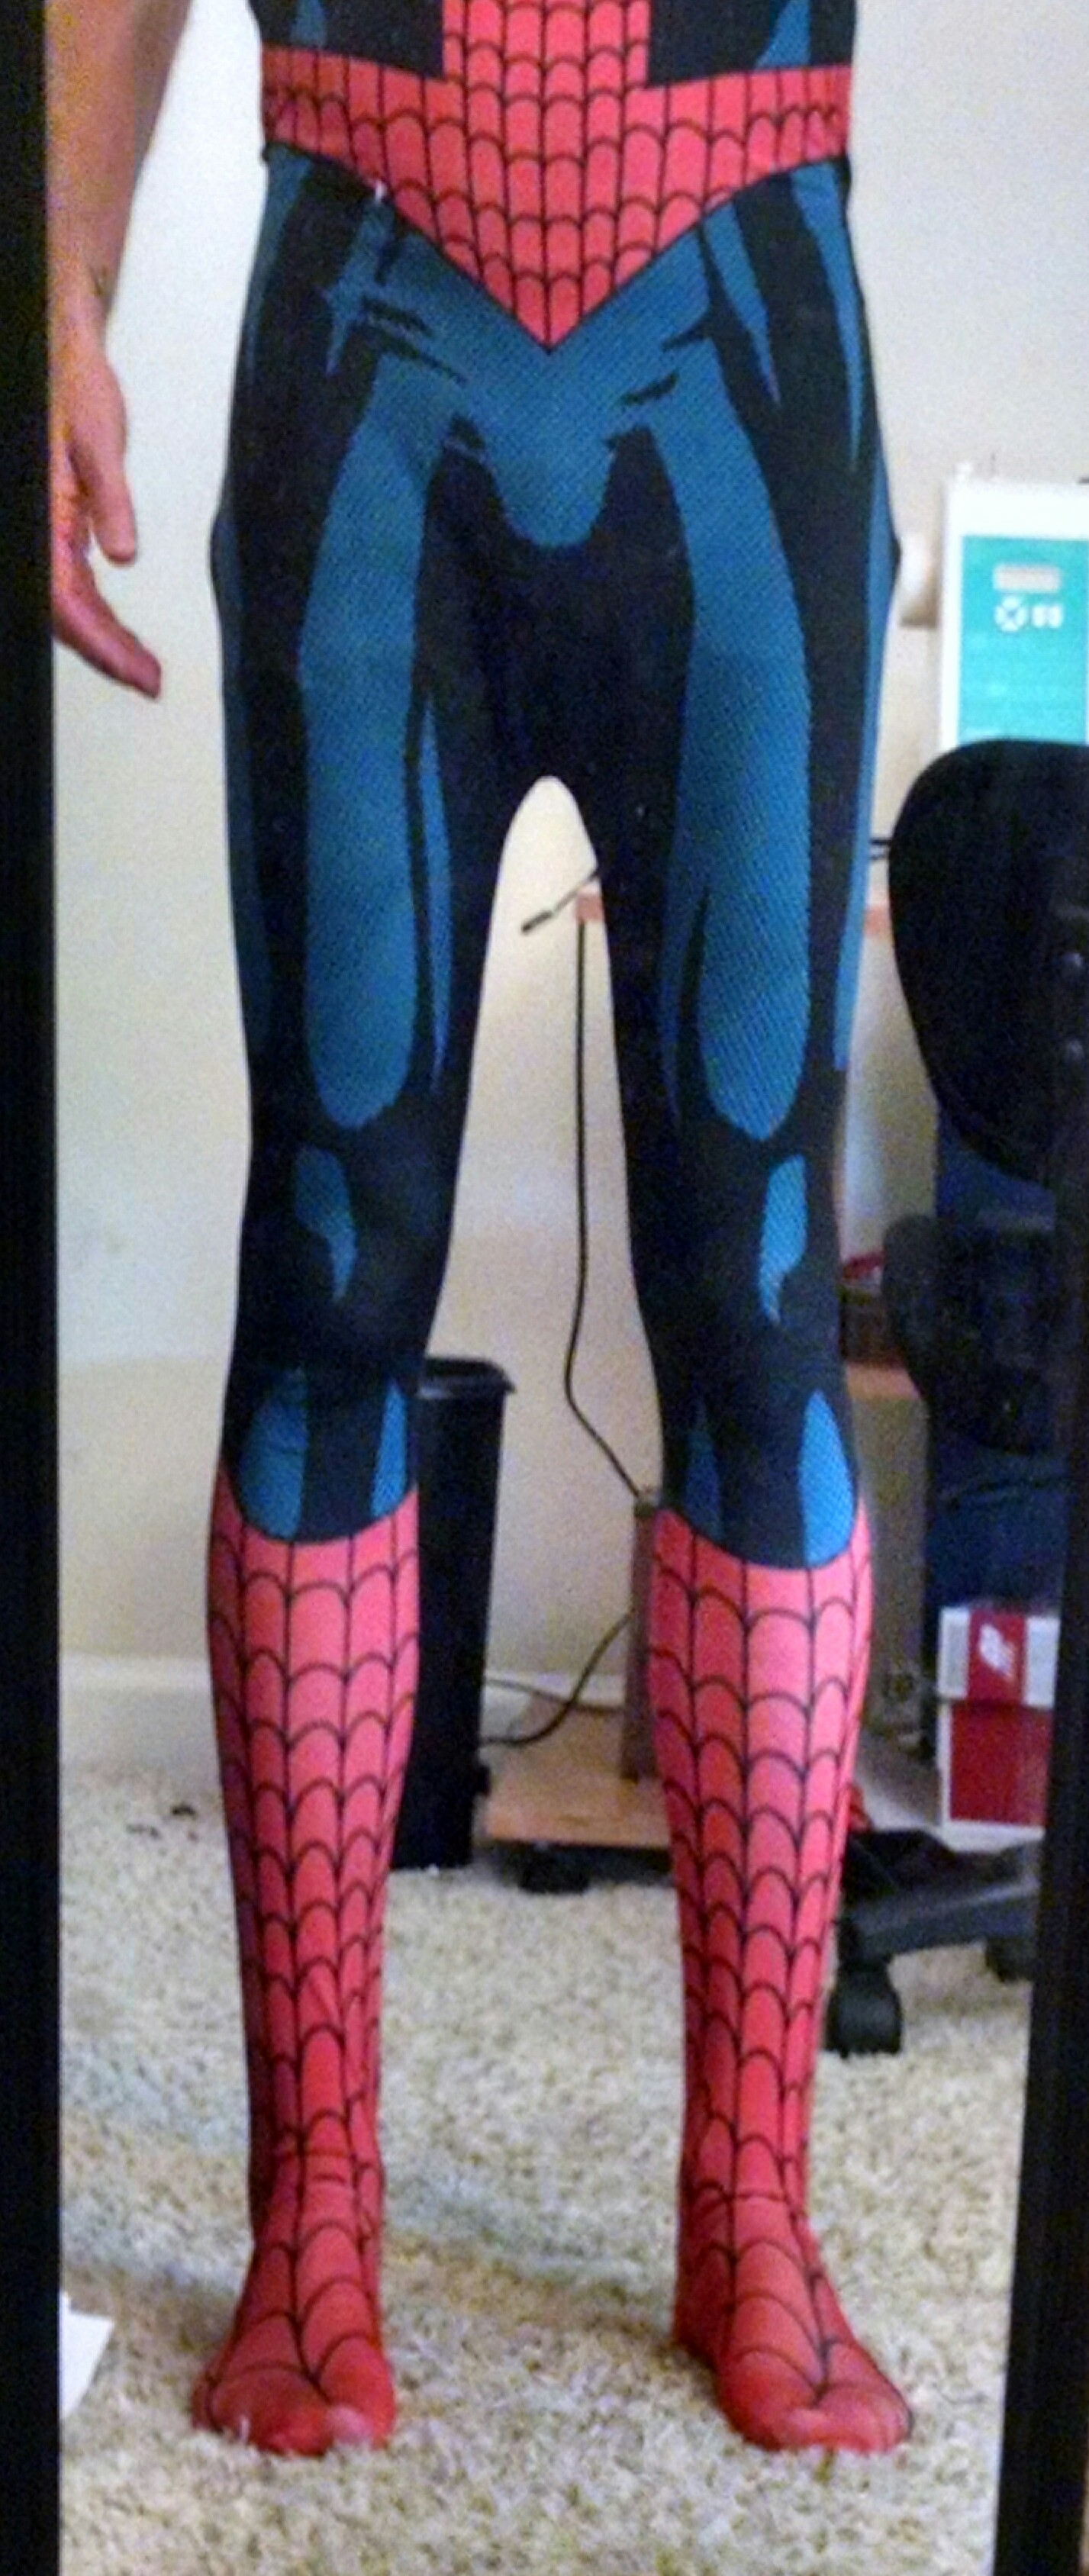
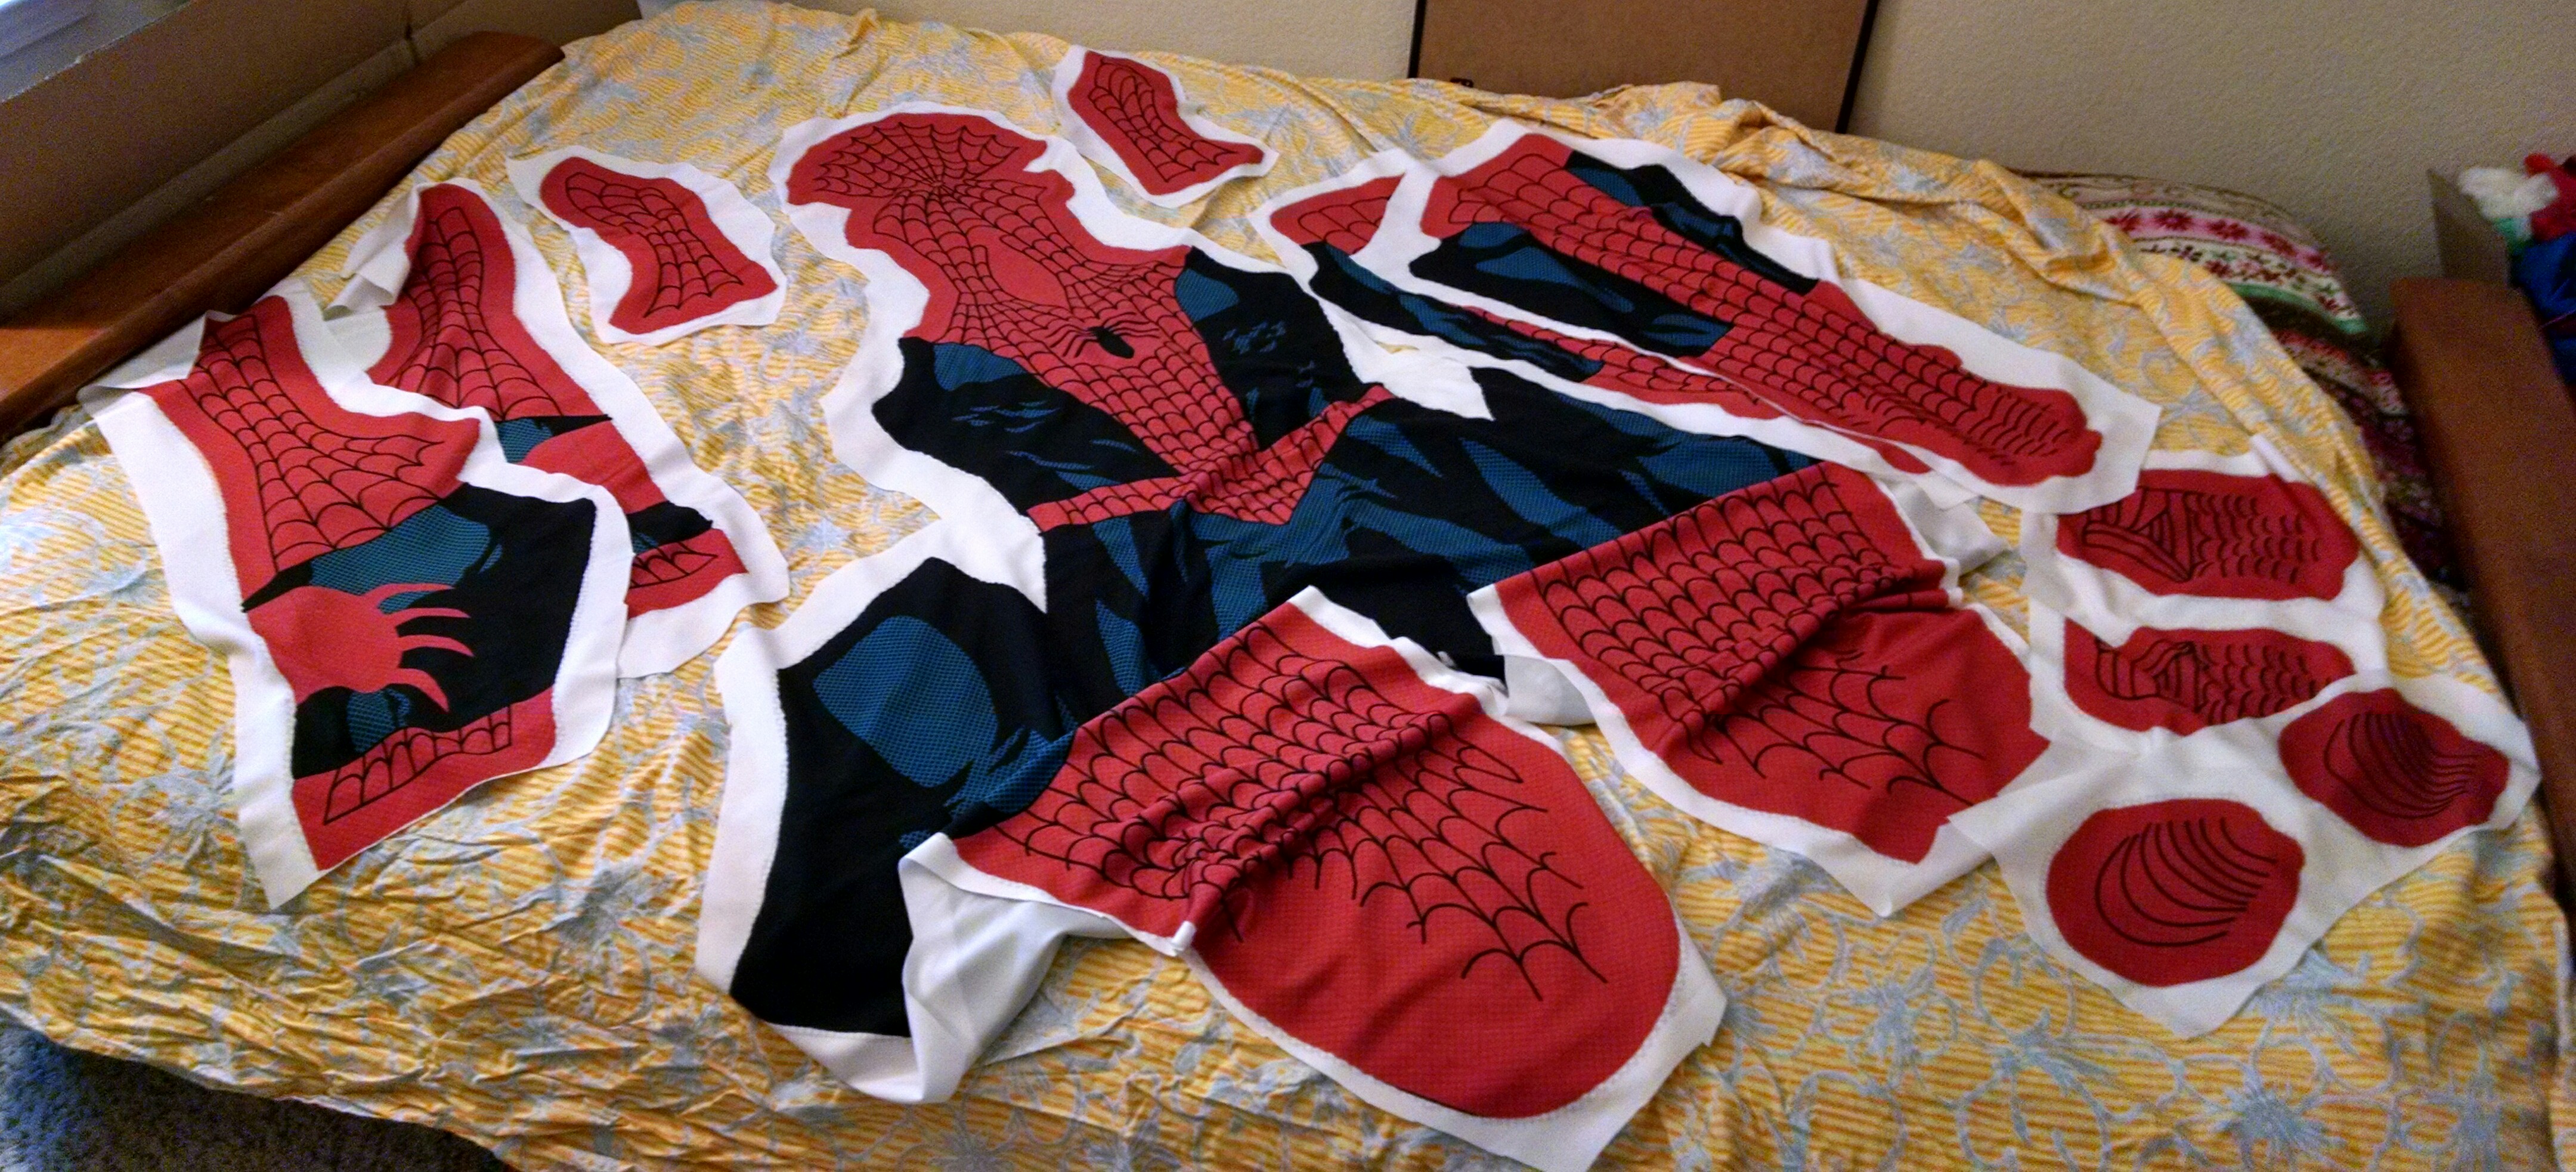
I’ve been doing a lot of careful mental prep for getting started on sewing the suit, and a big part of that has involved things that are only just now occurring to me that I wish had occurred to me when I was designing the template. For example…

When I am stitching the costume, I will be sewing the reverse side, the side with no lines to follow. I will hand baste based on measurements, so I can follow that basting thread line on the reverse side but–as I am not using a serger–I gather that it is best not to actually sew on top of the basting thread. So I need to have a way to use the basting thread as a consistent stitching guide without sewing over it.

The idea, I believe, is to mark the costume for basting 3/8 of an inch inside the eventual seam line to be stitched, and then, once I have basted, I can line up the basting thread line with the 3/8 indicator line next to the machine’s presser foot to place the stitch on the actual seam line.

Anyway, that’s just one of the details I am trying to carefully consider before I jump in and mess something up in an irreversible way. But in the interest of keeping to my goal of brief posts, I will not go into other details. Instead…back to the Costume Quest!

Happy Weekend everybody!

Tutorials Complete & Zippers + Spandex = Anxiety

Almost Ready to Start!

I just wrapped up the final steps of my multi-part tutorial for assembling and sewing the custom printed costume fabric. The obsessive side of me is tempted to go through and refine it all, but even though I will give it a once-over and probably add more items to my checklists, I will resist trying to prettify something that is just for my own use.

Zipper Madness

The final stage of the costume sewing will be the installation of the invisible zippers, and that is the part that causes me the most apprehension. But I am feeling better the more research I do. Other than the general concerns about doing something stupid like installling the zipper backward or out of alignment–issues that can be avoided with checklists and cautious marking and so forth–there is the rather more slippery matter of installing a zipper in spandex without rippling and curling. But I am getting some good tips and will be doing some practice and testing ahead of installation in the actual costume, so that will make me feel a lot more confident (or a lot more scared, depending).

And the Most Important Missing Ingredient…

Time. It always seem to run out so quickly. But with my plan to do things in chunks (oh yeah, that’s the other prep thing I need to do, my scheduling of costume production phases…), then theoretically I should just need to set aside a small amount of time each day to get at least a little something done. But every now and again I should probably spend time with my family and maybe do some housework or something.

Up Next: Lookin’ for Time in All the Wrong Places (I don’t know what that means either)