Waiting for Supplies and such…

So, I am in standby mode in terms of actual costume and accessories. Here are the items that are being delivered:

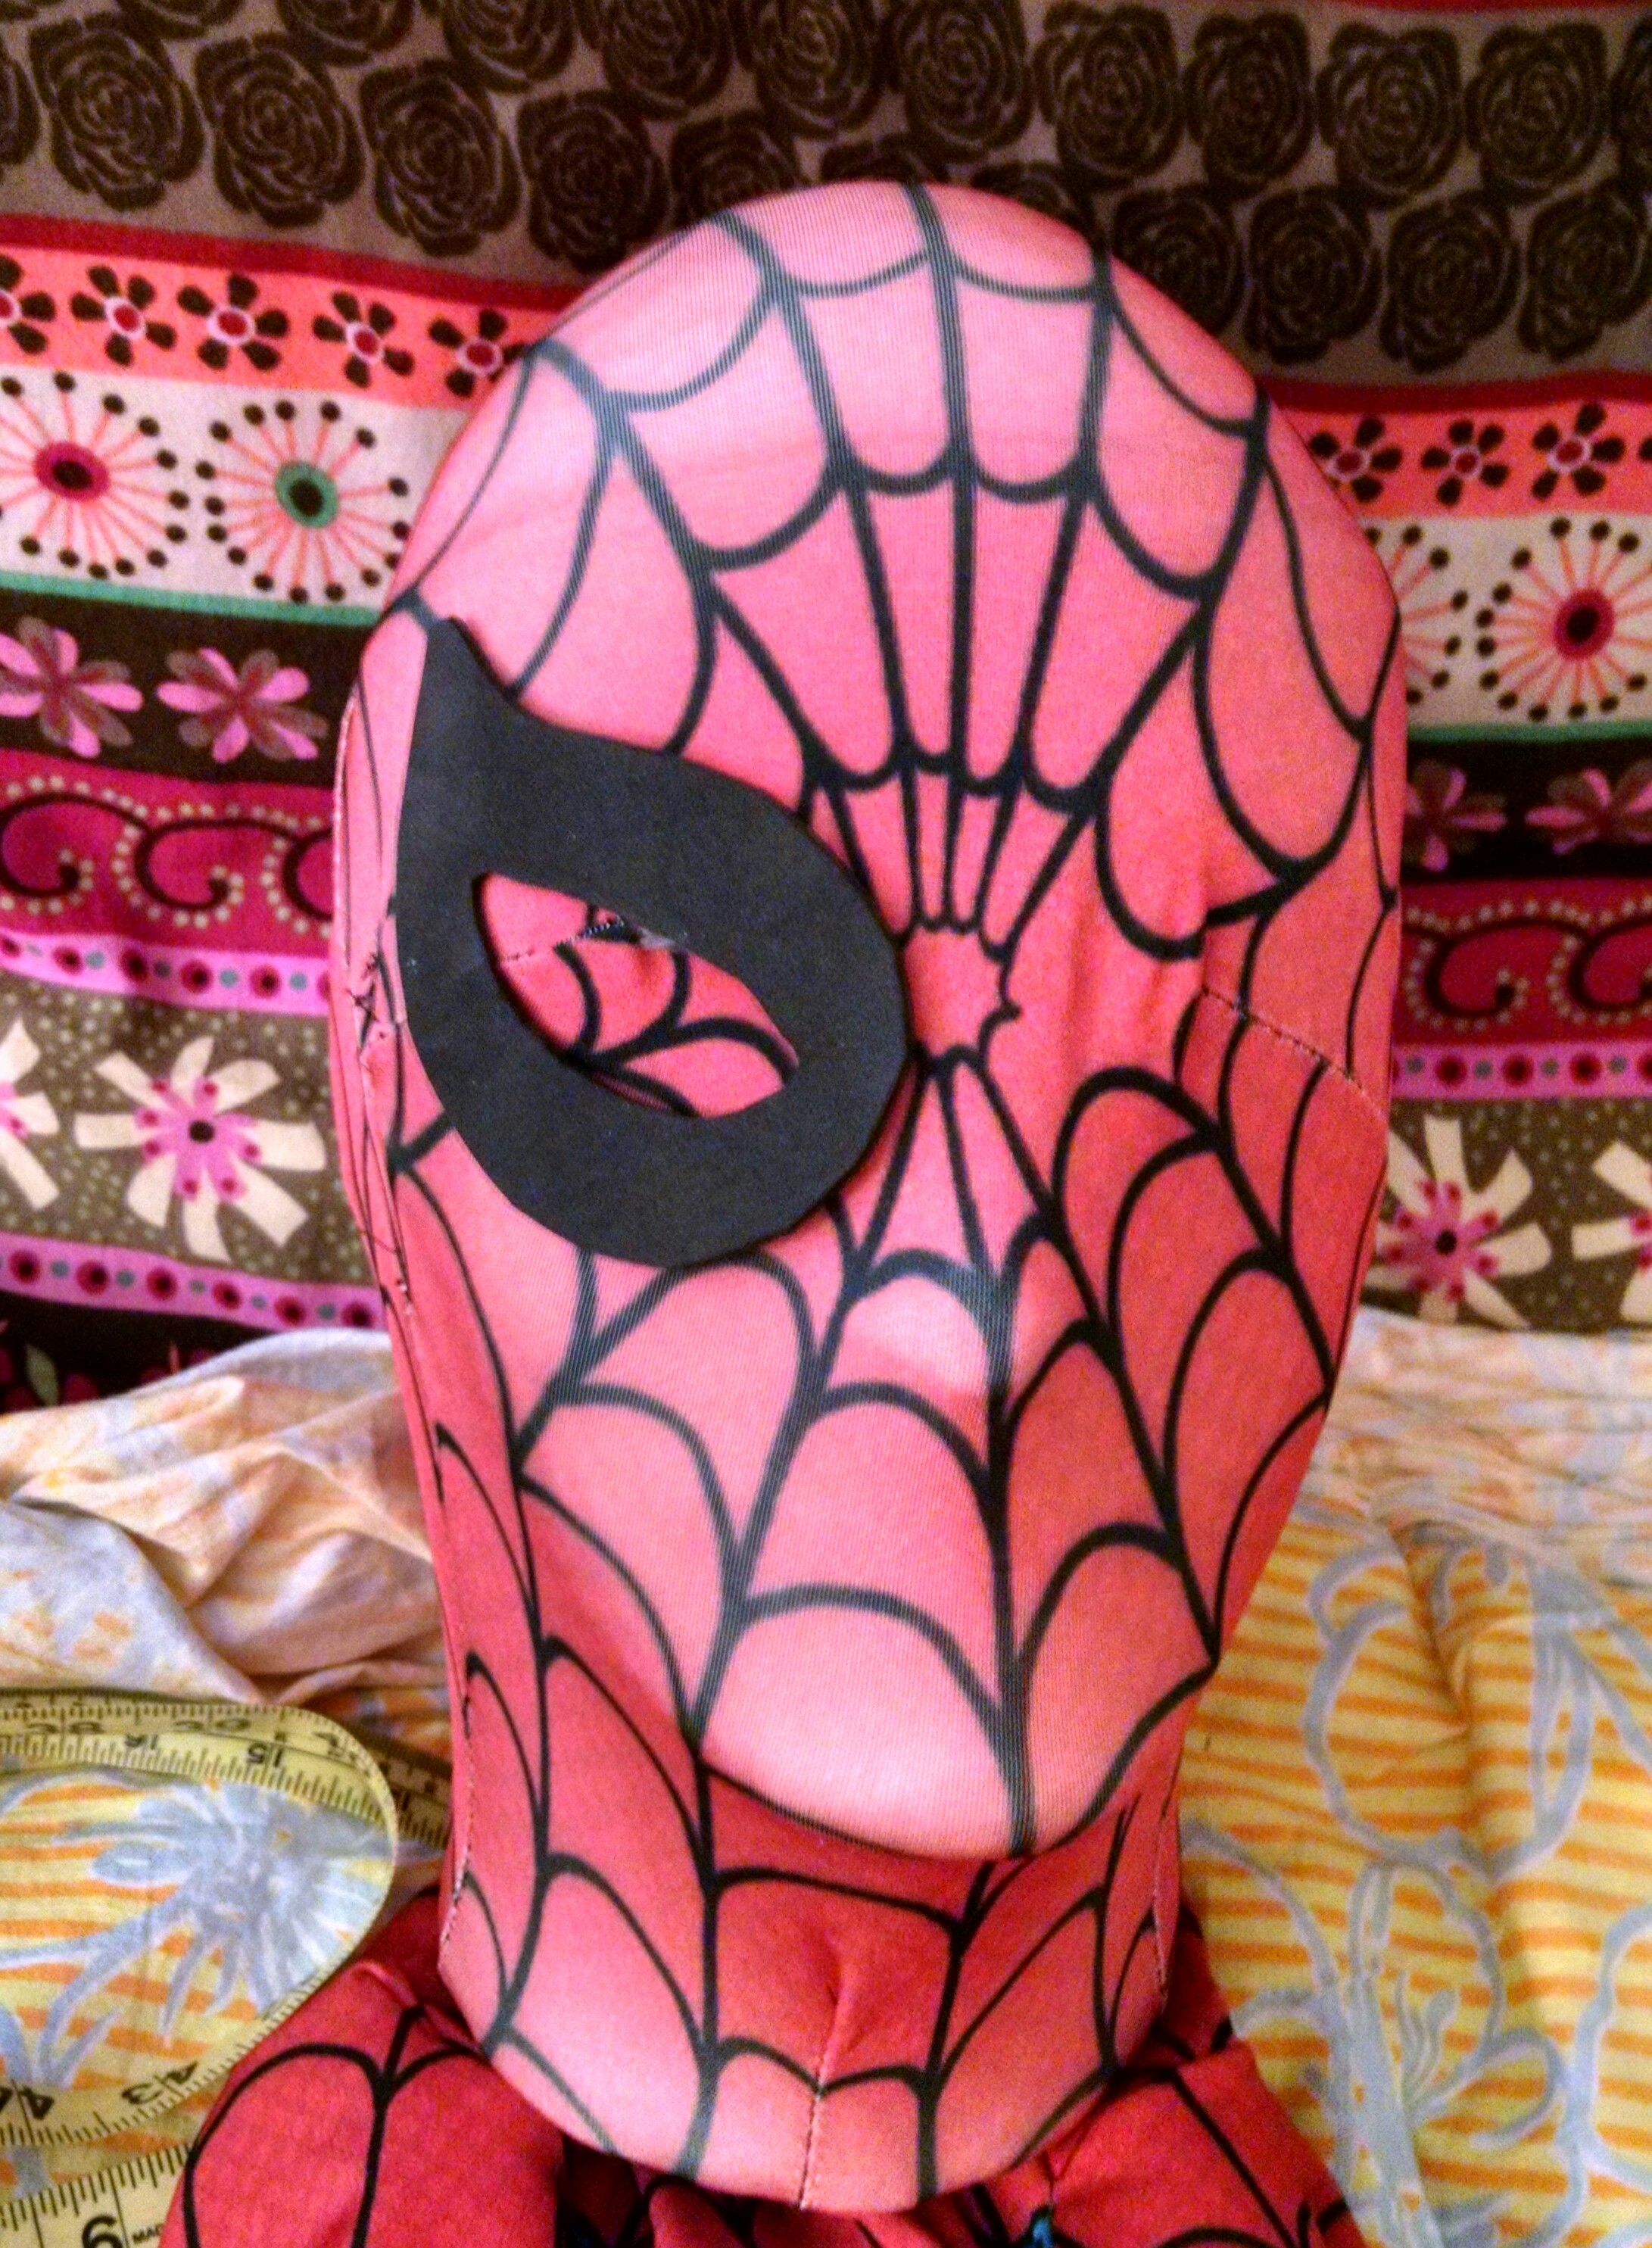
  • The printed costume fabric (traditional Spidey bodysuit)
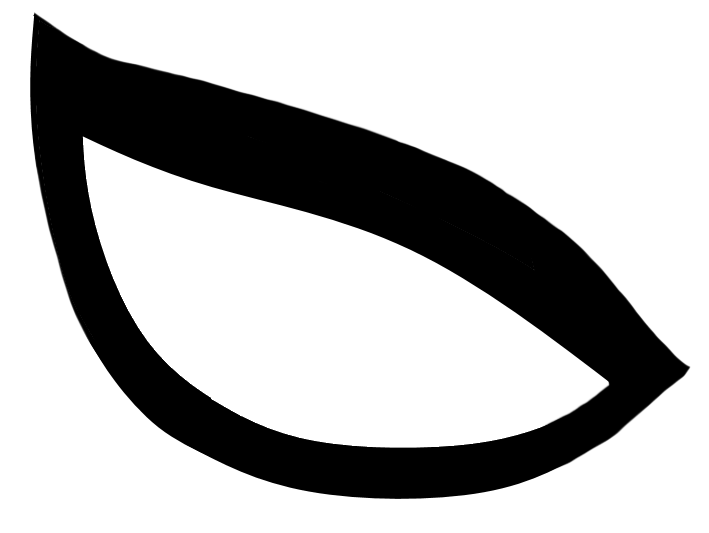
  • Worbla sheet (for eye frames)
  • Mirrored window liner (for covering eye lenses)

Here are the items that have been delivered:

  • Make-a-Zipper Invisible Zipper kit (a roll containing one long invisible zipper that can be separated in the manner needed, along with several zipper pulls)- color: blue, for the main entry zipper on the traditional Spidey bodysuit (gonna do the ‘down the sides, across the bottom of the back’ thing this time)
  • A red invisible zipper for the back-of-the-mask zipper (to allow for pulling the mask forward off the head when needed)

Here are a few sundry items that I will need to buy/make:

  • Base coat and main coat paint for Worbla frames
  • Heat resistant board for working with Worbla (similar to the one in this clever how-to: Working with Worbla Safely)
  • Duct tape: Useful for so much (including previous list item), but specifically for building out the circumference/size of Bob the head model’s head.
  • Clear plastic of some kind to line with the mirrored stuff.
  • Construction paper (recommended base medium for tracing onto Worbla, which makes sense as it will curl less than printer paper.

So, today I will go out and grab a few things, and I can get Bob prepped for when I do the Worbla frames. But it will likely be the weekend after next before I have time to start the main work on the traditional Spidey bodysuit.

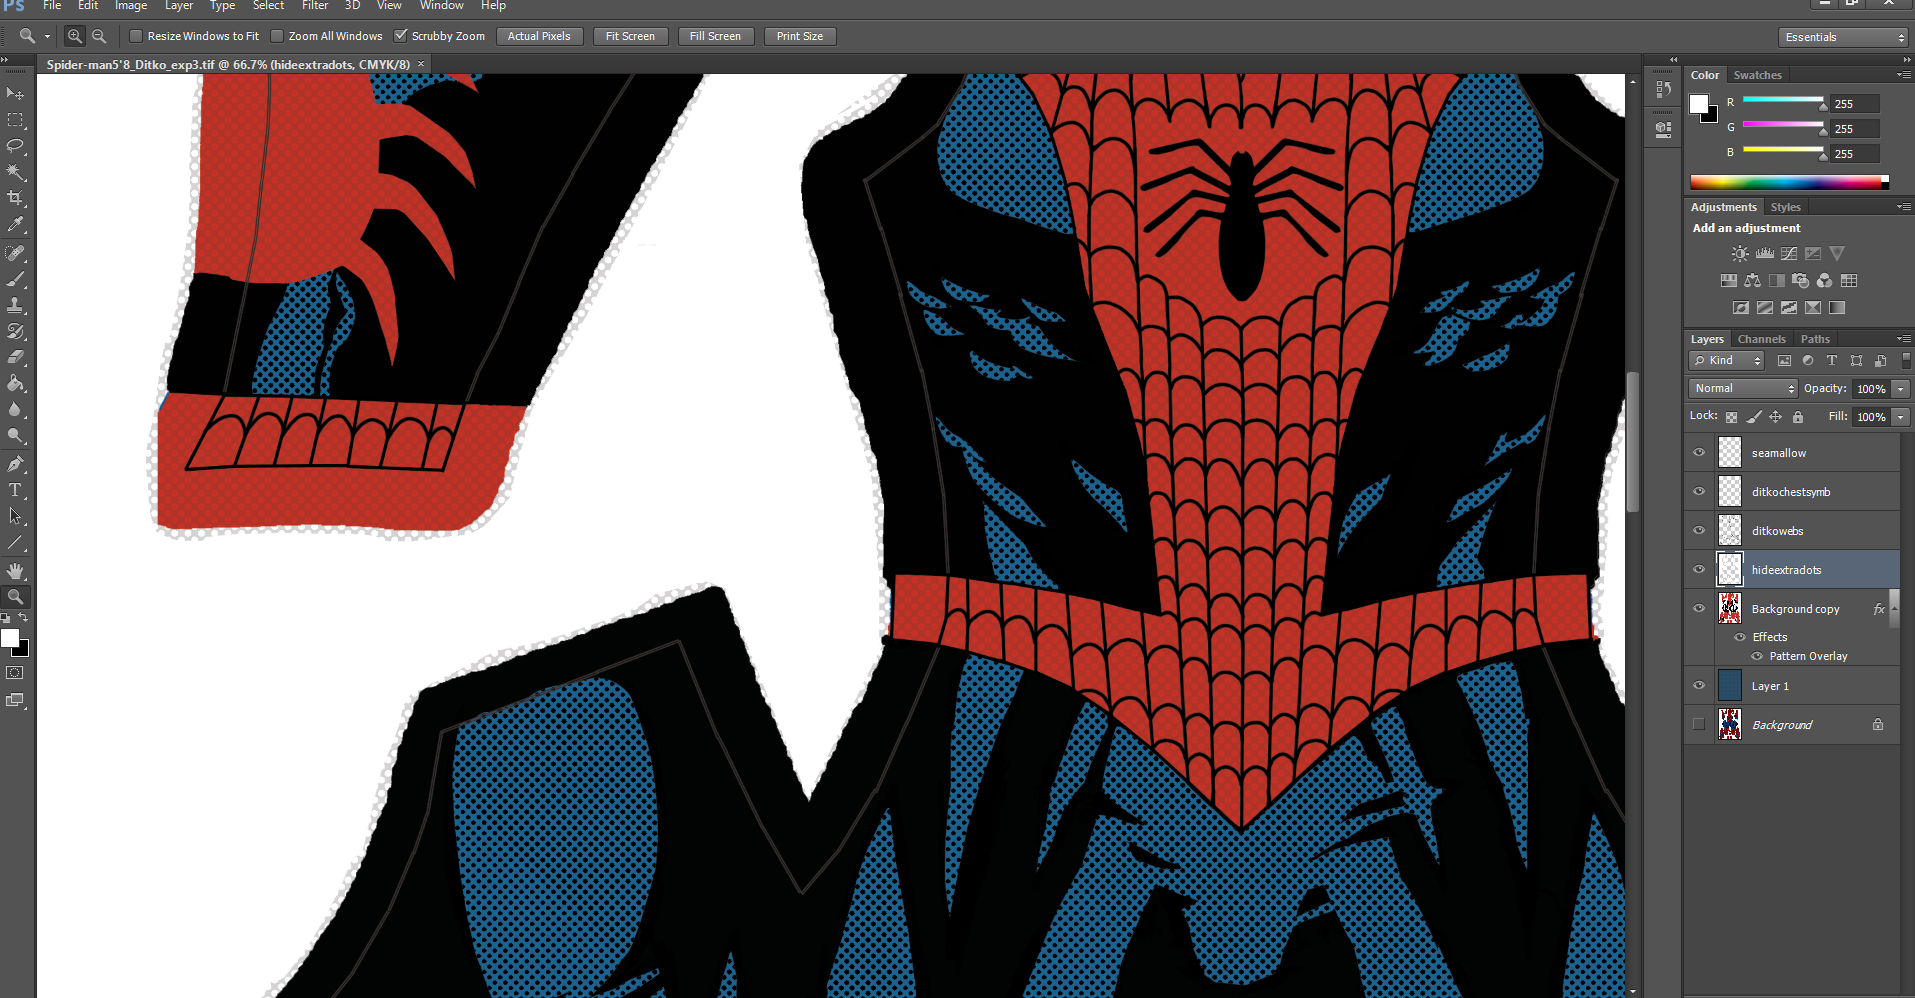
In the meantime, I’ve continued working on modifying the Photoshop template for the Ditko style costume to separate it into the component parts:

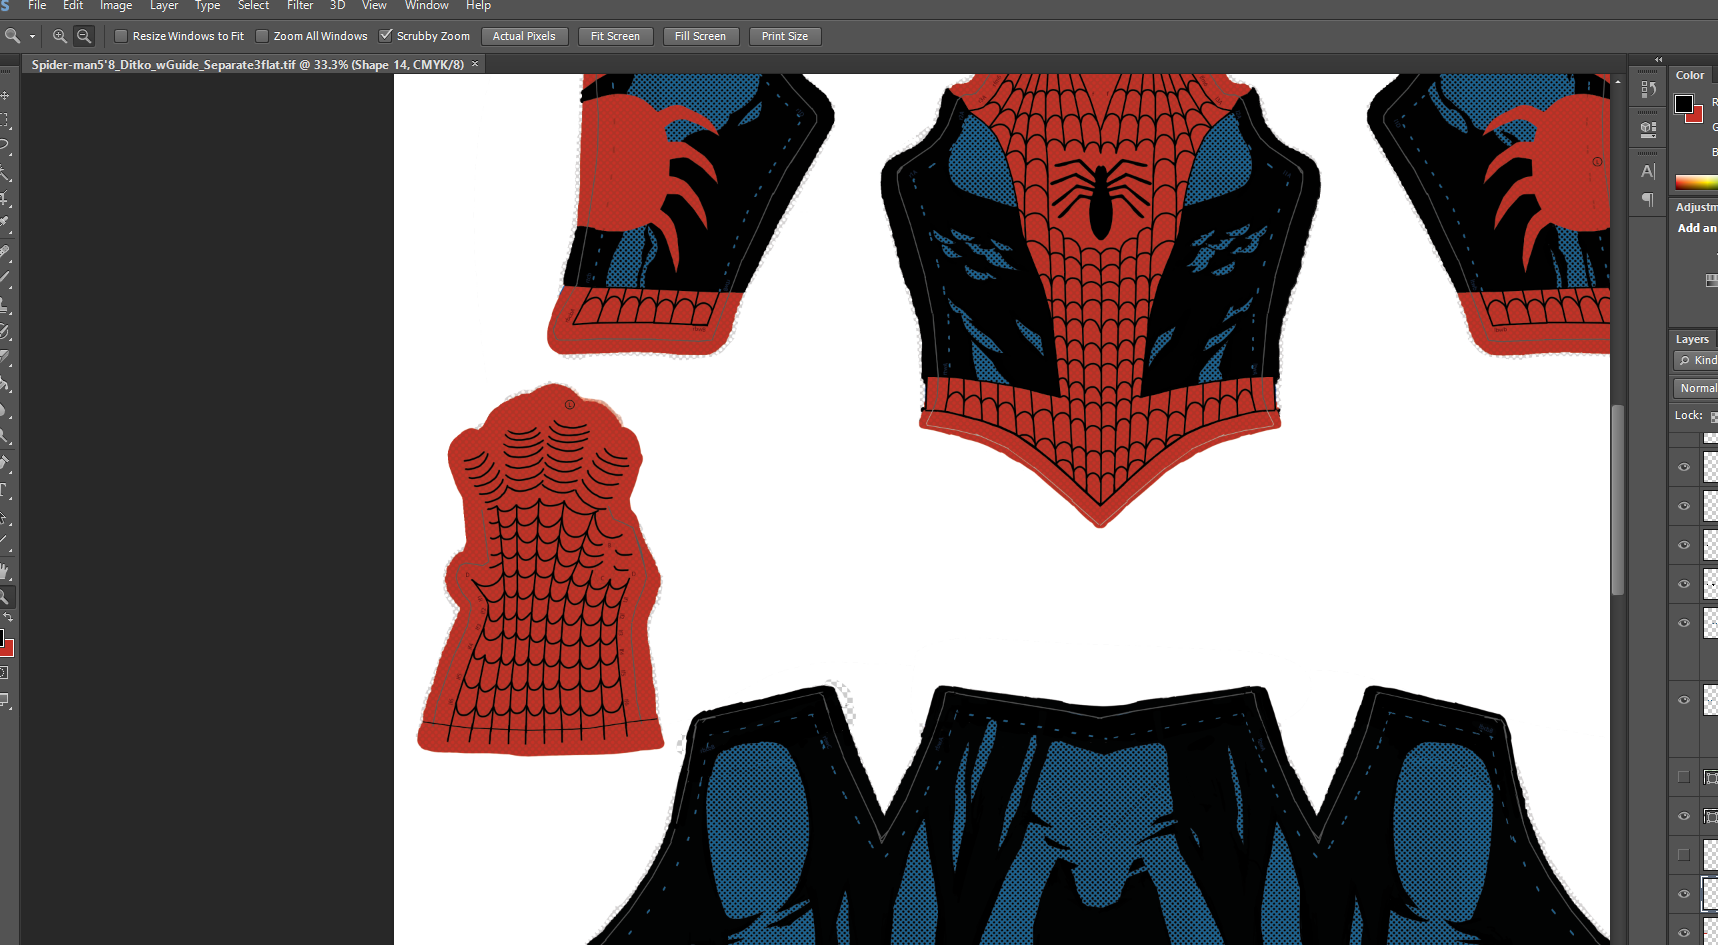
It’s not as hard/complicated as I feared, but it is superbly tedious! It’s coming along, though. I’ve separated the top and bottom fairly well, built up the height of the waist for good fit and so that there’s plenty of overlap. Just started on separating the gloves, then we’ll do the boots, then the mask. And I want to try and piece together the back halves of the shirt, because there’s really no sense in them being separate in this new configuration.

No hurry on that design, since I have the traditional costume to work on, and I really should forego spending more on costume fabric for a long while!

That’s all for now!


What a Couple of Eye Holes

This morning, I set myself to the task of researching and testing some good sturdy hand stitches that would have good durability and stretch. I chose one, did a diagram to make sure I understood it, tested it on some scrap spandex, and then made an attempt to do it on the mask around the eye hole lines I had marked.

It was hard. The shape of the mask, the way it was hard to get to both sides of the fabric the way I was reaching through the back of the mask… So then I thought, howsabout I cut out the eye holes, then maybe I can fold over the edges and stitch those thin folds.

I cut the eye holes. But before I started stitching, I thought I would give them a try on my own head, since the presence of eye holes meant I could actually see myself in the mirror with the mask on. So I did.

It occurred to me that I probably don’t have to worry that much about the edges holding up. They stretch well, even when I use my hands to stretch them beyond the strain my head puts on them. And as for how they look, well…once the eye frames and lenses are in place, the edges of the eye holes won’t really matter. So I stuck them on Bob to take a look-see.

[Note: I added some more padding to the sides of Bob’s head to bulk up the circumference, which is why he looks a bit lumpy today. I plan to figure out a way to evenly distribute the padding at some point.]

wpid-img_20140815_065104.jpg

There’s some folding at the top edge of the eyes. It’s not as severe on my own face, but it’s there. Still, once you put the frames on, it’s hidden.

Here’s another rough, taped-on test of the frames:

wpid-img_20140815_064409.jpg

The ace bandage under the mask slid down accidentally, but it actually does a good–though rough–simulation of the eventual white of the lenses.

Finally, I figured it would be nice to a neater version, with the tape on the back to get a better idea of the look:

wpid-wp-1408100127482.jpeg

Bob’s lumpy head aside, this is not looking too bad. Even without the lenses, the frames themselves hide the rough edges of the eye holes quite nicely.

And I don’t completely hate the foam sheet material for the eyes (though I will still be looking for a more polished look).

I think I feel pretty good about just cutting out the eye holes and not seaming them. In fact, I wonder if stitching the edges would just reduce stretch and cause issues. I will cut slighlty smaller holes next time, however, to account for the increase in hole size that the stretching produces. In this case, I got lucky that the holes stayed smaller than the frames.

As for the frames themselves… I ordered a sheet of Worbla this morning, so once that comes in I can see about working up some final frames that can be molded to the general curvature of the face. Which is another good reason to get Bob’s padding evened out. He’ll be the base for shaping the curvature of the frames.

Happy Friday, all!

Should I Be Worried…?

Should I be worried how often I dream about matters related to my Costume Quest?

Last night–well, early this morning–I had a pseudo-dream (you know, the ones where you’re kind of half asleep) about a Spider-Man eye frame shape to try. So I decided to sketch it out this morning, and then refine it a bit, and it might actually be what I was aiming for with the “traditional” costume…

dream_eye1PNG

The traditional costume is a sort of classic-comic-look mashed up with the movie-look, and I think that’s where this eye lands. It’s not totally straight-edged like some of the movie ones, but the curves are very gentle. It’s got the slant of the Finch and Supaidaman (Japanese Spider-Man) eyes, but isn’t overly angry.

So, apparently, these things are coming to me in dreams now. But I also dreamed up my own episode of the CW show Supernatural last night as well, so I suppose I don’t want to make too much of my dream powers.

I think I have also decided to give the Worbla material a try for the final frames. It’s supposed to be easy to cut and mold, and then will hold its shape after you’re done working with it, and it can be sanded and painted. That means I can make something that is not too thick, but will hold the shape around the contours of the sides of my face, and I can sand down the edges, paint it the matte black I want… And if my magnetic attachment method works out, it will be pretty easy to have removable, interchangeable frames/lenses.

Worbla. That’s just fun to say. Worbla worbla worbla.

I did a little more prep work on the eye hole/frame testing with Bob. I measured the distances/areas for cutting eye holes that I can see out of and that will fit behind the frames. I then marked the borders for cutting the holes:

wpid-img_20140813_185401.jpg

The plan is to sew some strong embroidery style stitches around those borders before cutting out the fabric, sort of like making really big buttonholes. I hope I can get to those borders with the sewing machine via the unzippable opening at the back of the mask. But I suppose I can do it by hand if need be. That might even be easier.

Once all is said and done, these eye holes with sturdily stitched borders will be covered by the frames and the mirrored lenses that will be part of them. In theory. Hopefully.

I am also in the process of adapting the Ditko design,. First, I am incorporating the sewing guide that I created for the traditional costume. Then, I will work on splitting it into mask, shirt, gloves, boots, pants.

Apparently, I will not be spending money on anything other than Spider-Man costume-related stuff for the foreseeable future. But who needs groceries, really?

Really intended to work on the mask model head…

I intended to do more work on the mask model head and practical testing for the frames and eye holes, etc. But I got sucked into getting the eye shape for the next version of the costume just right. Still not sure if I’m there, but I think I’m getting close.

First, thanks to the fine suggestion from SaiTurtlesninjaNX, I started with the shape of the eyes from the 70’s era Japanese Spider-Man:

Supaidaman

A little tweaking:

supaidamanu_eye_mod3PNG

And then I thought maybe I want the eyes an itty bit taller, more…I dunno, bulbous? So I found an eye drawn by Stuart Immonen:

This was a bit too big, so I tweaked…

immonen_eye_mod2PNG

First of all, yes, they are different. Probably only in a way that matters to me. But I think I like the second one better. I’ll probably try paper versions of each on the actual costume when the time comes and see how they look.

As for the actual testing on the existing costume mask model, I did do a little tape test to see what the Ditko eye looks like:

wpid-img_20140812_071429.jpg

I think the shape and size came out pretty well (the sides of the model head need to be bulked up a bit to be closer to my head’s circumference I think). But I am still thinking the foam might be too messy around the edges.

On my next day off, I hope to spend some quality time with Spider-Bob here, doing some more final testing.

Happy Hump Day everyone.


Inching Along…

Whew! It’s been hard to find good times to work on much else besides the new template file, but it is done, and the next version of the design has been submitted to Fabric On Demand for printing. I went with the traditional style, as I mentioned, for this time.

Here’s the final version of that. I changed the subtle honeycomb pattern overlay to translucent black rather than translucent white to darken up the colors a bit. You might be able to make out some of the guide number codes at the seam corners and along the web lines, and I marked the outer edge of what will be the 5/8 inch seam allowance (which was a real pain to mark after the fact on the first attempt). :

Screenshot (117)

I decided that for the next try on the Ditko version, I will use a combo of my own pattern, the bodysuit template, and Fabric On Demand printing to make a multi-piece suit (shirt, mask, gloves, boots, pants). I now feel more confident in my understanding of the patterns involved, and the professional printing seems to be best for the look I am going for. I am still just really happy with the comic-esque look of my Ditko design, and want to merge that with the multi-piece suit style.

The Eyes Have It

wpid-wp-1407833514998.jpeg

This is Bob. I know it’s a cliche thing to name something, but he just looks like a “Bob.” I think it’s the nose.

In any case, I needed a model/structure for working with the mask and lenses, so here we go. But Bob’s head is a bit small in circumference compared to mine, so I am working on bulking up his noggin a bit.

So, we add an ace bandage, and make him look like a cartoonish head injury victim:

wpid-wp-1407833476942.jpeg

And then pull on the mask:

wpid-wp-1407833449974.jpeg

Eeh. It’s still a bit loose around the circumference, such that the eye seams are poking out. Yet my messed up placement of the zipper on the back makes this mask too tight vertically, and it wants to constantly pull upward, throwing the center of the web pattern off–well, off-center.

So, need to work on that some more. But time is again running short this morning, so we’ll visit Bob again later.

Happy Tuesday everyone!

Progress on Template & a Smidge on Eye Frame tests

I am almost done with the new and improved template that includes a thorough, built-in sewing guide! Whew. A lot of details. What I have left to do mostly involves checking and double checking, and maybe some triple checking.

I did a little bit of playing around with making eye frames out of craft foam sheets. I printed an assortment of sizes…

eye_ditkoesque_multi

…and then cut them out of paper to see how they worked in terms of size, the wrap around the eye portion of the face, and visibility, i.e. can I see out of the space in the middle sufficiently.

The smallest size turned out to be most to my liking, so I cut it out of the craft foam:

wpid-img_20140810_064450.jpg

Foam on left. Paper on right.

I like the color. A bit rough around the edges. And it remains to be determined whether the rigidity will be okay. I plan to glue magnet strips on the side of the mask, around the eye hole borders, and the opposing magnets on the back of the eye frames, see if that holds okay.

If this doesn’t work, we’ll try something else. Worbla, or possibly fake leather, as suggested by SaiTurtlesNinjaNX.

This is still in the experimental phase, and once I get something I like working on the imperfect Ditko costume, I will need to design an eye frame shape more suited to the new costume design. I have pretty much decided to go with the more traditional balance between classic comic and movie look. But for the eyes, I am thinking a “modern classic” look such as that pictured below:

new_avengers_spidey

This is from the New Avengers series from a few years back, art by Finch, I believe. These eyes are a nice balance of sharp and curvy and not too big. So I’ll play around with something like that.

All right. Just need to do my double/triple checking, maybe tweak some colors, and I hope to go for round 2 of the costume sewing soon!


Still Working on the New Template…and Eye Practice Soon…

Not a lot to report today. Working hard to get this new and improved template done, but I want to take the time I need to do it right so that I save myself a lot of work and grief when doing the actual sewing later.

I did get some materials to make an attempt at Spider-Man eyes, which I can try out on the first attempt costume. The Ditko style eyes should look about like this:

eye_ditkoesque

I’m going to try cutting them out of basic craft foam sheets first, and see if that is to my liking. I see a lot of cosplay Spideys with molded plastic-like eye frames (like in the movies), but I never really felt like that was the intended nature of Spidey’s eyes in the comics. But if the foam sheet eyes look to cheapy, I am going to try Worbla instead.

All right. That’s it for now. Happy Friday everyone!

Vote on my next Costume Attempt

So, I am plugging away at the new and improved, custom-sized costume template with integrated sewing guides, but as I get closer to ordering more custom printed costume fabric, I continue to struggle with what design to do next!

I really do like the design from the first attempt, the comic-style Ditko-inspired Spidey design. But it is also tempting to try something new. Plus, as I will at some point want a recognizable  Spidey costume to wear at Public Library events (thanks to my GF/fellow Librarian volunteering me), there is an argument for going with a more “traditional” look this time.

Anyone want to offer some opinions? I can’t promise I will go with the “popular choice,” but some outside opinions would certainly help!

Here are the choices:

A) The Comic-style Ditko-Inspired Design from the first attempt (it has a “halftone dot” pattern overlay):

Screenshot (55)

B) The traditional style that combines a bit of the classic Spidey with the movie look (it has a subtle “honeycomb” pattern overlay):

Screenshot (44)

C) The Amazing Spider-Man 2 template design from Gun Head Design:

The one on the right.

Thanks for any thoughts! Feel free to tell me why you would choose one over the others, or just state your preference.

More Pics of the Ill-Fitting First Attempt…

Yeah, definitely want to try again. It could have been worse, as I have said, but after last night’s “full zip” test with mask (thanks to my GF for zipping and unzipping, as well as picture taking), it’s clear that this attempt is too small and mismatched for general wear.

It was obviously difficult to pull the mask down to a true centered position on my face! And the shoulder-arm connections…not good.

wpid-img_20140805_191113.jpg

And the back view shows just how tight the fit is, and how mismatched the lines are, as well as how un-invisible the invisible zipper is (because the fit is too stretched).

wpid-wp-1407280389769.jpeg

So, I don’t think I’ll worry about fixing seams or touching up appearance stuff. I will go ahead and work on eye holes and boot soles, just to practice and refine the methods for the next iteration. But before I do any of that, I want to finish my new and improved template.

What I am REALLY struggling with is whether to do this same design again (but better) or do a different design. I really like this design… But even if I stick with this design, I want to tweak some things now that I see how they look in 3D.

Anyway, maybe I’ll post some options at some point and get a vote? That could be fun.

Onward and upward, true believers!


We Have Head to Toe Coverage…

Well, the seams are sewn, and we have a Spider-Man bodysuit, albeit a somewhat messy one…

Sorry for the blurry pic of me wearing the suit. The mirror is narrow, so I have to stand far away, and it is really hard to get my phone to acknowledge my thumb through the glove. (I have no similar excuses for the blurriness of the suit by itself. It’s possible that I suck at taking pictures in general.)

wpid-img_20140805_054835.jpg

There are still some issues. For one, this isn’t zipped up in the back. I think it can be zipped up, just not by me while wearing it. I think that’s partly due to not having the mask up, which pulls the zipper straighter. But having the mask up effectively blinds me, as there are no eye holes yet. So there’s that.

Then there is the issue that started from the poor mask alignment that resulted in poor alignment of the black-blue where the arms connect to the torso. And there’s a seam I need to close in one armpit. But I am overall surprised at how okay the suit looks considering the mess of the seams underneath it all. I might be able to touch up some of the pattern alignment issues with marker. Maybe.

Next Steps:

  • Before doing more to touch up this suit, I want to finish refining and tweaking the new and improved Photoshop template with built in sewing guide and customized sizing. And then, while I wait until I can get a hold of new custom fabric printed from the new and improved template…
  • I think it’s worth making eye holes and eye frame lenses for this suit, not only for a more complete look, but also as more of an experimentation and learning process. And so that I can actually see while I’m wearing it to get pictures of the whole thing on me.
  • It will also will be good to experiment with adding soles to the boots, again, both for the completion of this look and to learn for the next iteration.
  • Oh, and I will also touch up and repair where needed, mainly because it will drive me crazy not to.

So…there we go. I guess I can call that a major leg of the journey complete. But until I am fully satisfied with the results,  the Costume Quest continues!