

Okay. We’ve covered the gloves, the shirt, and the leggings. But we can’t have Spidey running around barefoot, so let’s see about those boots.
A Little History and Disclosure on My Spidey Boot Pattern
We’re going to use a boot pattern that I actually came up with myself. But you should know a few things:
1) My current fabric printings and costumes in progress use the boot pattern that is separated out from the bodysuit template I originally bought from Gun Head Designs.
I feel that I cannot share that pattern, both because it is not mine to share and because I don’t have a a method for telling you how to create it from scratch based on your measurements since I did not myself create it.
2) The boot-socks I have sewn from my pattern are 95% okay, but I will be adding a minor tweak that I have–honestly–partially tested in “real life.” So I strongly suggest trying this out with some test spandex first. And markers (see previous post).
So…yeah, this is kind of a guinea pig situation. You’ve been warned.
The Measurements
1) First, decide how tall you want your boots to be. If you pay attention to different iterations of Spidey, comic and movie versions, you may notice that his boots sometimes reach to just the base of his calf, and other times to mid-calf or a smidge higher.

Tall boots. Source: [https://liveforfilms.files.wordpress.com/2010/03/spider-man-av.jpg]
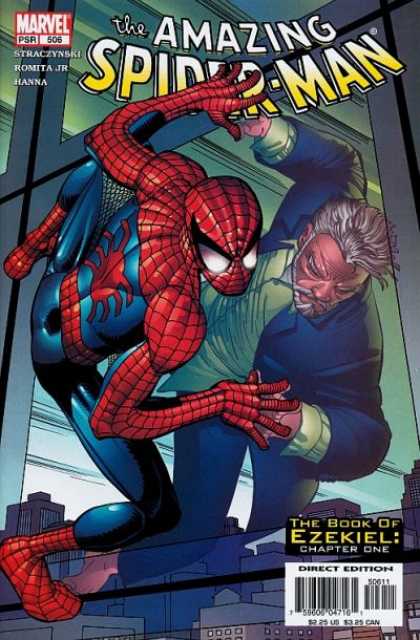
Short boots. Source [http://www.coverbrowser.com/image/amazing-spider-man/506-1.jpg]
UPDATE/NOTE/EDIT: You’ll see later on that I decide to change up late in the game and go with a taller boot measurement. This is a result of a shorter test boot not staying up very well. Just FYI.
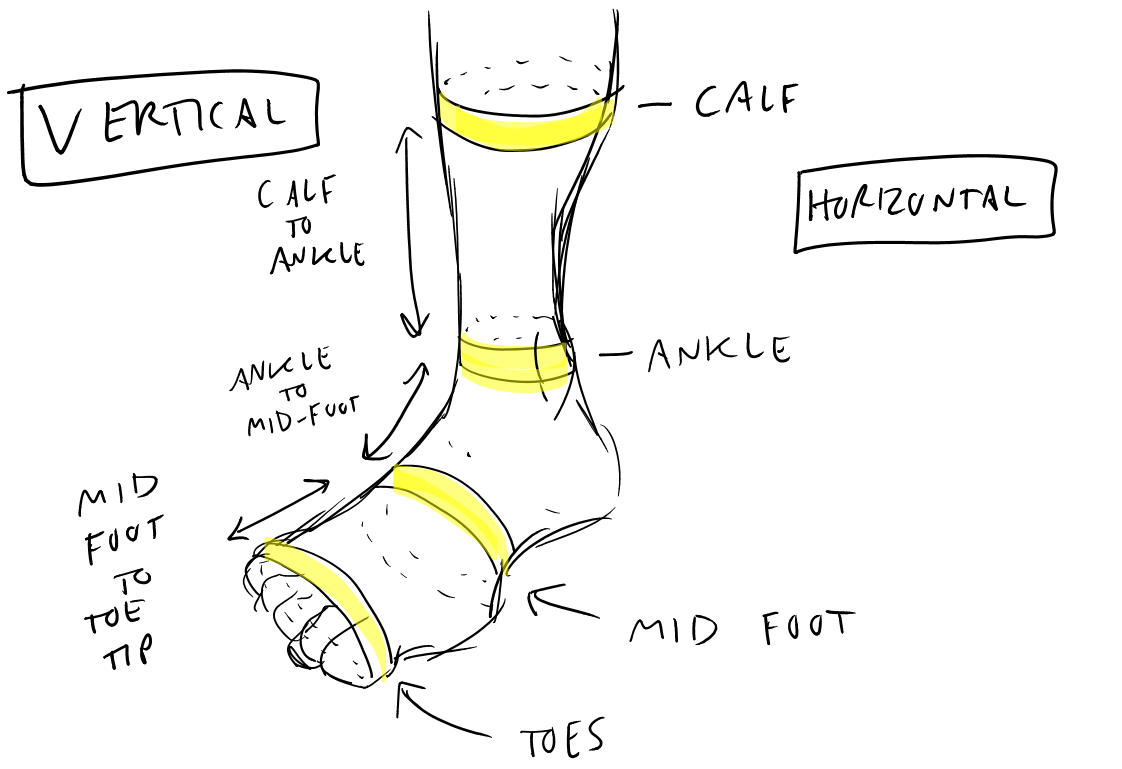
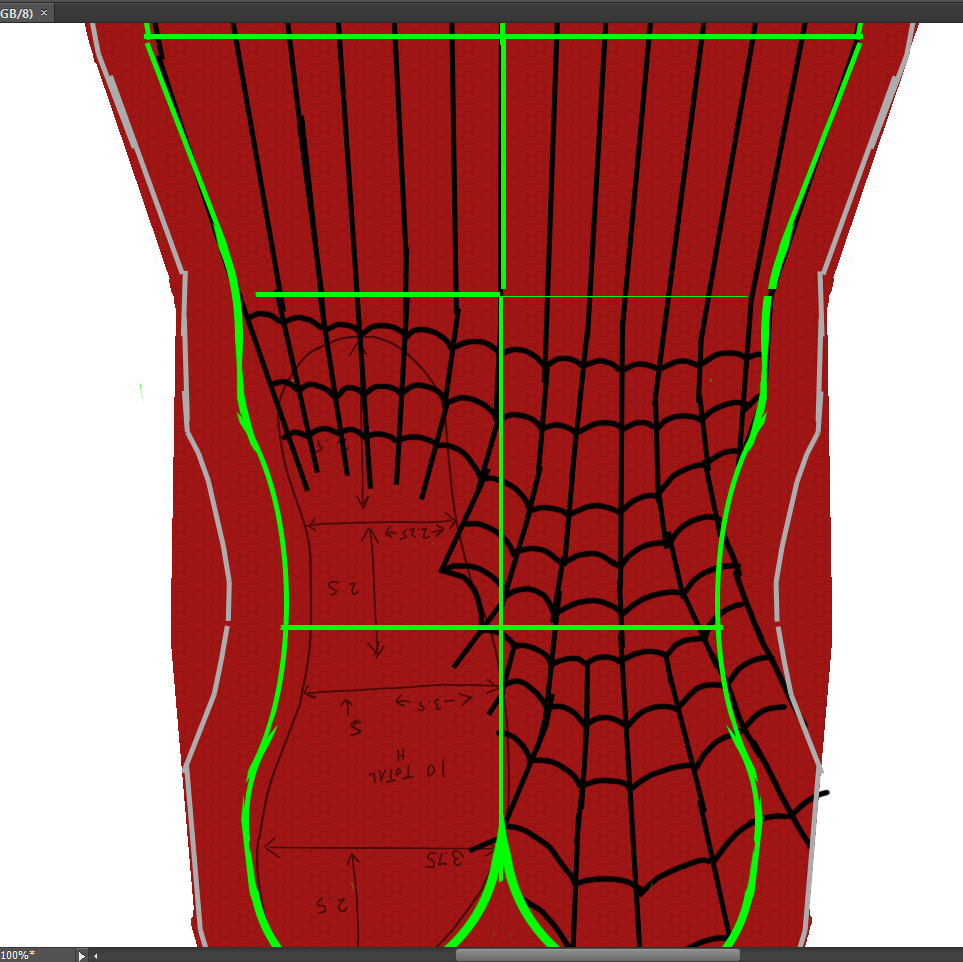
2) Take the following measurements. See the following illustration for clarity:
- Horizontal: Calf circumference
- Vertical: Distance from calf to ankle (right about the mid-point of the bony parts of your ankle)
- Horizontal: Ankle circumference (again, around the middle of those bony things)
- Vertical: Distance from ankle to mid-foot (roughly the highest point of the slight rise on top of your foot)
- Horizontal: Circumference around your mid-foot
- Vertical: Distance from mid-foot to the tip of your longest toe
- Horizontal: Circumference around your toes. As a group, not individually. 🙂
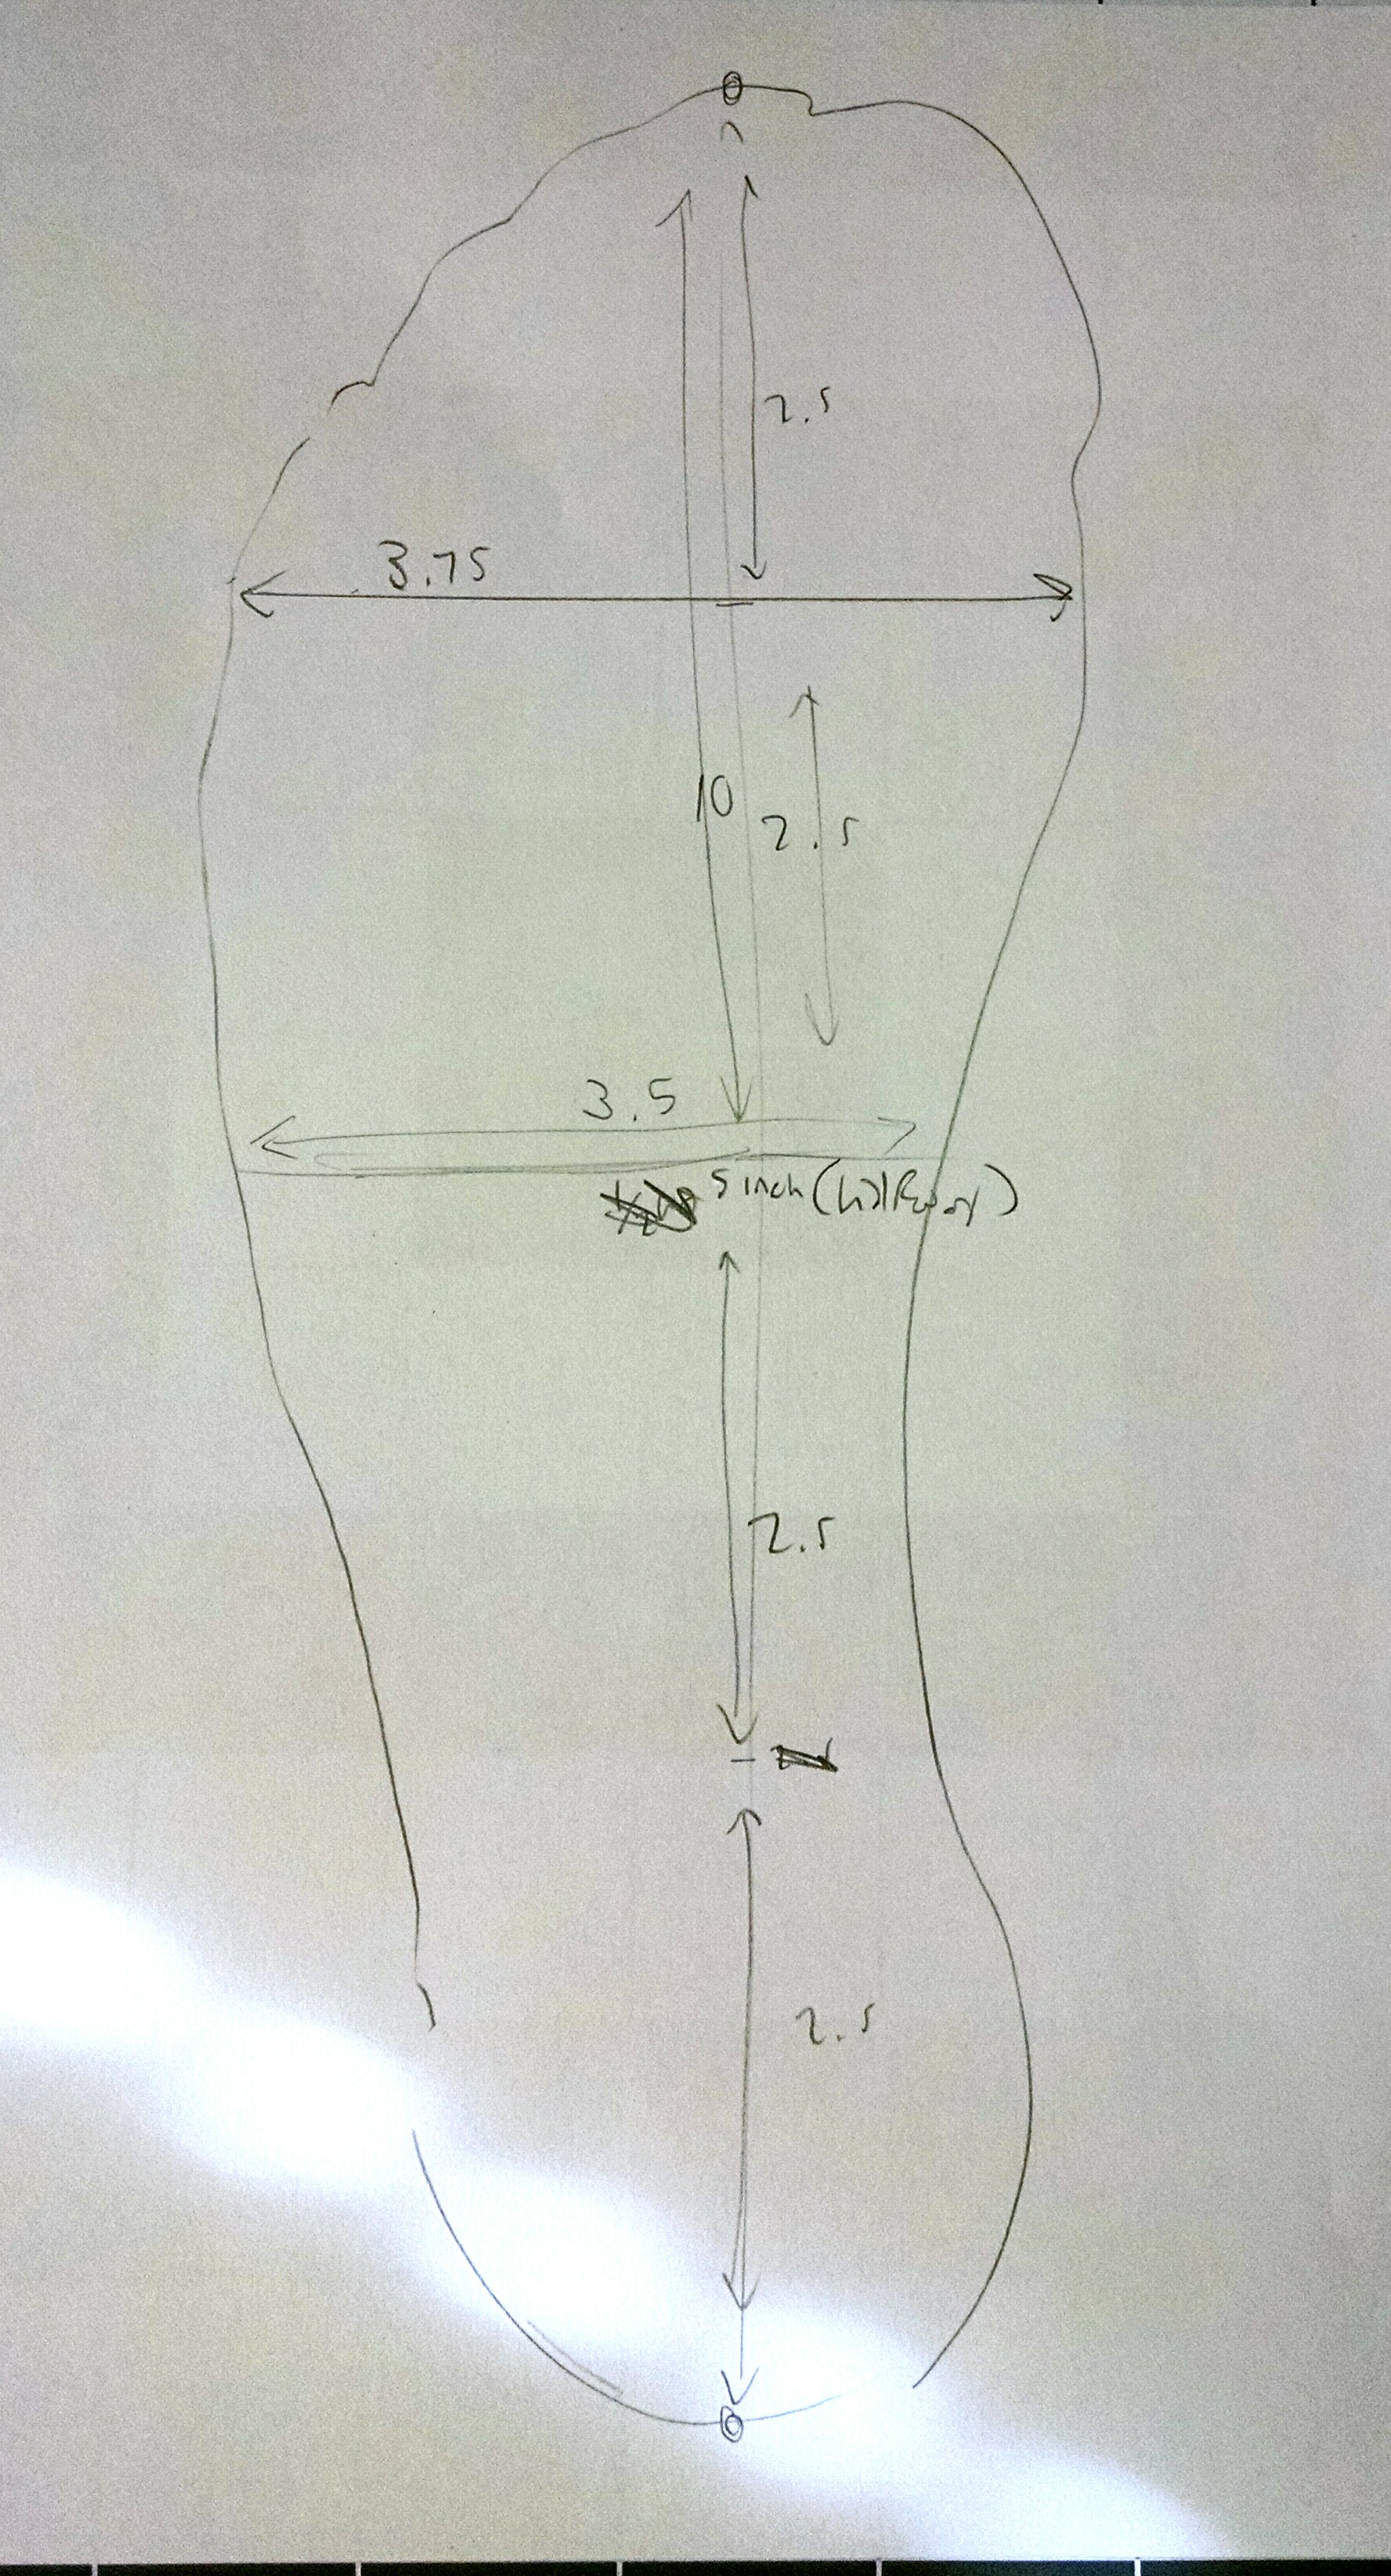
3) Now, do your 90-95% calculation on the horizontal measurements. You are, of course, recording all of this on a spreadsheet that you can set up to do the calculations for you (I didn’t, but you’re smarter than I am.)
Add up the vertical measurements to get a good idea of the total length and record that as well.
This Boot Pattern’s Got No Sole
This next step will involve taking off some clothes. But just your shoes and socks. On one foot, at least.
1) Get a piece of white paper and a pencil, set the paper on a smooth, firm surface, and trace one of your bare feet. Doesn’t matter which one. I traced my left because I am right-handed. Maybe you’re ambidextrous and have more of a choice. Doesn’t have to be especially exact or fancy.
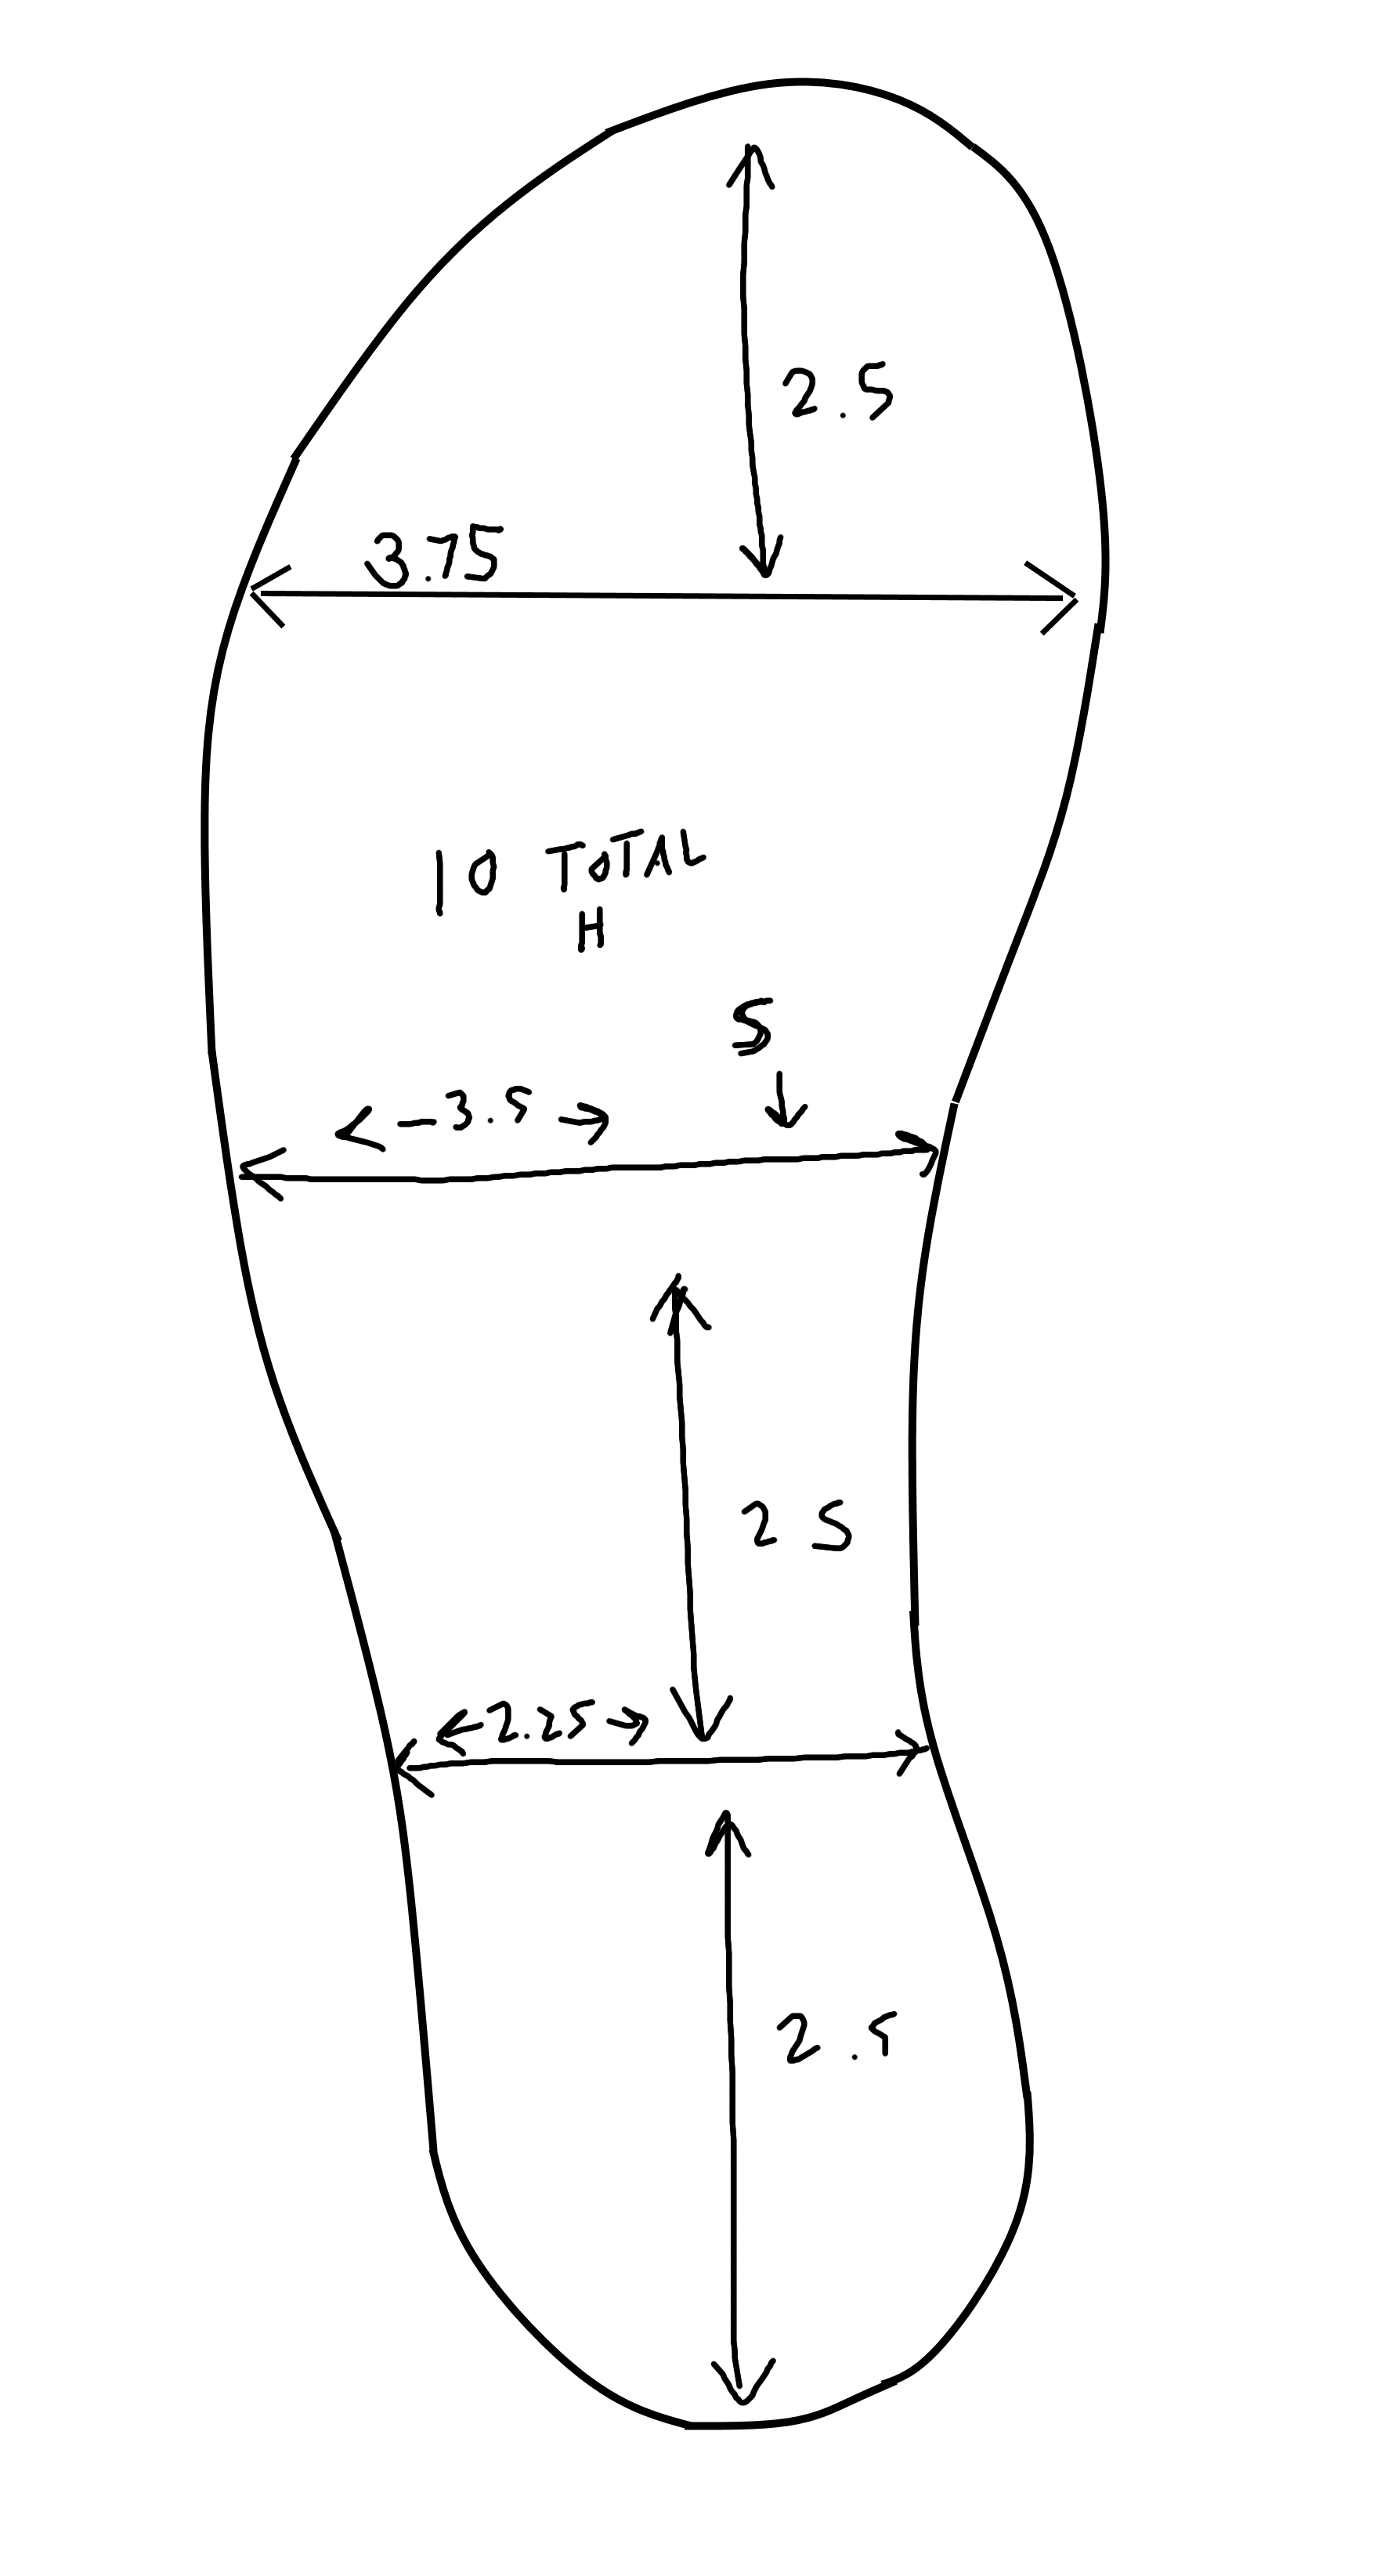
2) Get out the ruler and draw a straight line on the tracing from the toes to the heel, roughly in the middle, and mark how long it is. At the halfway point vertically, draw a horizontal line and mark how wide it is there. I also did other measurements, but that was really completely unnecessary. (I knowingly overdo things sometimes because I’m neurotic, but not in a particularly useful kind of way.)
Now you should have something like this:
Now you have no excuse for not ordering me some custom-fitted shoes for Christmas.
4) Take a smartphone pic or scan (I always say scanning is ideal, even though I usually take a smartphone pic). Put the pic into an image editor and do a trace layer to come up with a cleaner version (and let me reiterate that really the total height and midway width are the only truly useful measurements):
Digitizing the Pattern
1) Photoshop File: min. 72 dpi, 58″ wide, 36″ tall, tiff format. You might very well be adding this to one of your existing Spider-Costume Files.
2) You know the drill. Use the line tool to make a line matching the total vertical length. Then add the horizontal half-circumference lines down one side of that vertical line.
3) Get rid of any guidelines you used, and connect the horizontals:

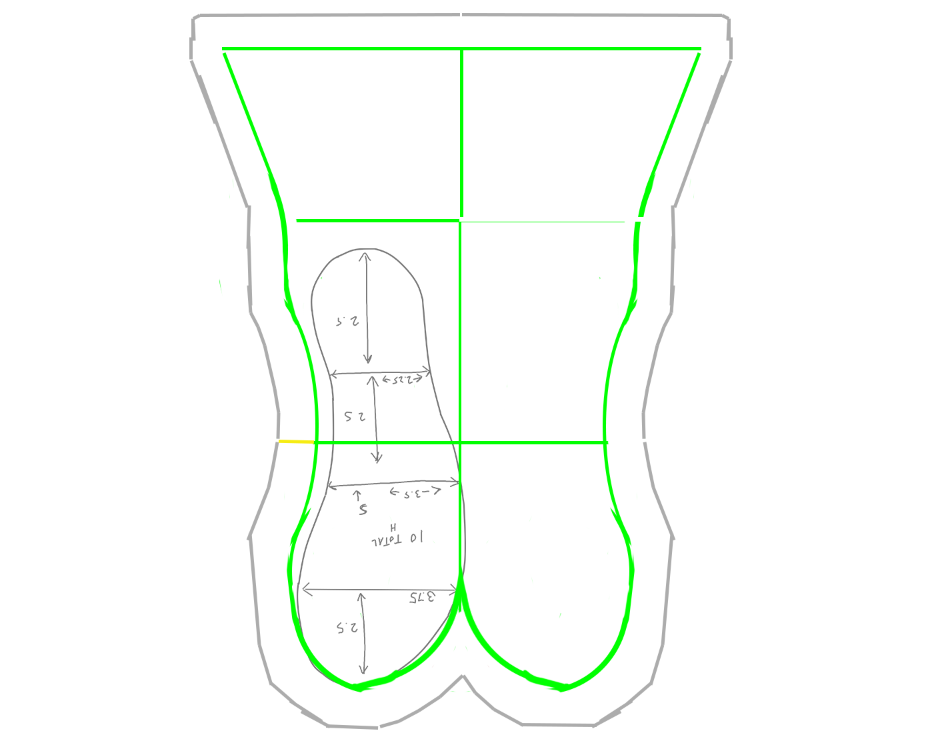
4) Now, there’s a half-foot in here somewhere, so let’s do some curves to find it:
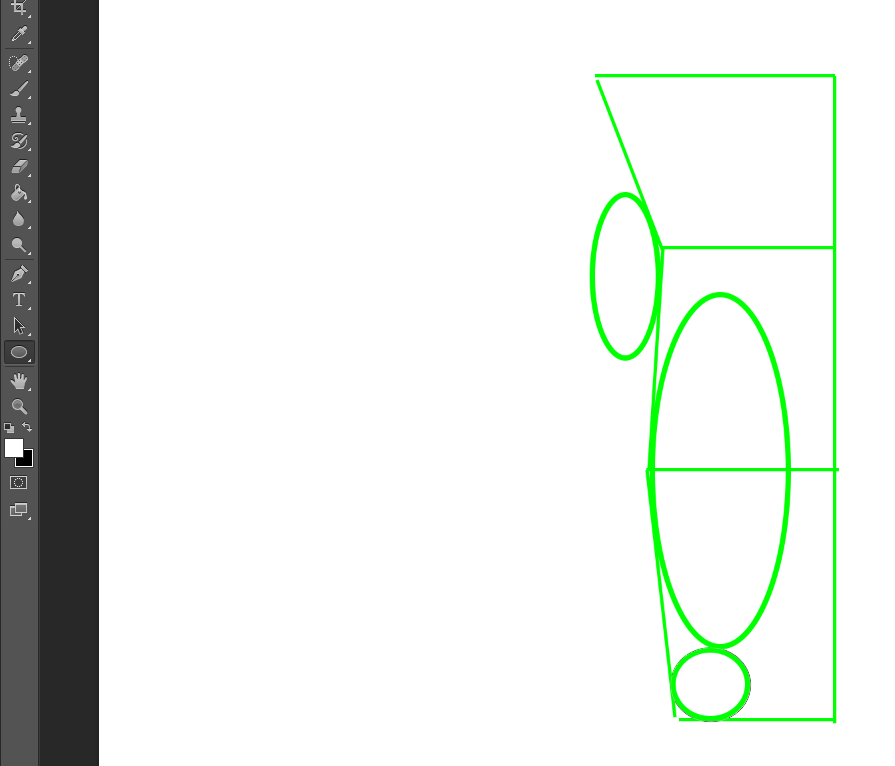
After getting the curves on there, clean up the lines to flow together and we end up with a good half-foot dimensions layer.
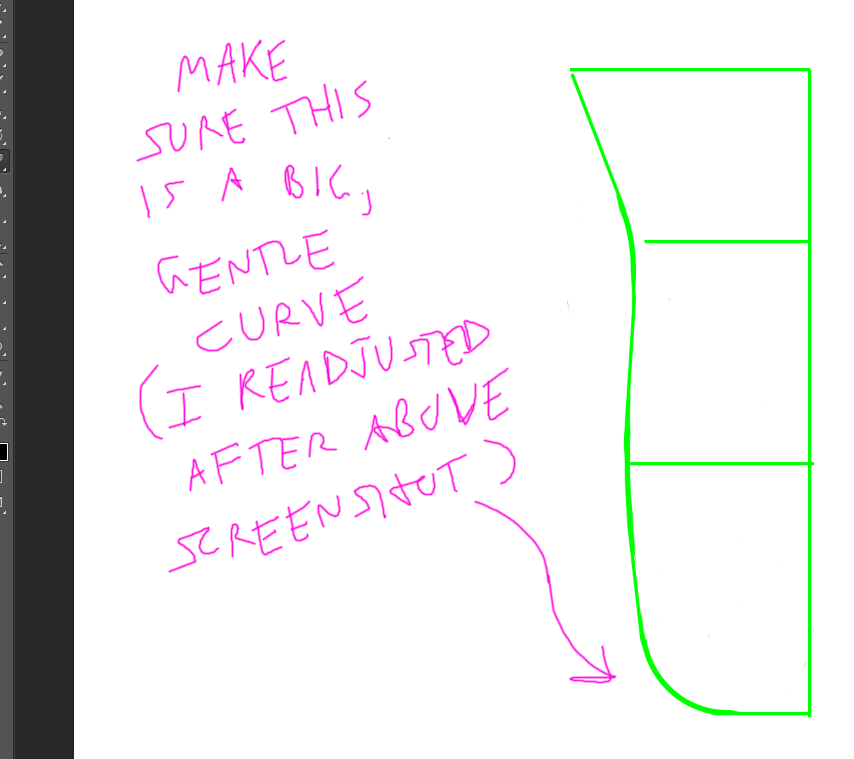
5) Now, we copy and paste, flip and move. Then use our 5/8″ ruler lines to add a Seam Allowance border: (You can wait on adding the Seam Allowance Border. I’m retroactively working in some further tweaking I did without re-doing all the screenshots.)
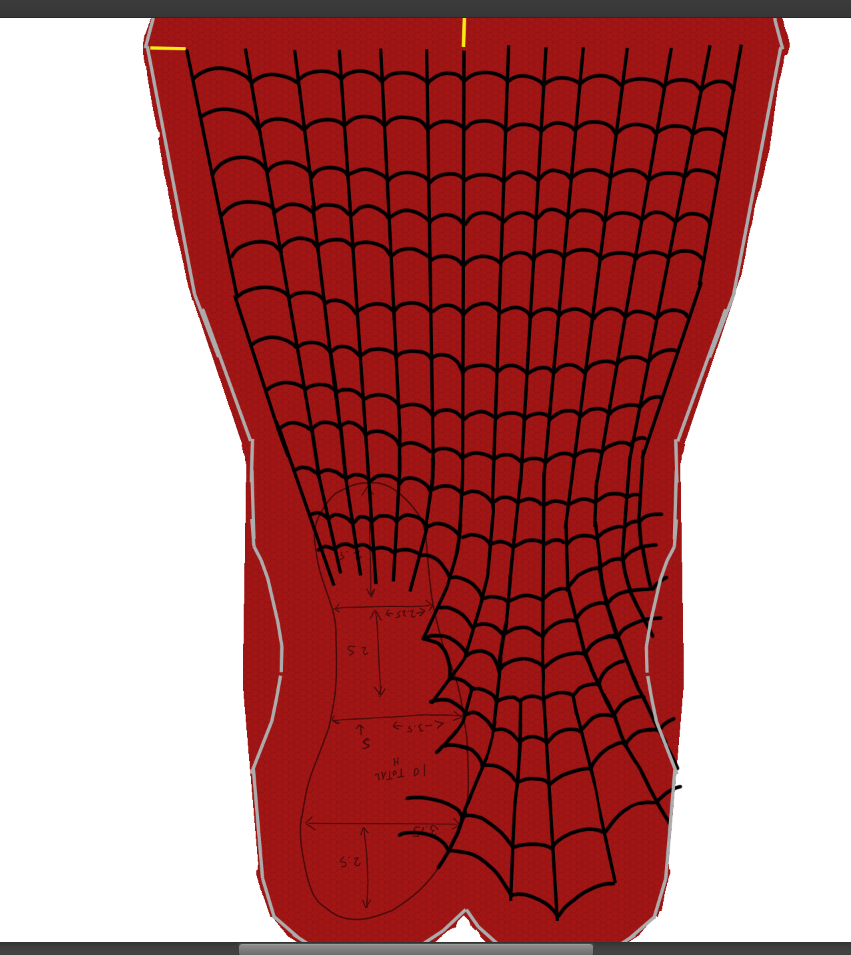
6) This would work, but let’s do some refining for a better fit, and to guide us in adding the design.
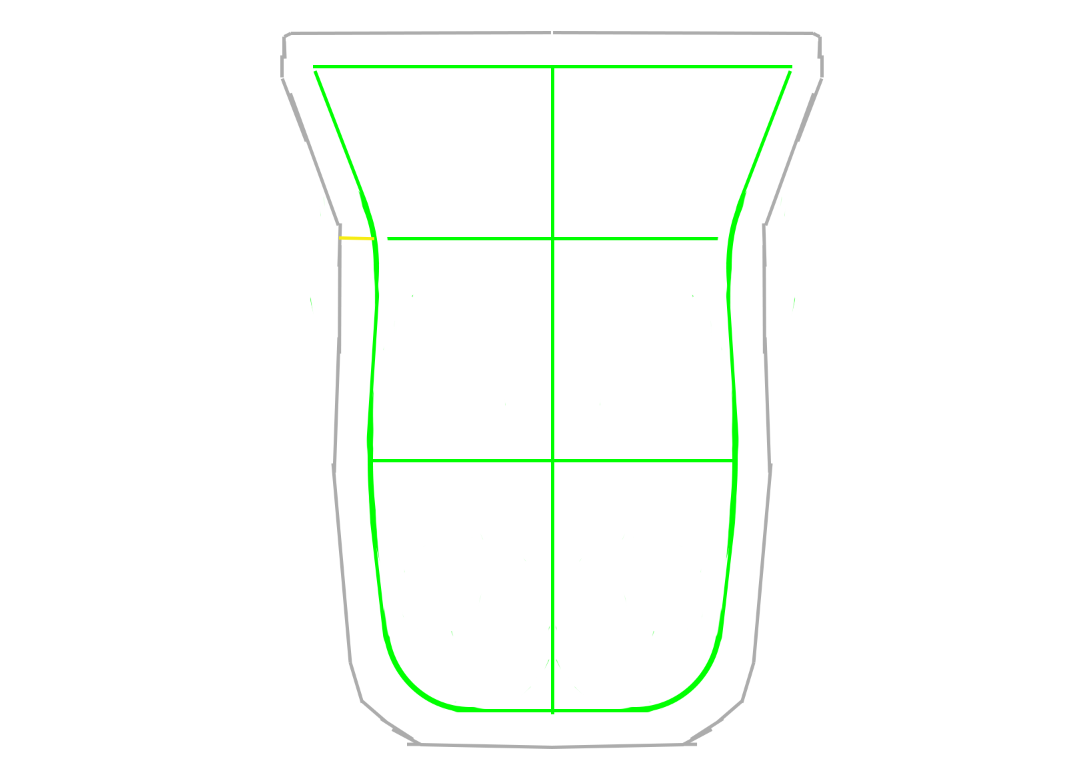
We’re going to “place” the clean foot-trace we made earlier into our Photoshop boot file. After you place it, reduce the size by 90-95% to match the overall measurements.
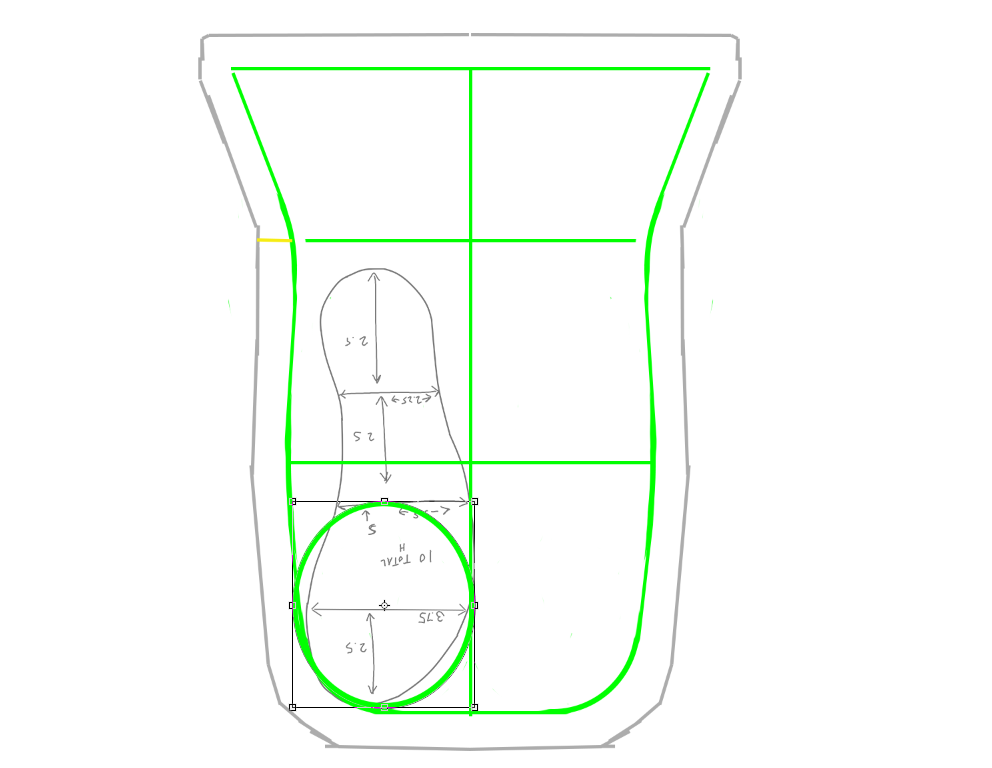
This is a good time to examine the anatomy of the foot pattern for the purposes of understanding what falls where when it’s all put together.
Below you can see I’ve added the foot trace to the boot pattern. I have decided that this is the boot for the right foot (until we add the foot trace and web pattern, there is no difference between right and left). This being the right foot, that means the left half of the pattern represents the back of the calf and bottom of the foot, and the right half represents the front of the calf and top of the foot.
So, the bottom left half of the pattern represents the sole of the boot. Let’s stick the foot-trace there, and orient it as in the image below. That looks backward at first glance, but note that it will flip when the fabric is sewn, as my messy arrows do their best to indicate.
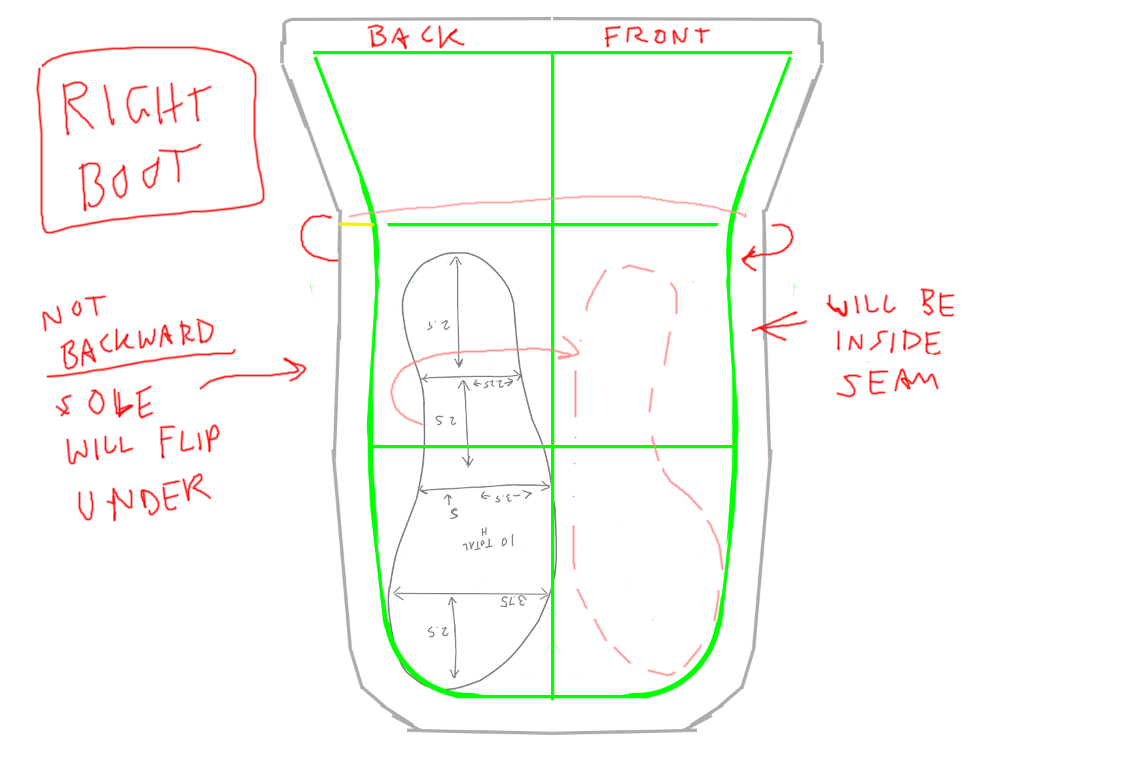
Let me be clear here: we are NOT going for exact sole shape and position here. The foot-trace is a very general orientation tool.
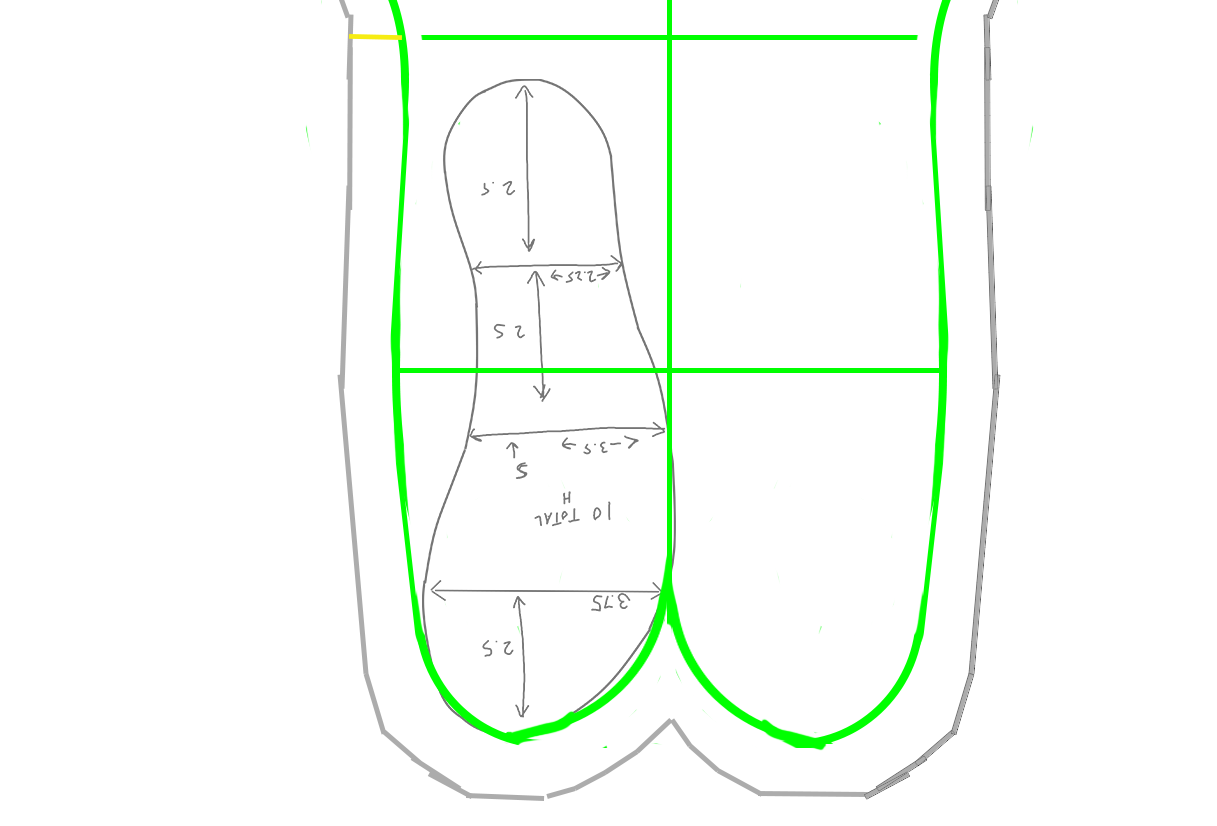
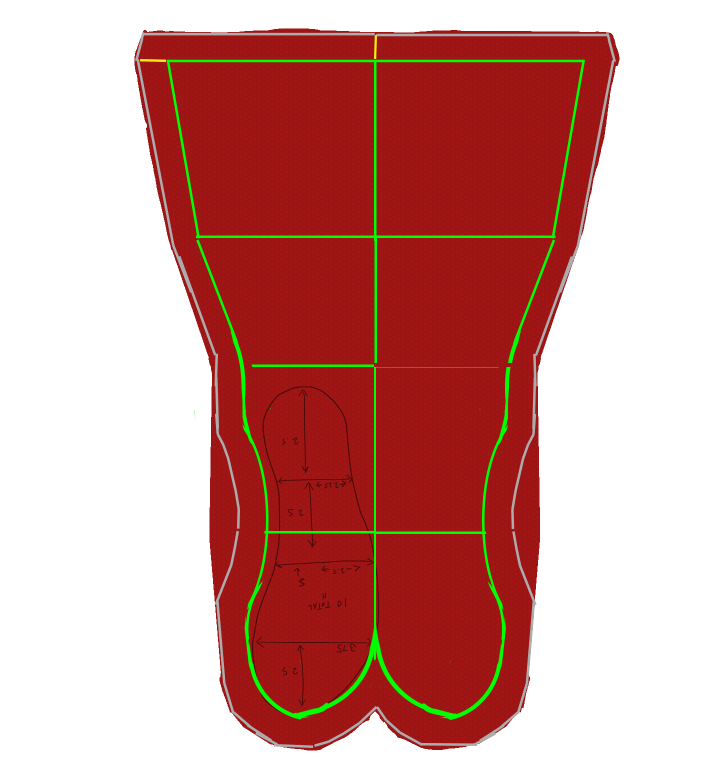
(A) Let’s adjust and add curves to “hug” the outside of the foot a bit better.
So, the outside curve turned out to match the foot close enough that it’s fine. But we lack inner curves, so let’s take care of that.
Use an ellipse to form the curve…
…then rasterize and clean up. Copy, mirror, paste, and move. Adjust the Seam Allowance border… (Again, you can wait on the Seam Allowance as there will be more adjustments coming in a sec.)
Now for the inner curve of the foot:
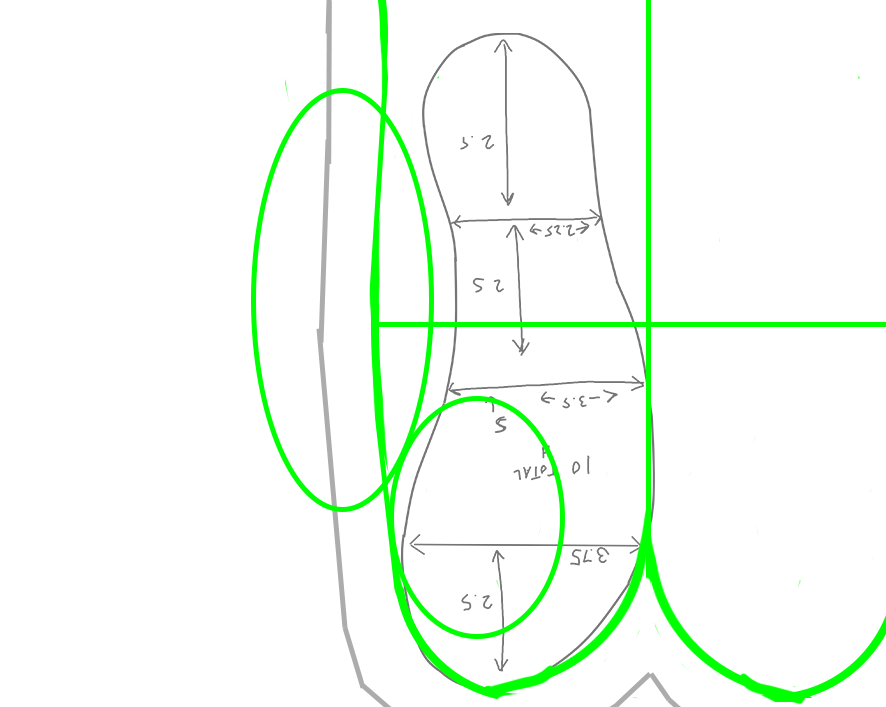
Note that we’re not putting those inner foot lines right up against the heel, but leaving a bit of room. In my test boot, it felt a smidge tight at the heel/ankle bend.
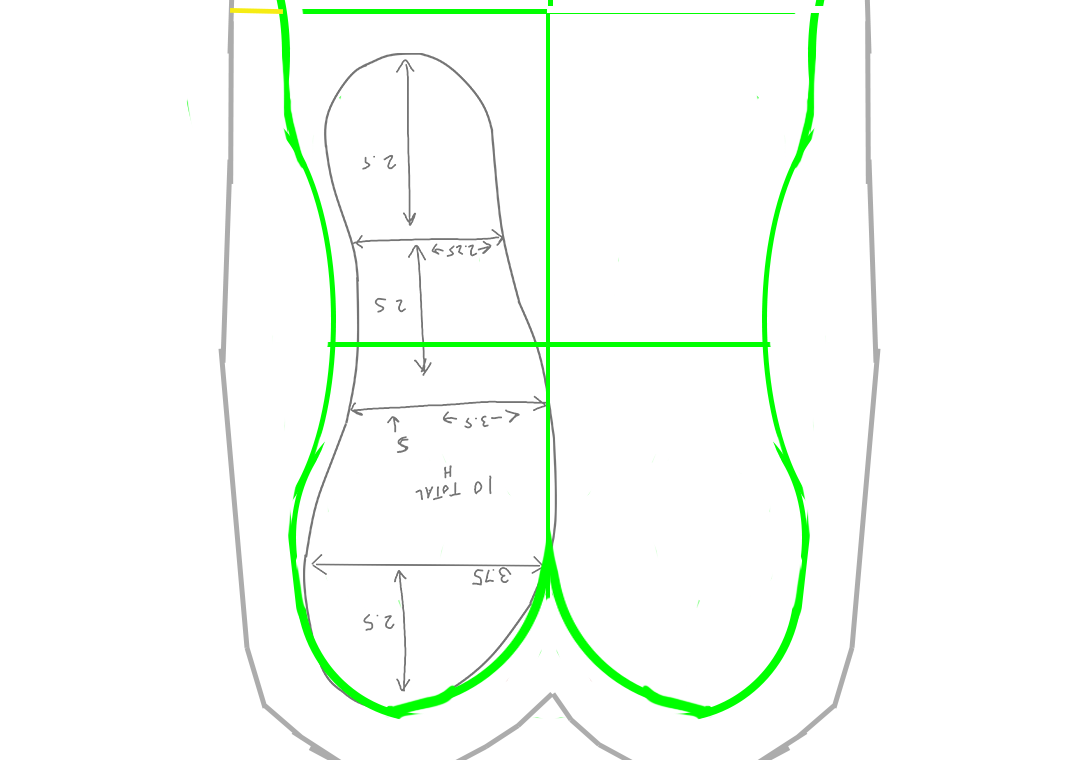
And now we can fix up those Seam Allowance Borders.
Adding the Color
Does this really need it’s own whole section anymore?
Add your color, and the pattern overlay if you’re using one.
UPDATE/EDIT: You might notice that I decided to add some length/height to the boot, due to issues with with my test boot not wanting to stay up.
Adding the Webbing Pattern
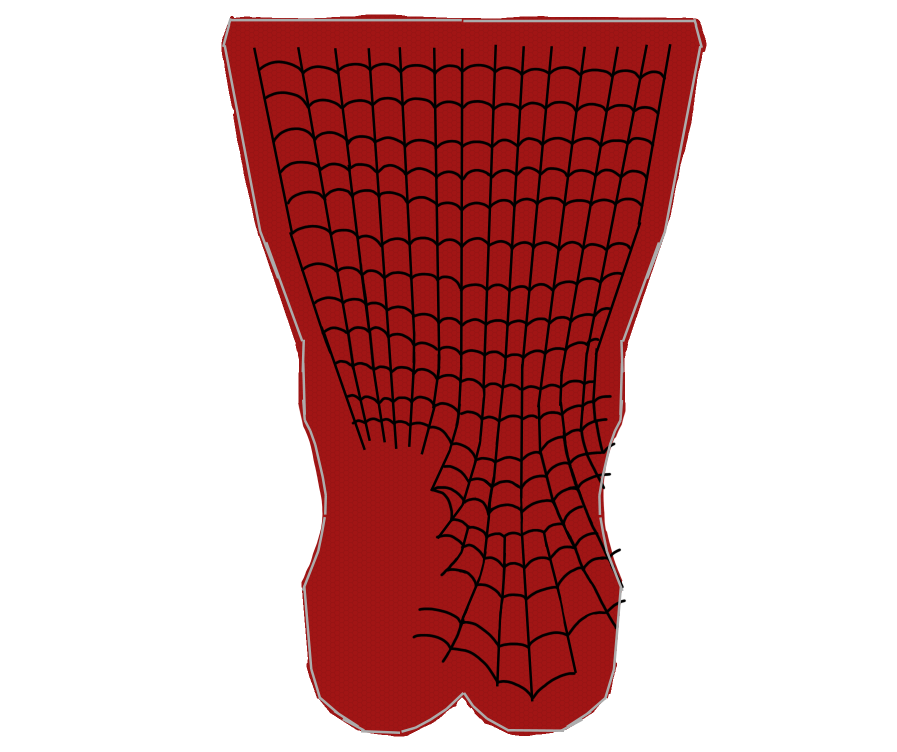
So, now that we’ve got the layout set up pretty well, and the color laid down, let’s get a general idea how the webbing pattern will fit in here.
This illustration of Spidey’s boot shows the basic layout of the web lines as well as how the seam of our boot will fall (roughly). I’ve also shown the boot without webs, but with seam, and the basic fabric shape folded for sewing. This should give us a rough idea of how to start working in the web pattern.
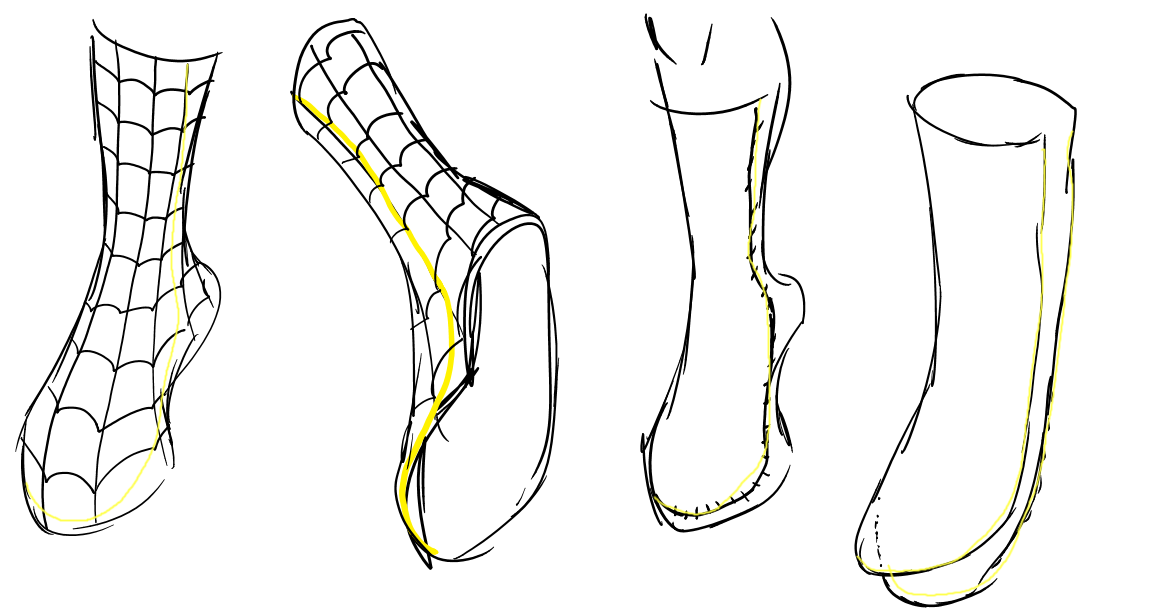
Take a look at the pics of my boot test sewing in the previous post to see how this sort of translates in “real life.”
We see that the webs come down pretty straight on the calf/ankle portion, continue straight down the heel in the back, but fan out across the top and sides of the foot.
Start playing with your straight web lines on the boot pattern, but don’t commit to anything right away. Lay down some lines, think about how it plays into the final shape, erase and re-draw, move and shift, trial and error.
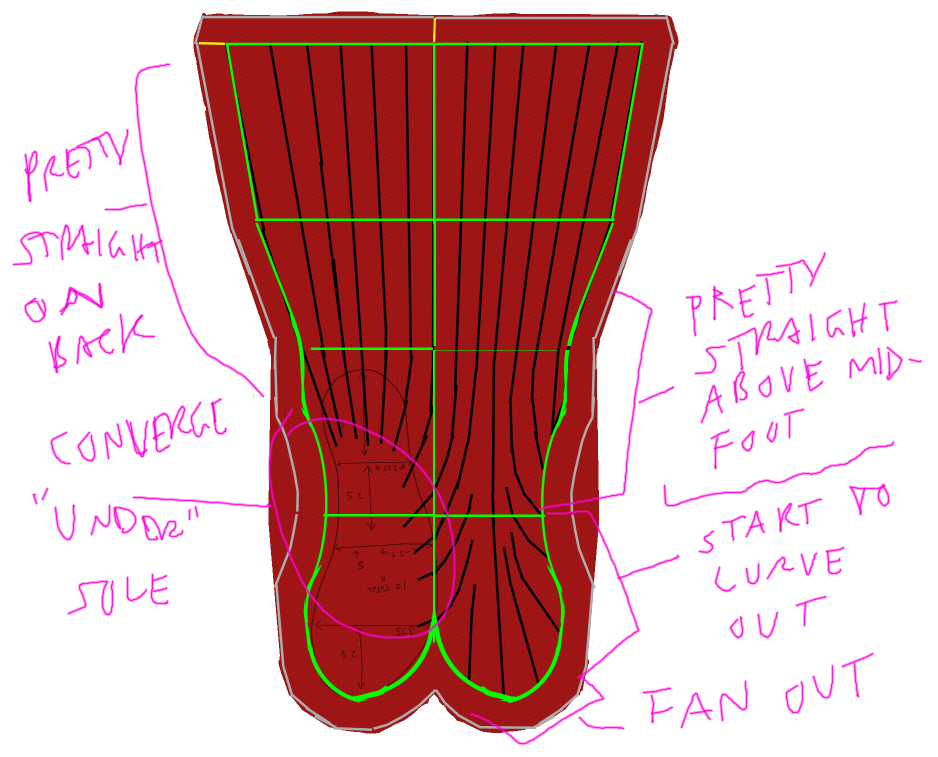
You’ll note that we’re drawing the web lines to converge at the bottom, at the middle of the sole. If you’re thinking that most of this won’t show in the end, you’re right. But since it’s hard to judge exactly where the sole will be when wearing the boots, the best strategy is to over-cover the territory so that we don’t guess wrong and end up with gaps. Plus, you’ll eventually be adding some kind of external sole to the boots, which will cover the bottoms of the sock-boots anyway.
Once you get the vertical lines how you like them, add the horizontal web lines layer and start playing around with those lines.
Keep messing around and cleaning up until you like them.
And then clean up a bit. Trim the color around the Seam Allowance (optional). Hide any layers that shouldn’t show (like thos bright yellow rulers and the sole trace).
Reiterations and Tips:
- The takeaway here is not the way I have done the webs, but to get an understanding of how it will all lay out. Yours will turn out different from mine, both in measurements and style.
- Play with the lines, see how it looks, think about how it will translate to the finished product. Don’t be afraid to erase part of it or all of it and start over if you don’t like it!
- Please do get some spandex from the local fabric store and do what I did: Make a version of this that you draw on with permanent marker to test the layout of the web lines. You could get a handful of “test” boots out of a yard of fabric. Once you get a feel for the web lines, you can digitize them and order the final printing.
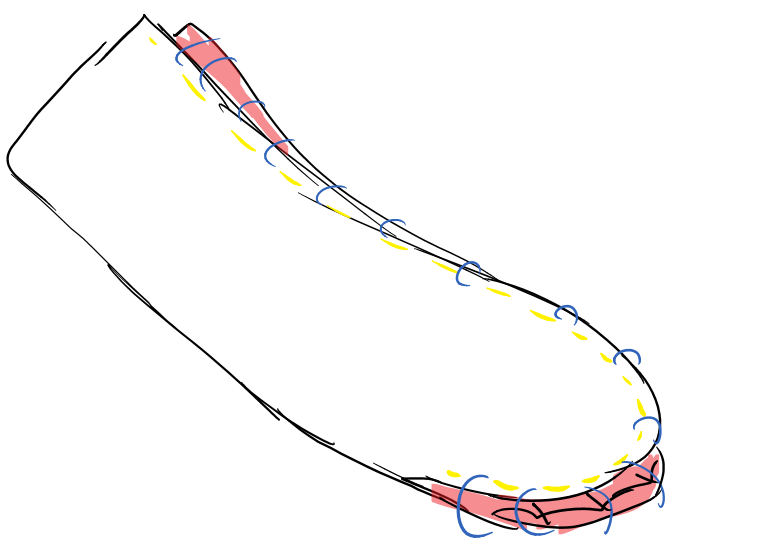
Sewing the boot
This is…well, pretty simple. If you’ve gotten the pattern right, and the design laid out on the pattern right, then you’ve done the hard part. Now you just have to sew one seam.
Fold the fabric along the center line with the backside (non-colored) side showing, matching up the toes and sides. Use chalk to mark the 5/8 inch seam allowance. Sew. Turn right side out. And there’s a sock-boot.
Unless I missed something, we have one piece of the actual costume left: the Mask.
That will be a bit tricky, in more ways than one, but we’ll get to that next time.
