I’ll start today by sharing a small experiment that might or might not come to anything.
The Experiment
At this stage in my Costume Quest, I am in the midst of two costumes. I thought that I had put my DIY Spidey costume pretty well on hold, but I keep thinking of ways to approach the issues involved in making it. Plus, it still serves a purpose as practice, in addition to its stated goal as an experiment in how practical it is or is not to make a DIY Spider-Man costume.
Yesterday, down to scraps of fabric that are too small to comprise any one piece of the costume, I decided to play around with what has turned out to be a real tricky aspect of the costume: the webbing patterns.
How to get the webs on a Spider-Man costume is a whole topic in itself, and a number of methods have been used, from what I can see in the cosplay photos. But ever since the Raimi Spider-Man films, a popular approach has been what’s often called “raised webbing.” I’ve stated before that I’m not a huge fan of the raised webbing look. But it also seems really complicated to do it. So, would this be a case of me working really hard to achieve a look I don’t love? We’ll come back to that in a second.
Now, ideally, if you wanted to use clues from the early comics (and I am doing the early look for the DIY costume), the pattern on the costume is silkscreened (Spidey himself says so). But that method has proven to be an…interesting process to try with my at-home, DIY facilities. So I have been considering other options.
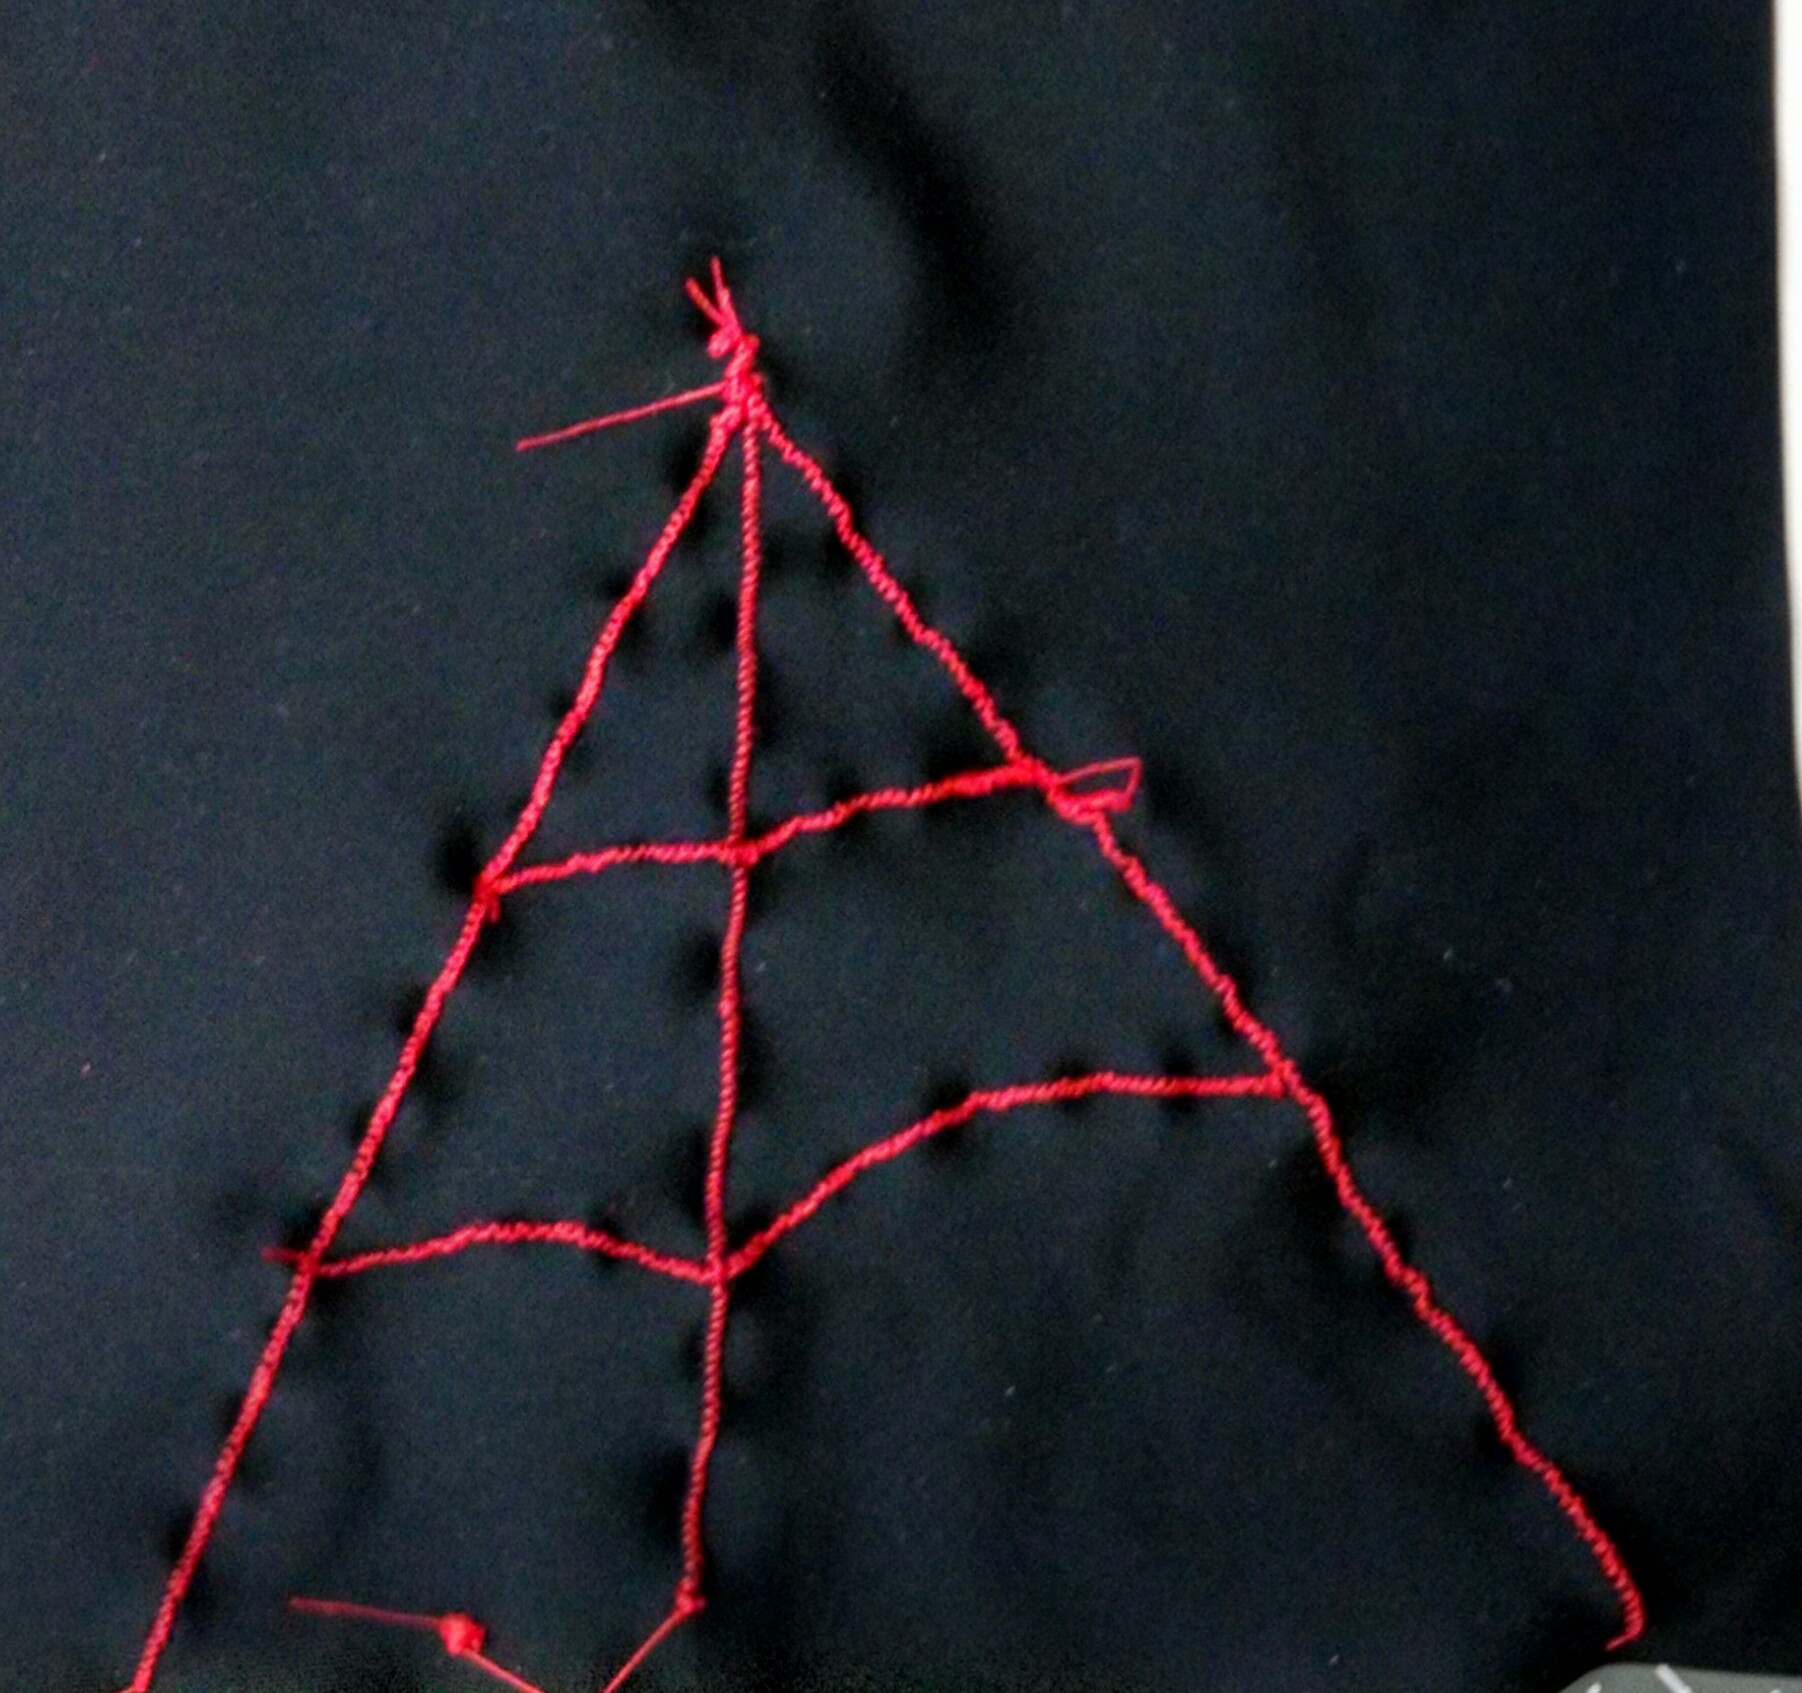
Now, let me preface this image with the admission that this approach would be (A) time-consuming (B) prone to “one screw up ruins the whole thing” issues and (C) rife with issues regarding stretch and durability, but it was a fun experiment:

I did red on black mainly because I didn’t want to switch out the bobbin and the spool in the machine. But the idea comes across. It’s a mite messy, but considering that this was a quick, off the cuff experiment and this borrowed machine is somewhat limiting in just what stitches it will put into spandex (a tighter stitch than this tangled immediately), it was better than I thought.
Is it practical? I mean, assuming I could use some kind of embroidery-style stitch that was nonetheless able to withstand %10 stretch, and assuming I could successfully and neatly stitch all the lines into the material for the masks, gloves, boots, and shirt before sewing that material together… Ermm…probably not practical.
But it did get me thinking more about the advantages of–well, not raised webbing, but the webbing as a separate material affixed rather than being printed on. I’m sure this is a standard method of cosplayers out there, and I will do some digging. But for the sake of brevity–and because I haven’t looked into and have nothing to say about it at this point–I’ll save that topic for a separate post.
Back to Basics Brief Topic (Part 3 if you’re counting): Basting:
If you’re a sewist, you’ve likely thought of and/or encountered more than your share of the jokes regarding the sewing term “basting.” If you’re not a sewist–or are just getting started–you may not have encountered said jokes.
If you are not a sewist, and in addition are terribly unfamiliar with cooking terms, you might be wondering what sort of jokes these might be.
Regardless, let’s clear it up for anyone who doesn’t know: In sewing, basting (which I just learned from Wikipedia can also be called “tacking”) basically refers to a method of temporarily holding pieces of fabric together, useful if you aren’t sure how the pieces are supposed to fit together, or if you want to be able to test and adjust fit before placing the final stitches.
Basting can be done using pins to pin the fabric together (this type of basting is pretty much a necessity), or by using easily removable–i.e. straight–stitches applied by hand or machine.
I’ve made references to the fact that my current borrowed machine, as much as it has served me very well these past weeks, is not worth much for stitch-basting when it comes to spandex. There is a narrow range of stitches it will put into the material. Too tight a zigzag will clog up the works immediately. But too loose/straight a stitch, and it will just refuse to even put in a single stitch.
I might have been able to resolve the basting issue by using a walking or rolling presser foot, but I didn’t really want to purchase attachments for a borrowed machine that might or might not fit the new machine I would eventually purchase.
And it might not even work. This is a perfectly serviceable but quite simple machine, great for standard sewing projects, but probably not ideally suited for the specialty world of stretch fabrics. (I gather than a serger would be the way to go for exclusively sewing stretch fabrics, but my GF and I want to be able to sew more than just superhero costumes. Well, I’d be fine with just costumes, but she has grander notions. :] )
Anyway, stitch-basting is a practice that I want to incorporate once I have a capable setup. There have been many times even in my brief sewing “career” when I believe I could have recovered from a major screw up by having basted ahead of the final stitching. And when it comes time to sew the professionally screen printed fabric–well, as I have said, I cannot afford to screw that up.
With that in mind, I will be ordering a compatible crawling presser foot to my order for the sewing machine (I will also order a Singer brand invisible zipper foot. The machine comes with 10 presser feet, and somehow those two types are not among them!) I will also be adding stitch-basting to my list of practice tasks to perform with the new machine ahead of starting in on the professionally printed fabric.
I am learning–albeit slowly–that the devil is, indeed, in the details in the world of sewing. So here’s hoping the right equipment and good basic habits can go a long way toward an exorcism of the issues I have encountered in my beginning weeks as a sewist.
Up Next: Payday!


.png)
