The Crotchening Part 2: Redemption

There’s always a lot of debate about sequels, and whether they are ever better than the originals. I think that–as with so many things–you have to judge such things on an individual basis. Sometimes the sequel is as good in a different way, but other times it’s an obvious cash-grabbing abomination. And sometimes it’s better. Spider-Man 2 (Raimi series), the Dark Knight, Captain America: Winter Soldier…and the Crotchening Part 2.

If you haven’t seen the original Crotchening, check it out. Or don’t. It’s not that exciting. Basically, it was my first attempt at spandex leggings, and I ended up with major bunching issues at the crotch seams. It’s a kind of tragic tale because in this original Crotchening story, the crotch in question could not be saved. But in this new story of the Crotchening, there is a much happier ending. There is triumph.

Now, I should have taken a “before” pic, but I was too concerned with the problem at hand, i.e the fact that there was a small but unable-to-unsee crease front and center on the seam of the crotch, coming up about a half inch from the seam. I tried and tried to rationalize it away, to say it’s “not that bad.” Even my girlfriend tried to convince me that it was not a big deal.

But, no, it was a big deal. It was unacceptable.

So last night, I tweaked, picked at the seams, tried minor hacks and fixes, but these were either minimally helpful or just made it worse.  Finally, this morning, I decided that it was a do or die situation, and got out the scissors. Maybe if I cut out just the least amount of fabric possible so that I could re-sew that section of the seam… If it didn’t work, then this costume build was over halfway through.

Unbelievably, it did work. The crotch has been saved.

wpid-img_20140901_062924.jpg

Oh, and I got other stuff done before that too:

The Mask/shoulders:

wpid-img_20140831_110550.jpg

wpid-wp-1409497655647.jpeg

wpid-wp-1409497660183.jpeg

The Feet/legs:

wpid-img_20140831_123210.jpg

There are still some pretty big steps to complete, but at least with the salvation of the crotch, I feel like it’s worth continuing to those next steps. I know it sounds a bit melodramatic, but when you’re wearing a skin-tight spandex bodysuit, you really don’t want to draw any more attention to the crotch than necessary.

As for today: I will be happy if I can successfully sew the gloves together. They gave me fits last time and never did turn out exactly right. I’m hoping the guide numbers/letters I had printed on the fabric this time will make it more clear.

One step at a time.


Traditional Spidey Costume Progress

wpid-img_20140830_111218.jpg

wpid-img_20140831_061433.jpg

wpid-wp-1409480533310.jpeg

So, even though I don’t feel like I got much done in overall terms, I got the hood zipper installed, which is a major load off my mind. Invisible zipper + Spandex + web pattern + curvy seam = major stress + much seam ripping and re-sewing!

Today, I hope to close off the seams above and below the hood zipper, and then sew this rear torso portion to the mask/front torso/legs main portion, which will have the mask, shoulders, and back done.

Until next time, true believers…


Let Me Explain. No, there is too much. Let me sum up…

Update 1: Traditional Costume Fabric

So, finally, my new costume fabric with the “traditional” Spidey design is on the way, and should–fingers crossed–make it here in time for my 3 day weekend, i.e. when I actually have time to do something with it. Yay!

Screenshot (44)

Update 2: Web-shooter Props

I was brainstorming “found” items to build web-shooter props, but I think I might actually make them mostly out of Worbla or another thermoplastic material. That way, I could get the size and appearance just right, including painting them with metal and leather finishes.

Update 3: Spider-Shoes

Did a little looking into shoes that I can cannibalize for the structure/soles of the Spider-Boots. I am starting out by looking for aqua shoes/aqua socks, because I like the sturdy rubber tread they have. Here is my best candidate so far: cheap, and they appear to have a toe and tread structure that could be separated (with the remainder to be discarded). The idea is to put the tread portion on the outside/bottom of the costume socks, and the toe structure under the costume socks, over my toes, to get the right shape.

Update 4: Eye Frames

While I am reasonably happy with my Worbla frames, I may look into an alternate bead-based thermoplastic that is more suitable for a mold that I could make out of clay. But I will have to be sure that the result would be a big enough improvement to be worth the effort.

wpid-img_20140824_192936.jpg

Update 5: The Multi-Piece Ditko Style Design

I have been hard at work modifying the Photoshop template for the Ditko design so that I have a mask/shirt/gloves/pants/boots type of costume. I ran into some pretty uncertain territory modifying the existing torso/arms portion of the template, so I have switched to building my own shirt portion based on the design I have actually sewn before, and will adjust the colors/web pattern to fit. I feel much more confident about the shirt portion now.

That’s about it for now. I’m looking forward to getting the traditional costume started.

And for those with a three day weekend… Friday isn’t too far away!

And even if you don’t get to enjoy an extended weekend, or a weekend at all, try to give yourself some time to relax and enjoy. I recommend making a super hero costume.

Painted Frames, versions 1 and 2


wpid-img_20140824_130147.jpg

wpid-img_20140824_140755.jpg

So, that’s version 1 of my Worbla Spidey-eye frames. I went with a blue base coat (2x), and then black on top of that. And let me say, I knew the edges were a bit rough, but I didn’t think it was too bad. Until I painted the frames. Now the rough edges just really seem to stand out. The pinched edges not only added to the non-smoothness of the surface, but also made the edges where it was pinched less smooth, which was kind of the opposite of what I hoped it would do.

Frames :Take 2:

So I decided to do another set of frames, this time without pinched edges. I also decided to form them onto a smoother curve for the overall shape, which I accomplished by taping a piece of paper across the front of Bob’s face:


Bob gets humiliated more and more every day...

Bob gets humiliated more and more every day…

This way, I had the right radius, but a smooth curve.

So, I cut, heated, and cooled new frames–minus the pinched edges–and did the double blue base coat with black on top:

wpid-img_20140824_192936.jpg

Much smoother. There are some minor spots along the edges that aren’t as even and smooth as I would like, but I don’t think they’ll stand out enough to matter once everything is put together.

I might like to try another pair, and be more careful about smoothing the edges while the stuff is warm. I think the issue of smooth edges is a good reason to use a heat knife! But I am not convinced I need to go there yet.

On the next attempt, I might also try spray painting instead of brush painting. It might help get a smoother surface. You can’t tell in this last pic, but the surface is kind of–I don’t know, almost leather-ish looking. That might actually look okay once it’s all put together though. We’ll see.

Regardless, if I come up with a good magnetic attachment system, I won’t have to worry about the frames being permanently attached, and I will be able to upgrade later if needed.

Next, I will look into a good way to securely affix the mirror film to the frames, and then we’ll work on the magnetic attachment system.

Spidey-Style Tortilla

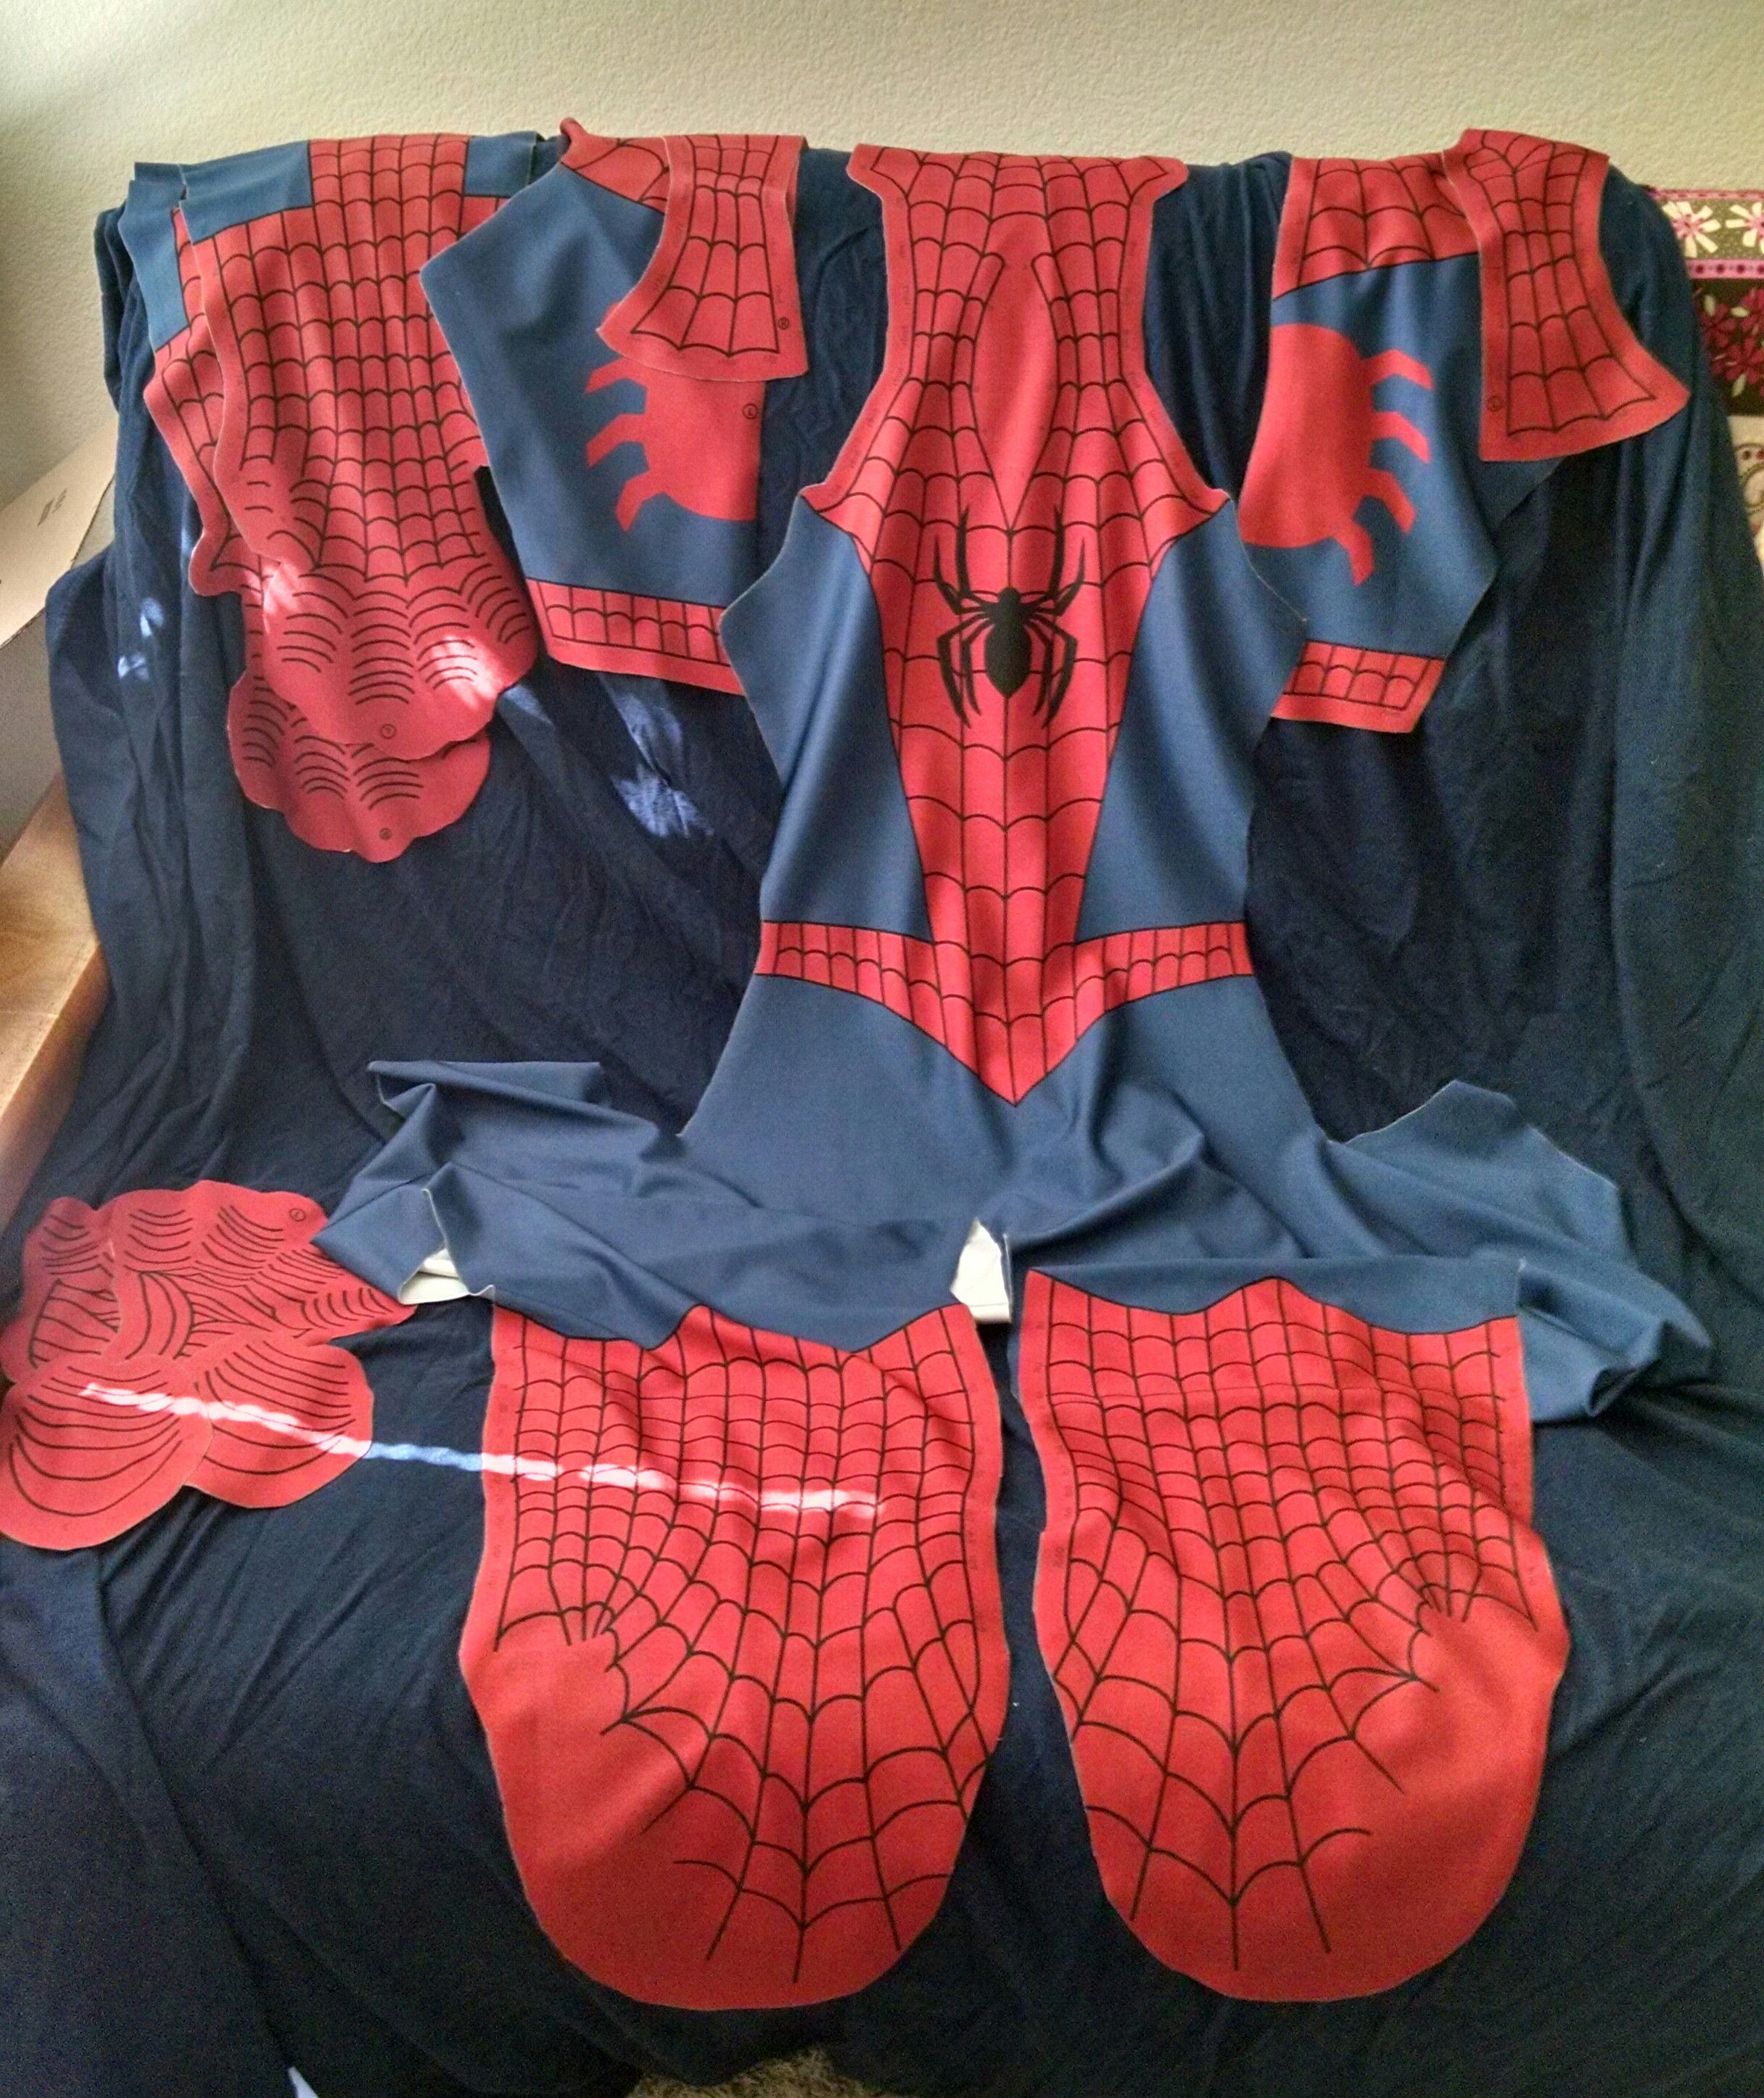
Spidey-style Tortilla. That’s what the results of my first Worbla outing resemble. But not in a bad way. That’s just what the unpainted Worbla material looks like.

wpid-wp-1408840591904.jpeg

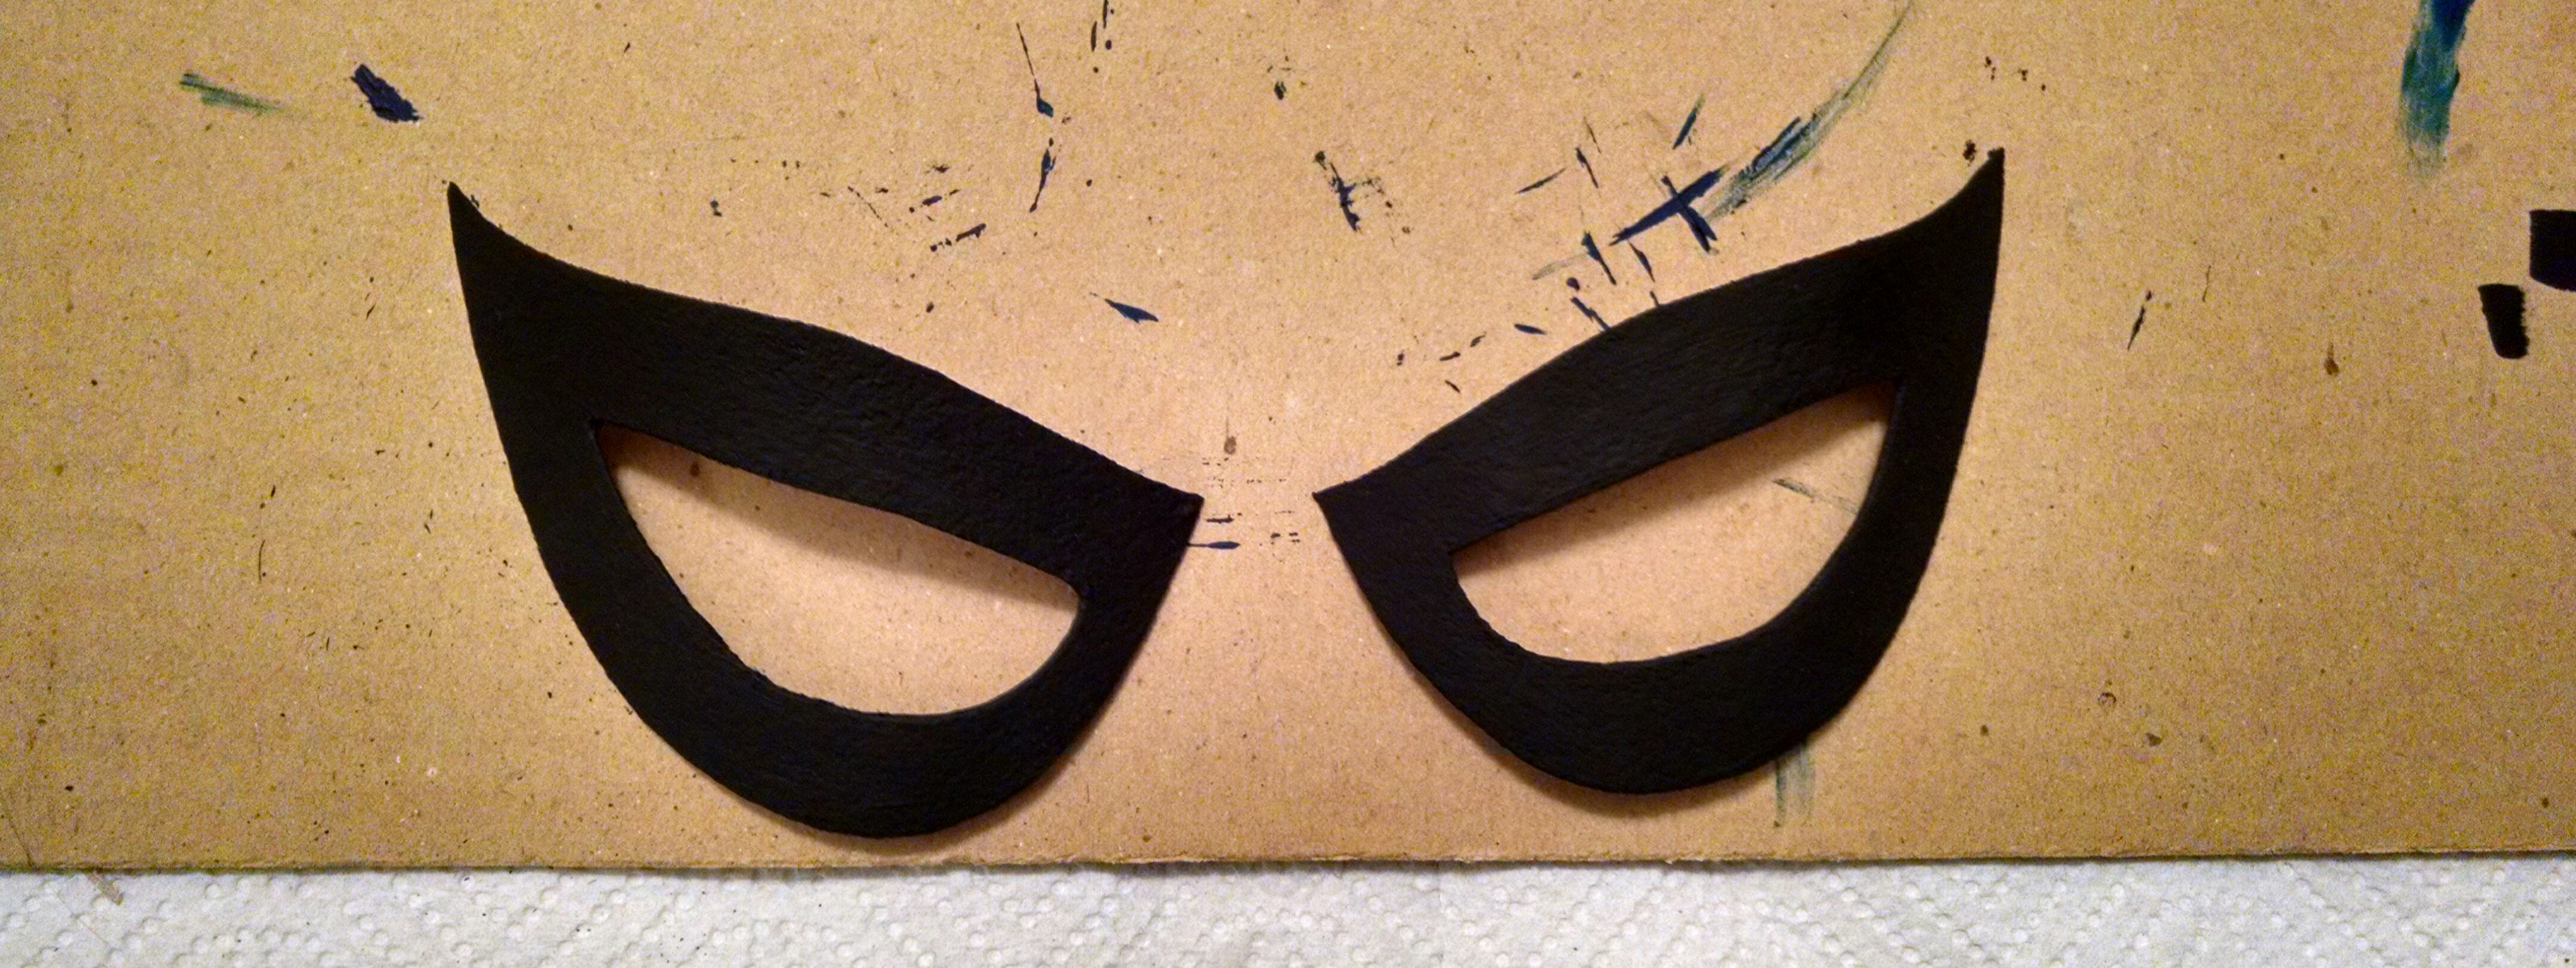
Above, on the left, are the foam sheet versions of the eye frames, which I traced from construction paper with chalk onto the foam sheet and cut out with scissors and an X-acto knife.

To the right is the roll of Worbla thermoplastic. While looking at a shaped, curving piece of it might remind one of taco shells or tortilla chips, touching it will put you in mind of those “rawhide” dog treat things. When cool, it is stiff (yet somehow rubbery), with a rough surface. It has a shiny side that is slightly tacky. When it is heated, the shiny sides will stick to each other, which can be useful.

Step 1: I eyeballed how much Worbla I would need, made marks on the roll and cut it out with scissors. It’s tough stuff, but even the crappy scissors I use when I don’t want to ruin good scissors didn’t have too much problem. The trickiest part was that it was rolled, thus curved, which made it hard to cut, and then, of course, it wasn’t flat for tracing. But that’s where the cool part comes in.

wpid-wp-1408840566230.jpeg

Step 2: The whole point here is that Worbla becomes pliable when heated, and that came in handy even for this basic first step. I took the fairly standard hair dryer above, set it to the highest heat and highest fan setting, and then moved it over the curvy Worbla pieces. In a surprisingly short time, they began to soften, and I could sort of push down the edges to coax them into flattening out.

NOTE: In my experience, the Worbla did not get so hot that I ever felt like I was in danger of getting burned, but definitely proceed with caution in case your particular hair dryer or heat gun or heat sensitivity surprises you with a different experience!

ALSO NOTE: I am using a crudely homemade “heat-resistant” surface clumsily crafted from aluminum foil wrapped around cardboard. See this tutorial for a better way to do this, especially if you find yourself working with a heat gun.

wpid-wp-1408840574370.jpeg

Pretty quickly, I had two flat pieces of Worbla.

Step 3: I laid out the foam frames for tracing:

wpid-wp-1408840544959.jpeg

NOTE: The tutorial I referred to (see said tutorial at worbla.com) called for layering two sheets of Worbla around the craft foam for each shape involved. I realized that made sense for armor, but I didn’t want my frames to be that thick. So I just used one layer of Worbla, minus the craft foam. But I still traced and cut the Worbla slightly larger than the foam so that I could fold over the edges for neatness. That may or may not have been necessary, but we’ll get back to that.

wpid-wp-1408840524068.jpeg
 Step 4: Next, I cut out the shapes. Cutting around the outside was easy enough, but it was tricky getting to the inside portion. I had to poke and saw out a small section with the X-acto knife in order to get in there with the scissors. I think I’ve read that people use a heat knife to cut precision shapes with Worbla, but for this I got by with an X-acto and scissors.

Step 5 (no pics, sorry): I then used the hair dryer to heat up each frame for working with it. I made small slices along the inner edges and the bottom edge in order to fold over those edges and kind of pinch them together. I neglected to take pics of that part, being rather involved in the process. But it might not have been necessary anyway. The top edge is un-pinched, and it seems to look all right.

Step 6: Anyway, once I had done the detailed shaping with my fingers (again, be careful in your own efforts!), I heated each frame to softness once again and gave each its turn on Bob’s face for final shaping:

wpid-wp-1408840506065.jpeg

Within maybe–I don’t know, 30 seconds to 1 minute, each frame had cooled, and could hold the shape.

wpid-wp-1408840488818.jpeg

wpid-wp-1408840480623.jpeg

The curves are a bit wavy, but that’s a reflection of the wavy surface they were cooled on (I’m talking about you, Bob). It might be good enough, but if not, the great thing is that I can always smooth out Bob’s face and then re-heat and reshape the frames on the newly smoothed surface.

wpid-img_20140823_203416.jpg

So, there they are. I feel pretty good about these as a first attempt, if nothing else. The next step is to paint them. First, a base coat or two to smooth them out (the surface is pretty rough), and then the final coat of black. I think if I go with a good matte black, the waviness of the curves won’t be too obvious. Or I might try to fix the waviness first. Once they’re painted, the reshaping is not an option.

To sum up, here’s what I learned about working with Worbla:

  • Not Scary: It’s not as scary as I thought, and is actually pretty darn cool
  • Tools: You can get away with using a hair dryer, scissors, and an X-acto knife for small, simple projects. I am guessing you may indeed want a heat gun and heat knife for larger and/or more complex projects.
  • Working Surface: Even just using a hair dryer, it’s probably good to use a foil-type, heat-resistant surface. If nothing else, it is slick and non-stick (hey, that rhymed!), so that the Worbla will peel off of it easily when hot. But I recommend using metal insulation tape (again, see this tutorial for more info) as opposed to overlapping sheets of foil. The hair dryer kept blowing under the edges of the foil, thus inflating it annoyingly.
  • Mold Mimic: The shape of your Worbla will follow the contours of what you are molding it on, so get that figured out, and the Worbla will cooperate nicely.
  • Finishing Work: Even after shaping, the Worbla has a very unfinished surface, so be prepared to finish it with a base coat (or two) and paint. You can even sand the edges before painting.
  • Free Your Mind and Stuff: Follow a tutorial for the techniques, but don’t be afraid to adapt the techniques for your own needs. This is fairly forgiving material, what with its reshape-ability and all, so feel free to play around.

Up next: Finishing and Painting the Frames (or more about web-shooters if I don’t get a chance to get paint today…)


While I’m Waiting for Stuff…

I’ve gathered all kinds of accessory-type stuff for the costume, but I’m still waiting for the stuff to actually make something. Plus, it will probably be next week before I have much time anyway.

So, while I’m waiting, I figured I could toy with ideas for superfluous accessories. For example…

That is a schematic for Spider-Man’s web shooter. I first saw this particular image in the entry for Spider-Man in the “Marvel Universe” series, which was basically a multi-issue encyclopedia of Marvel characters, etc. from the 80’s. That article employed marvelous scientific double-talk to make web shooters sound so wonderfully plausible. {sigh} Anyway, if you’re interested, this online version seems to contain the same text I remember.

For my purposes, I don’t need actual, functional web shooters. I never did get around to earning degrees in advanced chemistry, engineering, electronics, and whatever else one would need to know. Plus, I think web shooters that look and work like Spidey’s would run into some issues with the laws of physics. But it would be fun to make some web shooters that look relatively authentic and cool.

Brainstorming So Far

I did a bit of thinking and Googling. Here are some ideas for basic “found” components (as opposed to hand-crafted ones)  so far.

Web shooter Strap: Wrist compression strap

Pressurized web fluid canisters: Metal lighter cases

So, roughly speaking, we would have something like…

webshootmock

Yeah, that is not my best photo manipulation work. I’m in a hurry, okay?

Anyways, I would want to put some kind of raised edge around the top and bottom as well. That–along with the nozzle, activation button, and palm attachment stuff–will be topics for the web shooter brainstorming in the next post!

Happy Friday all!

The Amazing Spider-Feet

I believe I have covered the topics of Spidey’s mask, eyes, and gloves in more detail than anyone cared to hear. But I don’t think we’ve talked nearly enough about his feet.

First off, I could make a case for the general logic of a spandex bodysuit for certain types of super heroes (and have done so in more real life conversations than I would care to admit to). Spidey’s abilities are very much about flexibility and speed, which benefit from a costume that is form-fitting but stretchy. You don’t want loose-hanging folds and such that could get caught on things, or that enemies could grab a hold of (see No Capes), plus there’s the advantage of a costume that can be worn under “street clothes” for quick costume changes.

Granted, his suit is often getting torn up in more intense battles, but there is one aspect of a spandex suit that needs special consideration for even general wear: the feet. Walking around in a spandex suit without reinforcing the feet/boots in some way is like walking around in socks. No, scratch that. It’s like walking around in stockings. You’re okay casually walking around indoors, but I can’t imagine you’d get far on the cement or asphalt in spandex socks.

This issue is tacitly addressed in the comics. The bottoms of Spider-Man’s feet appear to be covered by a generic, smooth soles. Sometimes they are more heavily shaded, sometimes they are darker, but more often than not, the feet are drawn in such a way as to imply that there is some sublte form/structure to the boot portion of the costume. (Some artists draw the feet in such a way that they look very much like socks, with the impression of toes showing through. I find this a bit bothersome, not so much aesthetically, but logically.)

When it came time to bring Spidey’s costume into the real world, this matter had to be addressed, of course. Ideally, you want the boots to be sturdy and practical while still looking as much like the rest of the costume as they are depicted to in the comics. This has been achieved with varying degrees of success:

1970’s Spidey boots: A markedly different color and material (leather I assume) compared to the costume. I actually remember asking my mom why Spider-Man’s boots looked like that. She told me those were his “winter boots.” My mom was very committed to maintaining the “magic” of childhood a la Santa, etc.

Raimi Spidey Boots: They blended with the rest of the costume, but had obvious structure underneath. The soles were featureless and flat, like the comics. They were oddly very squared off at the end of the toes.

Marc Webb Spidey Boots: In the first Amazing Spider-Man, the boots were very strikingly different from the comics (as was the rest of the costume). They looked like running shoe treads attached to the costume boots, complete with pretty intense cleat-like attachments. But I think the idea of the ASM 1 costume was a pseudo-homemade, cobbled together from parts sort of look, so I get it. I just think the idea of someone who can cling to walls needing cleats is funny.

The ASM 2 boots were toned down, looked more like the comics and the Raimi movie boots until you saw the soles, where subtler treads were hiding.

My Spidey Boots:

Of course, all this is leading up to how I decide to do my Spidey boots once I get that far.

I do want to stick to a comic-y look as best I can, but there are the practical considerations I mentioned. If you want the boots to blend in with the rest of the costume, they can’t be of a wholly separate material. But since that means they are spandex, they need some reinforcement and structure, both for durability and walking comfort (spandex doesn’t protect well from walking on rough surfaces).

One approach is to put some structure under the spandex, covering the sole, toes and back of the heel, and then a sole on the foot bottom, the two basically glued together through the fabric on the bottom. That way, you’ve protected and structured the key areas, more or less.

But then, I suppose if you want to be paranoid, you might want to think a bit more about those toes. Not your toes, but the toe area of the spandex. It seems like a pretty vulnerable area. Even if you put something underneath it, that still leaves it vulnerable to ripping when you “go into action.” So I can kind of see the logic of the ASM 1 boots that have the tread wrapping up around the toes and the heels.

When I bought a pre-made (and not very awesome) Spidey costume on eBay a few years ago, I used the rubber soles of water shoes, which came up on the toes and a bit on the heels, and had tread. I spray painted them red, used a Sharpie to draw web lines that lined up with the costume’s web lines. I put padded foam inserts into the socks, and then glued inserts to water shoe soles through the fabric. It was very functional and comfortable, though not beautiful. If I can do something like that, but maybe more subtle and better looking, that would be my preference.

I want it to hold up well, but I do need to remind myself that I don’t really plan on fighting any super villains while wearing this costume, so I don’t have to go too crazy.

Mirrored Eye Lens Test: Success


The mirrored window privacy film I ordered arrived yesterday, and I was quick to cut out a sample to try in one of my foam test frames. I am very pleased with how it looks!

It was also easier to put it to use than I thought it would be. I assumed it would have a peel-off, adhesive side thing going on, but in normal use, you apparently wet the surface you are applying it to (usually a window), and it sticks. But otherwise, it is like a thin, flexible sheet of one-way mirrored material that behaves like mirrored sunglasses.

Here are some shots that catch the light from different angles:

wpid-wp-1408490773673.jpeg

Reflecting my phone as I take the pic…

wpid-wp-1408490745317.jpeg

Random reflection distortion…

wpid-img_20140819_192506.jpg

A sort-of view “through the lens.”

It works great. Once it’s up against your eye, you can see through it like you’re looking through sunglasses. And in normal lighting, when I hold it up against my eye, you can’t see through to the eye. I’ve only done a bit of dim lighting testing; in shadow, the lens just looks like a sunglasses lens.

But, overall, I am actually pleasantly surprised and pleased at how well this material is working out.

Soon, I’ll get the Worbla to start working on a final lens frame, Also, the traditional Spidey costume fabric should ship  in the next few days, likely arriving by the middle of next week, give or take. Then, as usual, it will just be a matter of having time to start sewing.

So, Spidey Suit Sewing Round 2 is coming soon!


Short Progress Post – Poor Bob…

I’ve started the slow but effective process of bulking up Bob (Bulking Up Bob… Good movie title just asking for a script?)

wpid-img_20140817_135637.jpg

I feel kinda bad for the guy. Impaled on a chair post, half-smothered with duct tape. But he knew what he was in for.

I’m doing layers of single duct tape strips along with triple and quadruple folded tape layers. I’ve added a half inch to the top part of the head so far, with the overall goal being a full inch and maybe a smidge more. After the duct tape, I will slide a previously sewn test mask over Bob’s head to smooth it out a bit. This should get me the right size and shape for molding the Worbla frames.

Happy Monday everyone. (Bob’s having a very Monday-ish Monday, I think.)

Waiting for Supplies and such…

So, I am in standby mode in terms of actual costume and accessories. Here are the items that are being delivered:

  • The printed costume fabric (traditional Spidey bodysuit)
  • Worbla sheet (for eye frames)
  • Mirrored window liner (for covering eye lenses)

Here are the items that have been delivered:

  • Make-a-Zipper Invisible Zipper kit (a roll containing one long invisible zipper that can be separated in the manner needed, along with several zipper pulls)- color: blue, for the main entry zipper on the traditional Spidey bodysuit (gonna do the ‘down the sides, across the bottom of the back’ thing this time)
  • A red invisible zipper for the back-of-the-mask zipper (to allow for pulling the mask forward off the head when needed)

Here are a few sundry items that I will need to buy/make:

  • Base coat and main coat paint for Worbla frames
  • Heat resistant board for working with Worbla (similar to the one in this clever how-to: Working with Worbla Safely)
  • Duct tape: Useful for so much (including previous list item), but specifically for building out the circumference/size of Bob the head model’s head.
  • Clear plastic of some kind to line with the mirrored stuff.
  • Construction paper (recommended base medium for tracing onto Worbla, which makes sense as it will curl less than printer paper.

So, today I will go out and grab a few things, and I can get Bob prepped for when I do the Worbla frames. But it will likely be the weekend after next before I have time to start the main work on the traditional Spidey bodysuit.

In the meantime, I’ve continued working on modifying the Photoshop template for the Ditko style costume to separate it into the component parts:

It’s not as hard/complicated as I feared, but it is superbly tedious! It’s coming along, though. I’ve separated the top and bottom fairly well, built up the height of the waist for good fit and so that there’s plenty of overlap. Just started on separating the gloves, then we’ll do the boots, then the mask. And I want to try and piece together the back halves of the shirt, because there’s really no sense in them being separate in this new configuration.

No hurry on that design, since I have the traditional costume to work on, and I really should forego spending more on costume fabric for a long while!

That’s all for now!