So, I am in a bit of conflict about this particular installment of the Guides, which is why I have saved it for the near-end of the series.
As with the boots, for the mask I have been using a pattern I extracted from the bodysuit pattern I purchased from Gunhead Designs, and I don’t feel like it’s mine to share, plus I didn’t create it and couldn’t really tell you how to create it from scratch using your measurements. But unlike the boots, I do not have a good alternative pattern of my own.
But I do have a not very good alternative, if that means anything. More importantly, I can at least offer options.
Option 1: Purchase just the mask pattern and sewing guide from 4 Neo Designs for $25 (as of this writing)

From the 4 Neo Designs web page listing for the mask: http://www.4neodesigns.com/downloads/amazing-spider-man-mask/
Above is the image from the 4 Neo Designs page that lists the mask pattern file for sale. $25 (as of this writing) gets you the pattern and sewing guide.
You can do what I did and modify the pattern design to match the rest of your costume.
Option 2: You should definitely not reverse engineer the above image to make your own pattern:
So, while I don’t feel comfortable literally sharing the pattern file, I will say that this same basic mask pattern shows up on Gun Head and 4 Neo, as well as at least a couple of other unrelated Spidey costume tutorials. That makes me wonder if its really the design that you’re purchasing from those sites more than the underlying pattern concept.
Of course, I wouldn’t go so far as to tell you that you use the visible layout of the mask as pictured above to reverse engineer the pattern. Or that if you add your own design on it, and just use it for your own personal purposes and not re-sell, that it should be totally fine.
I mean, it’s not my place to say that I think you can figure out how to do that using your keen mind and some of the skills we have been putting to use in these guides.
Just…you know. Not sayin’ that at all.
Option 3: The Not Very Good Mask Pattern I have sewn with little satisfaction
Way back when, I did manage to reverse engineer a sort-of mask pattern (a little ways into the post, version 2 of the mask) from a cheap Spidey costume I bought years ago. It’s passable, sort of. I mean, if you really don’t want to use Option 1 or “not” use Option 2, then I guess you can do this one. Maybe you can make something better out of it than I did.
It’s easier to sew than the other mask pattern. Sort of. You just have to be sure to get the stitches right. Because of how the seams are placed, it’s obvious if you don’t stitch them just right.
Here’s the down and dirty of it:
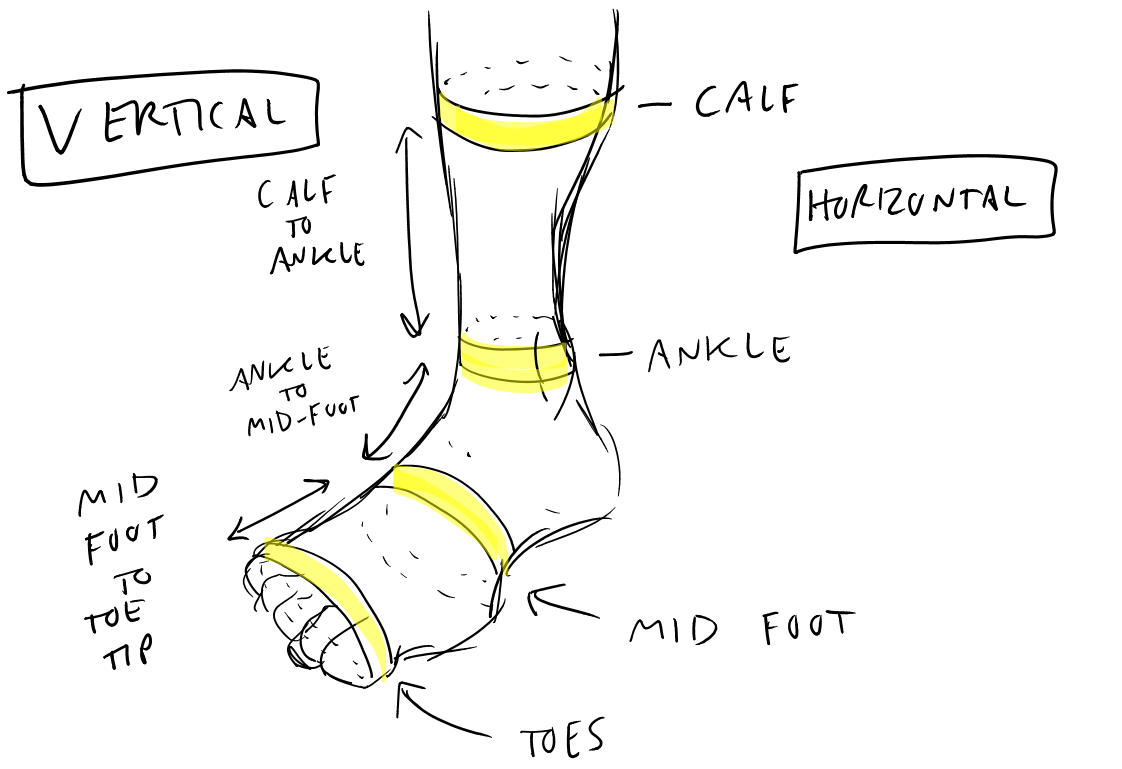
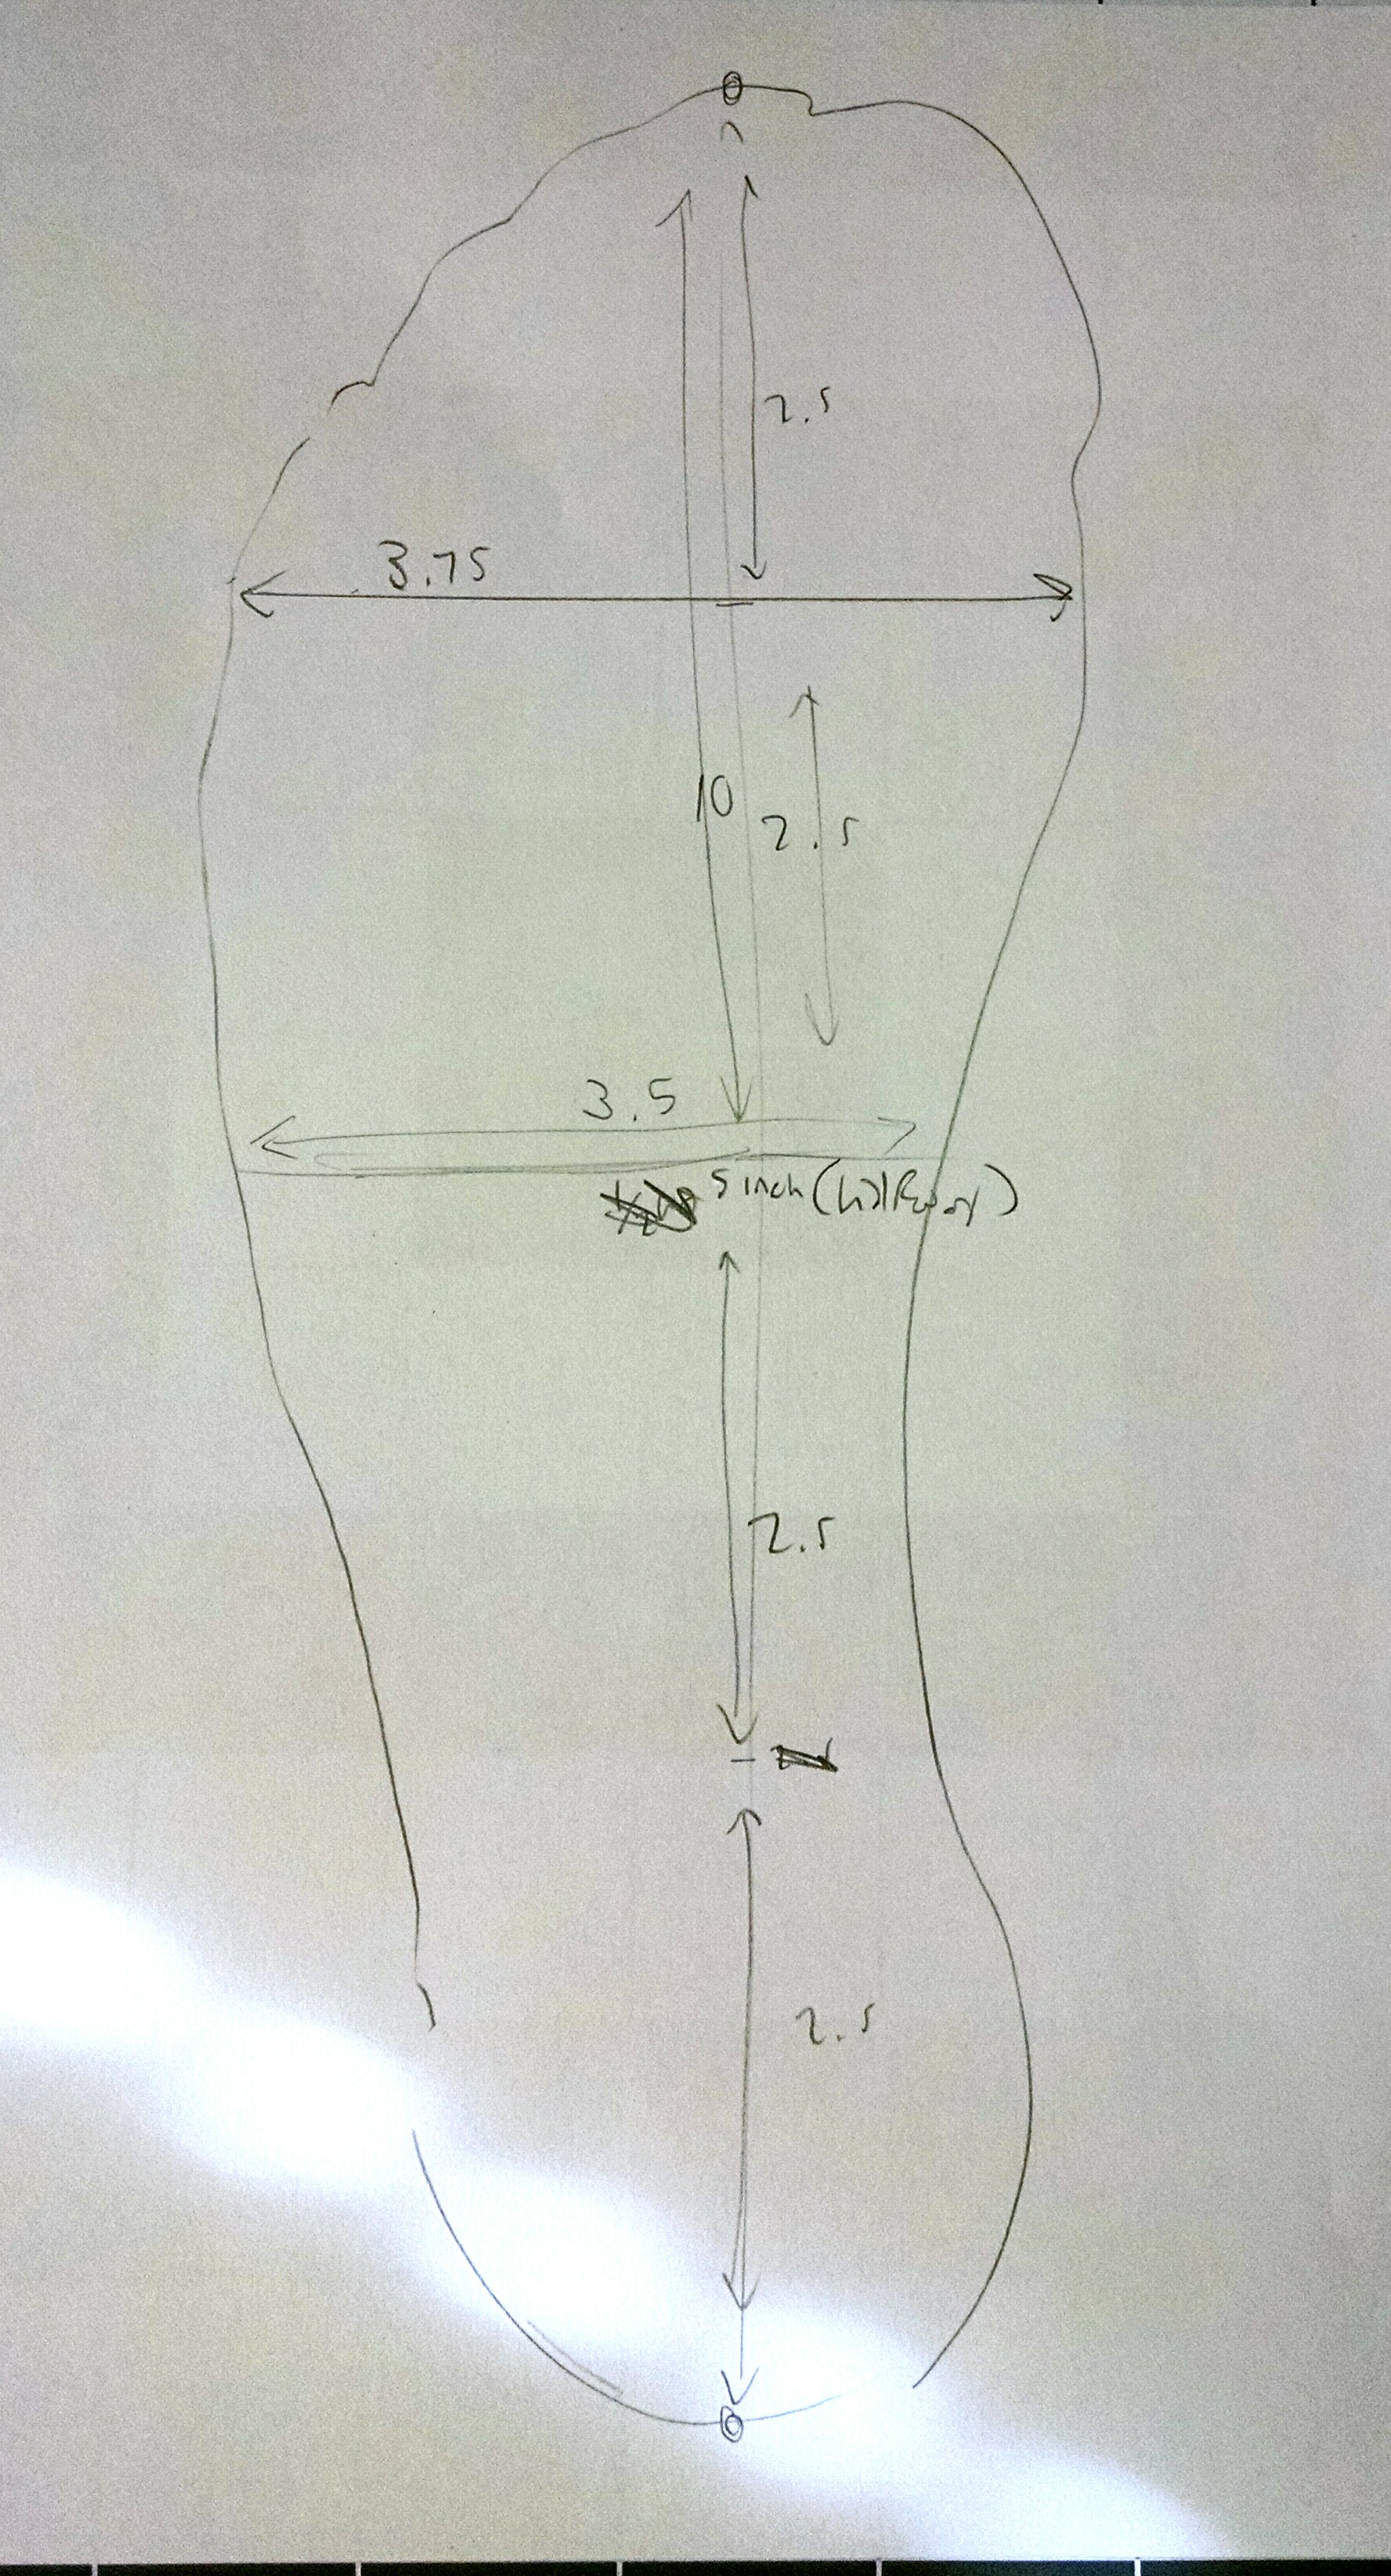
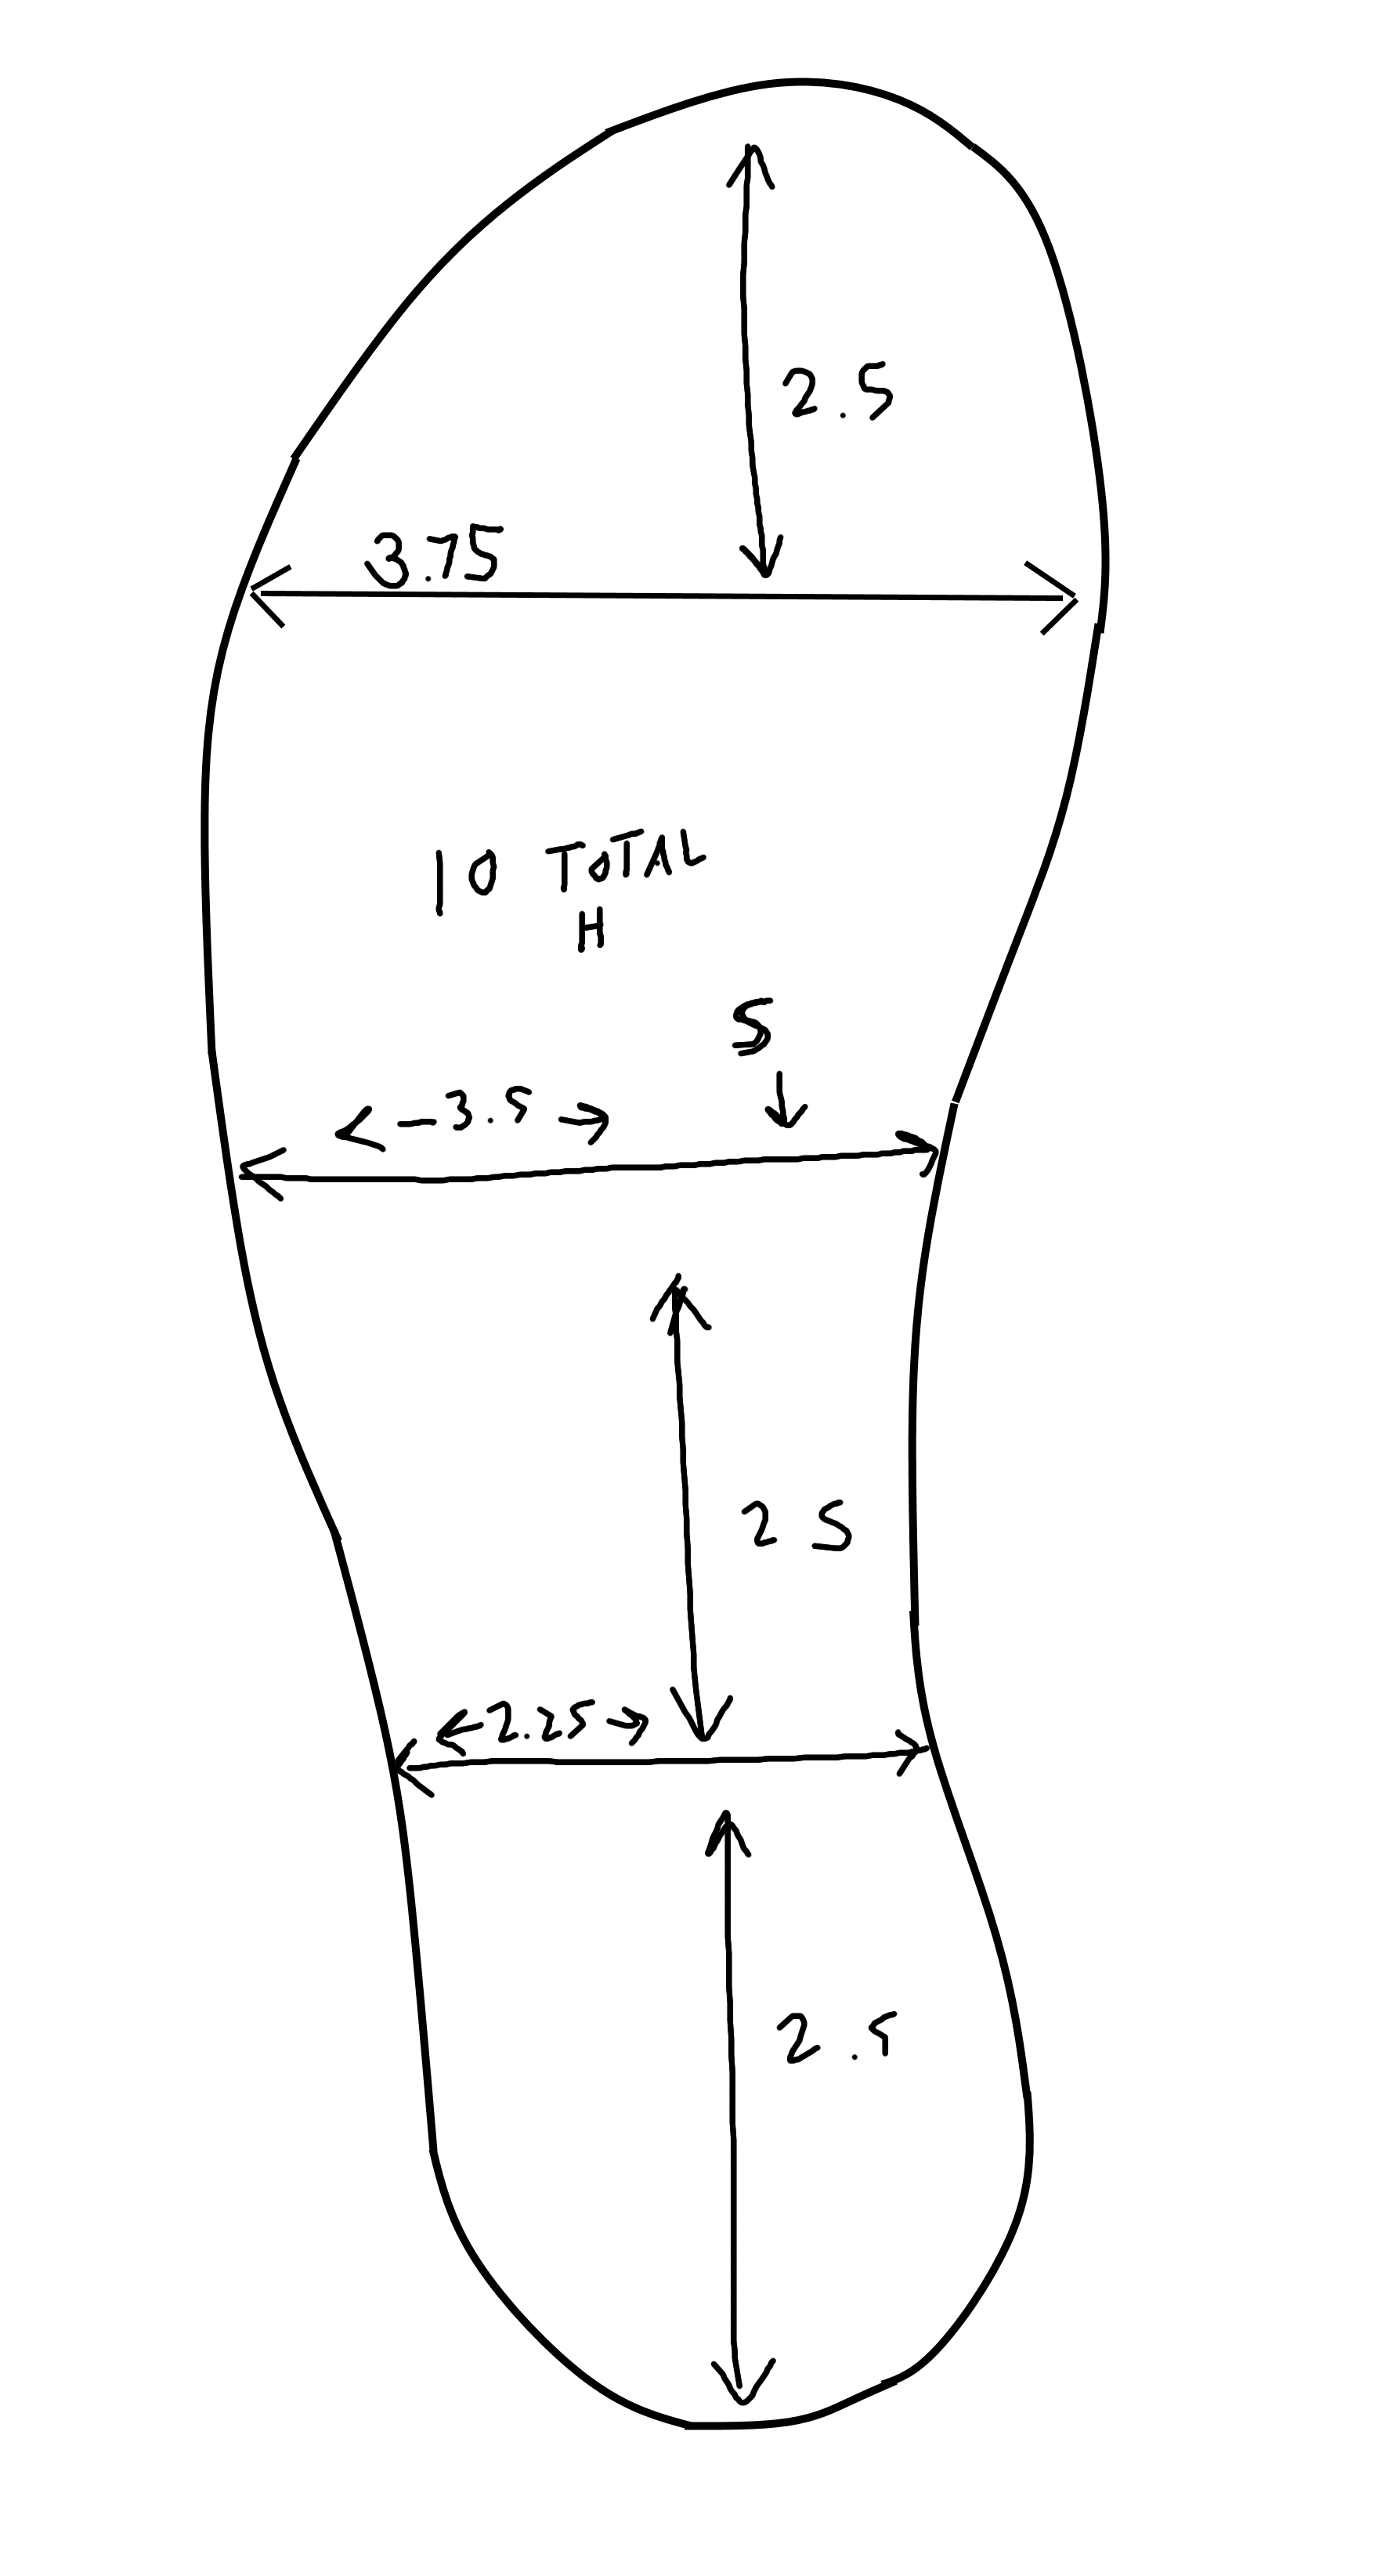
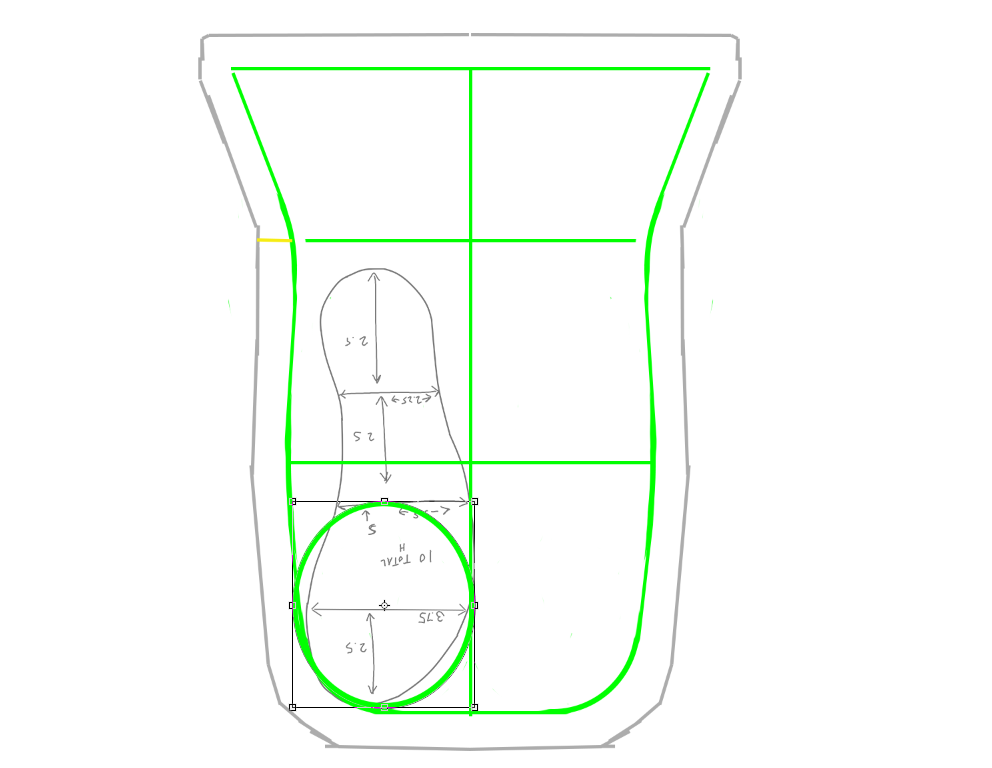
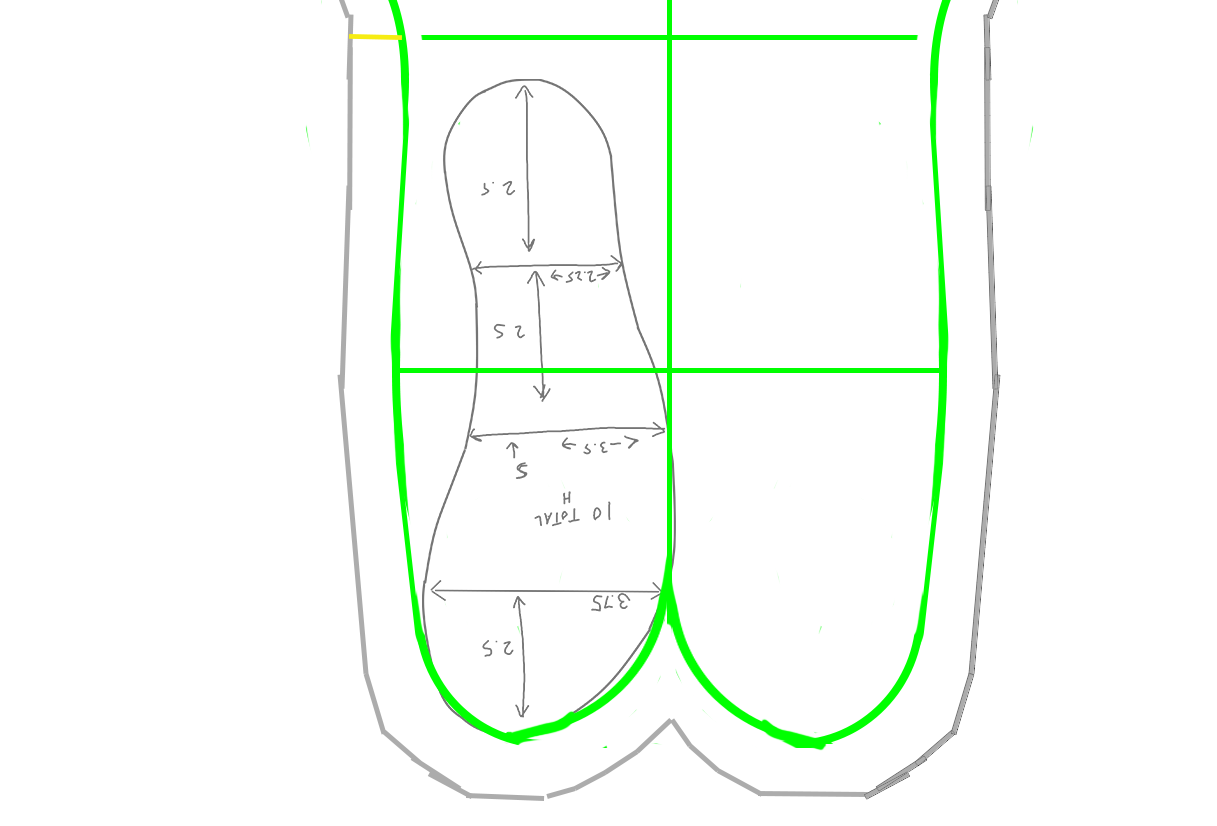
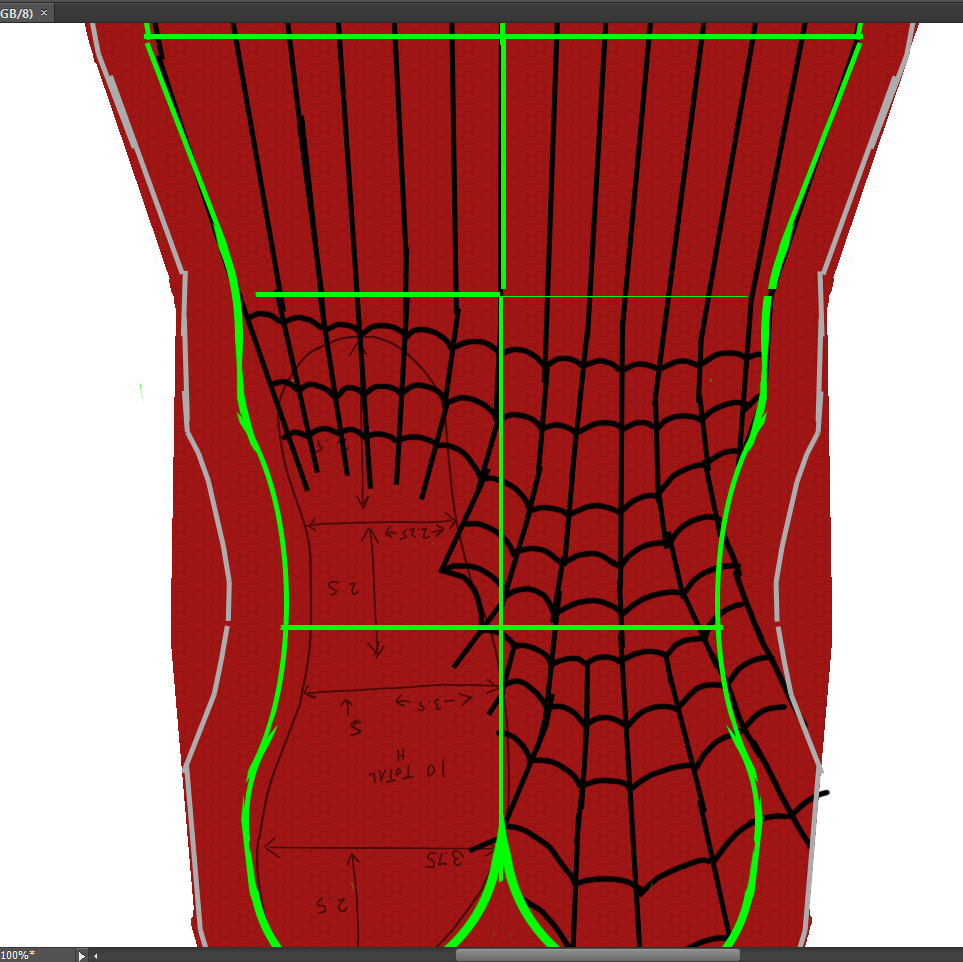
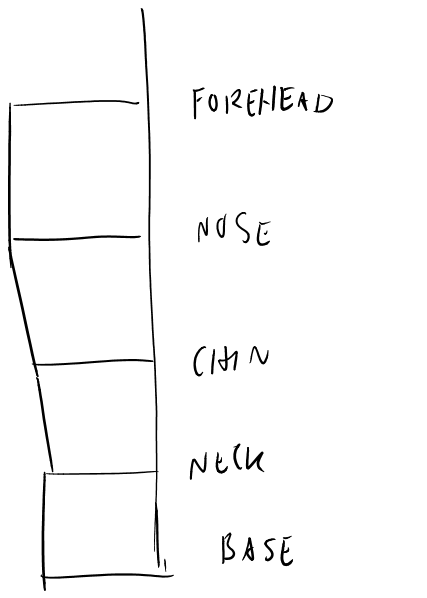
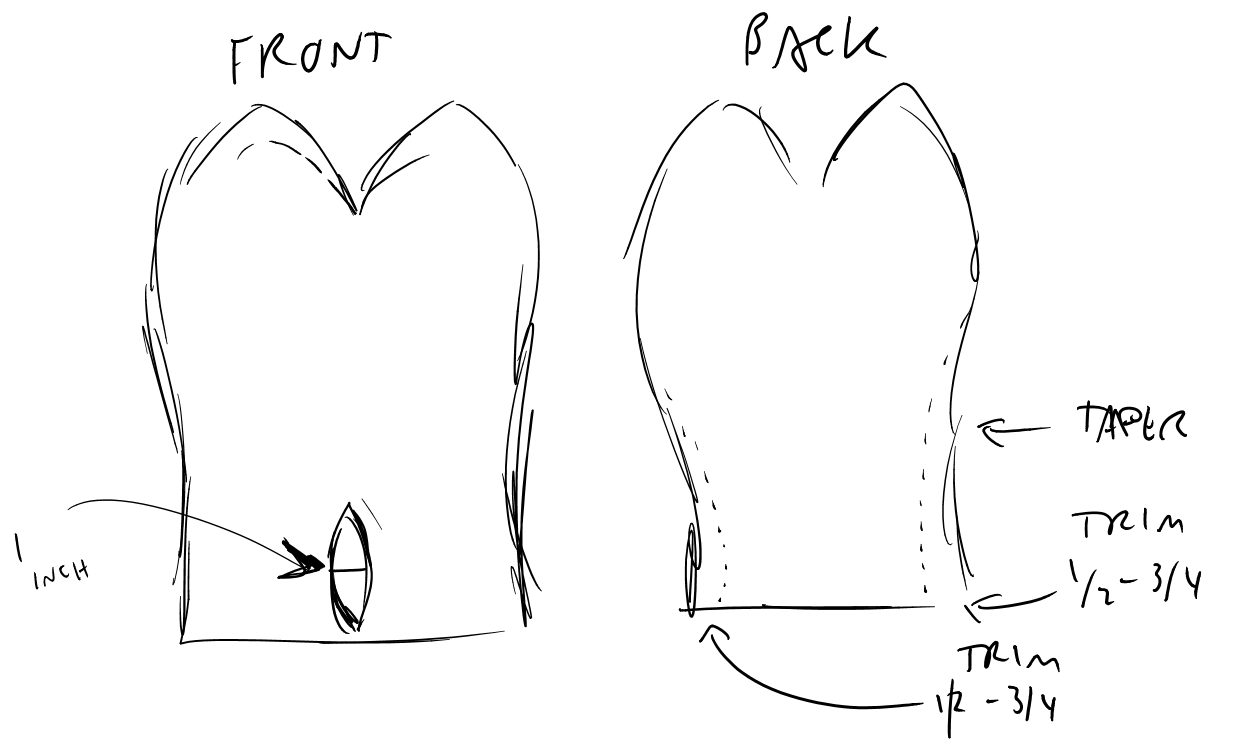
1) Horizontals: Measure your head circumference at forehead level, nose level, chin level, and neck level. Add about an inch to the neck level circumference. Because of reasons.
Convert Horizontals to 90-95%
2) Verticals: Measure the vertical distances: from the middle of the top of your head to forehead level ->From forehead level to nose level ->From nose level to chin level.
3) Total: Measure from the middle of the top of your head down to the base of your neck, tucking the measuring tape under the contour of your nose and chin as best you can.
4) Draw the Pattern ON PAPER: I recommend against just taking a chance on this one. You’re going to want to try it with un-printed spandex first, probably more than once. Seriously.
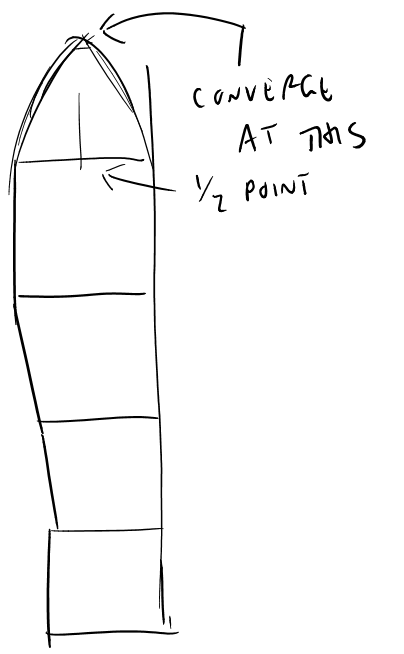
(You’ll want to tape together about four pieces of printer paper in “portrait mode” (or use a bigger piece of paper). Find the middle of the width and draw your total height line there.)
Using our usual method, except on paper, do your base pattern of vertical and half-width horizontal lines. Connect up as far as the forehead line.
Then add a near-pointy curve in the following manner:
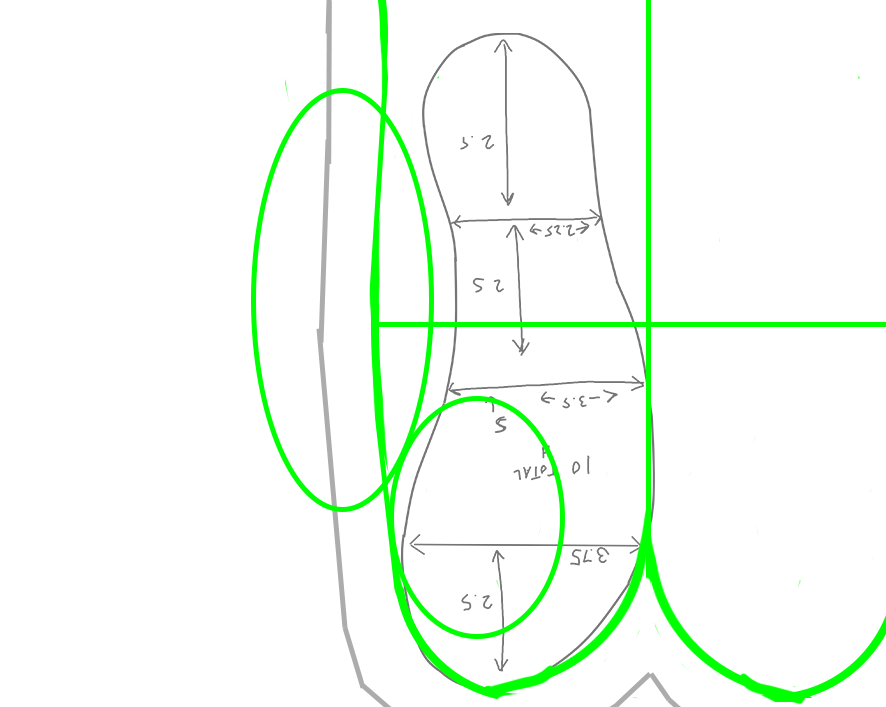
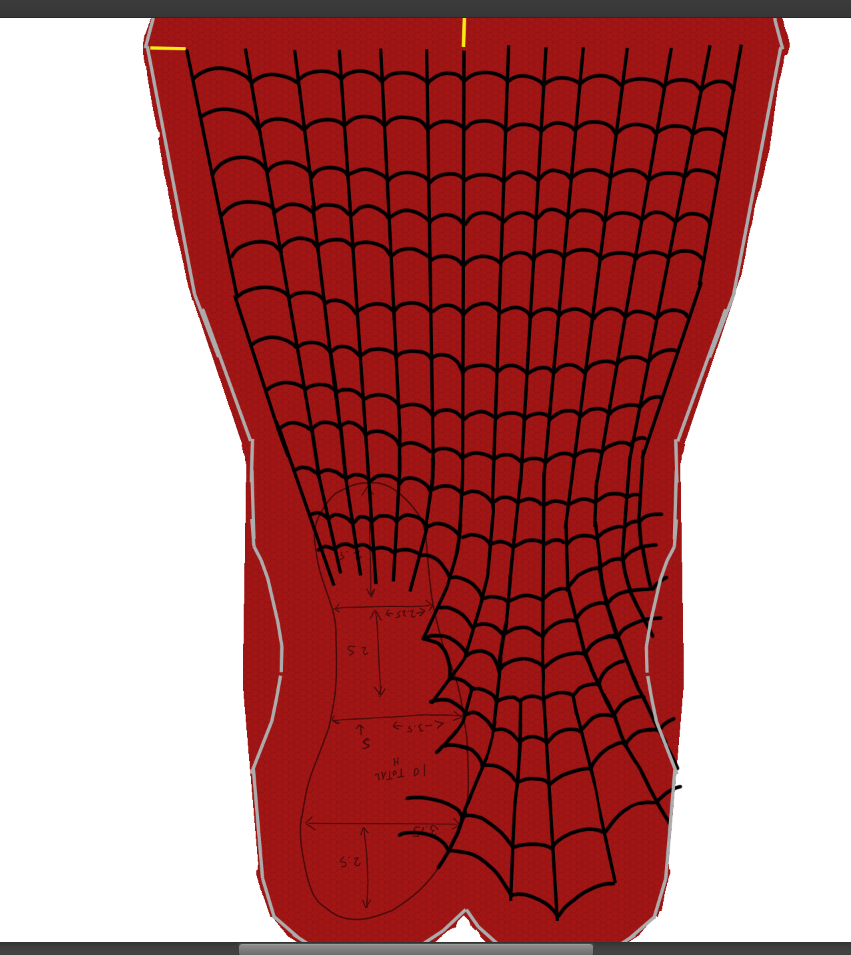
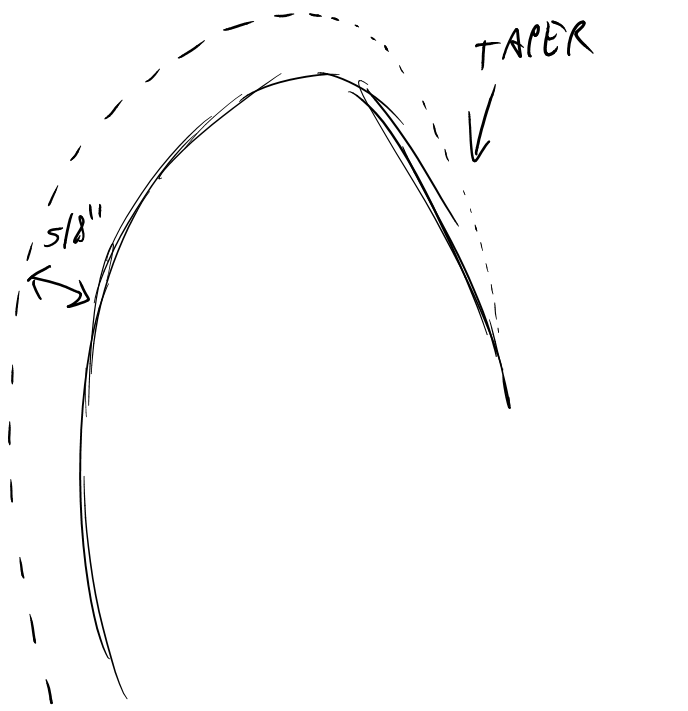
Once you’ve drawn that half, measure out a 5/8″ seam allowance and sketch it on. But pay special attention at the middle of the top curve, and taper it in at the bottom:
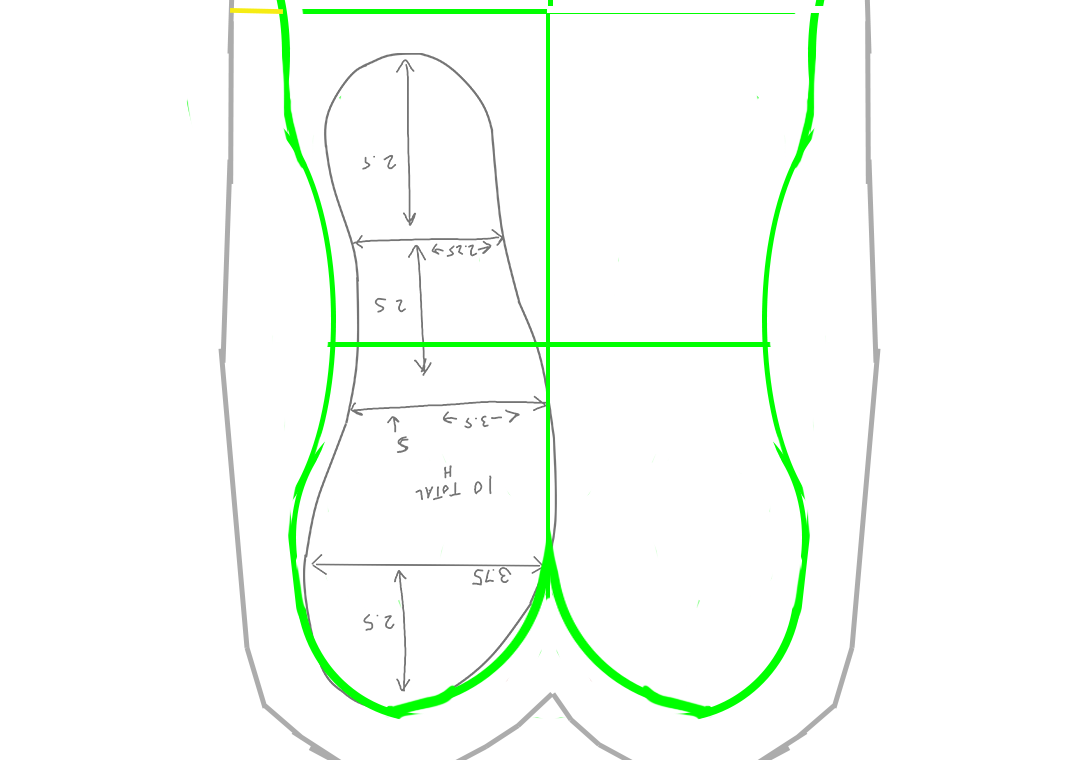
Now, fold your pattern paper in half along the center line and cut out that half so that when you unfold after cutting, you have the whole pattern, mirrored side to side.

Next, tape together four more pieces of paper and trace the pattern to make a duplicate.
Mark one of the patterns as Front and one as Back. It doesn’t matter which yet.
On the one you marked as Front, draw a sort of sideways eye that measures about an inch across at its widest point.
On the one you marked as back, trim about 1/2 to 3/4 of an inch off of the sides of the bottom, tapering that trimming as you go up.
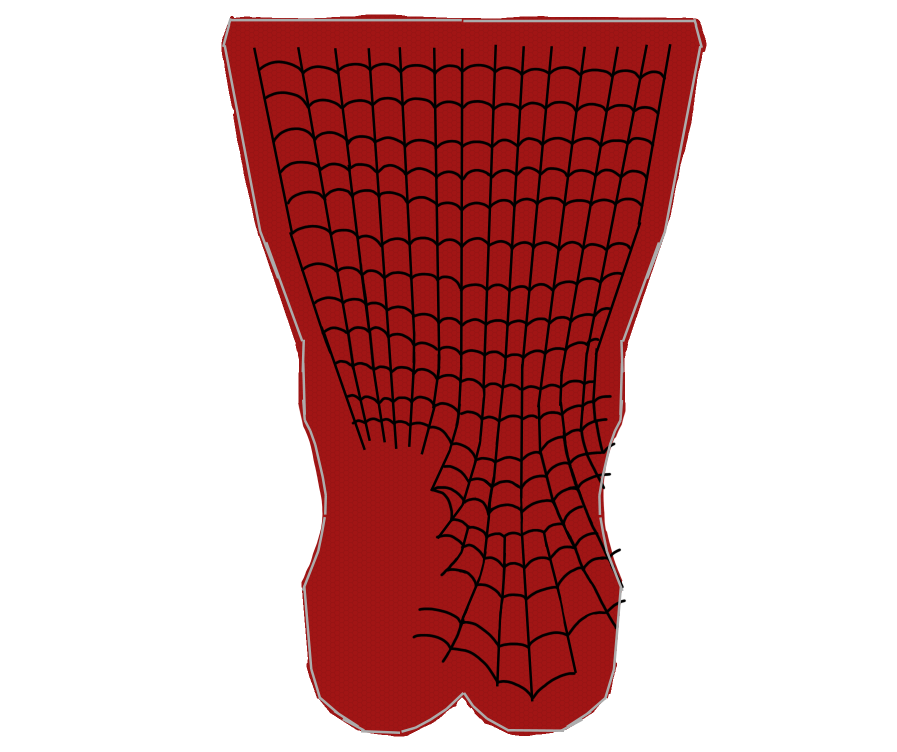
5) Experiment with how the web lines should lay out on the pattern. Do this on separate paper, or in whatever manner of visualization works for you. This is something you’ll probably need to do more than once in your sewing experimentation.

6) Trace the Pattern onto Fabric:
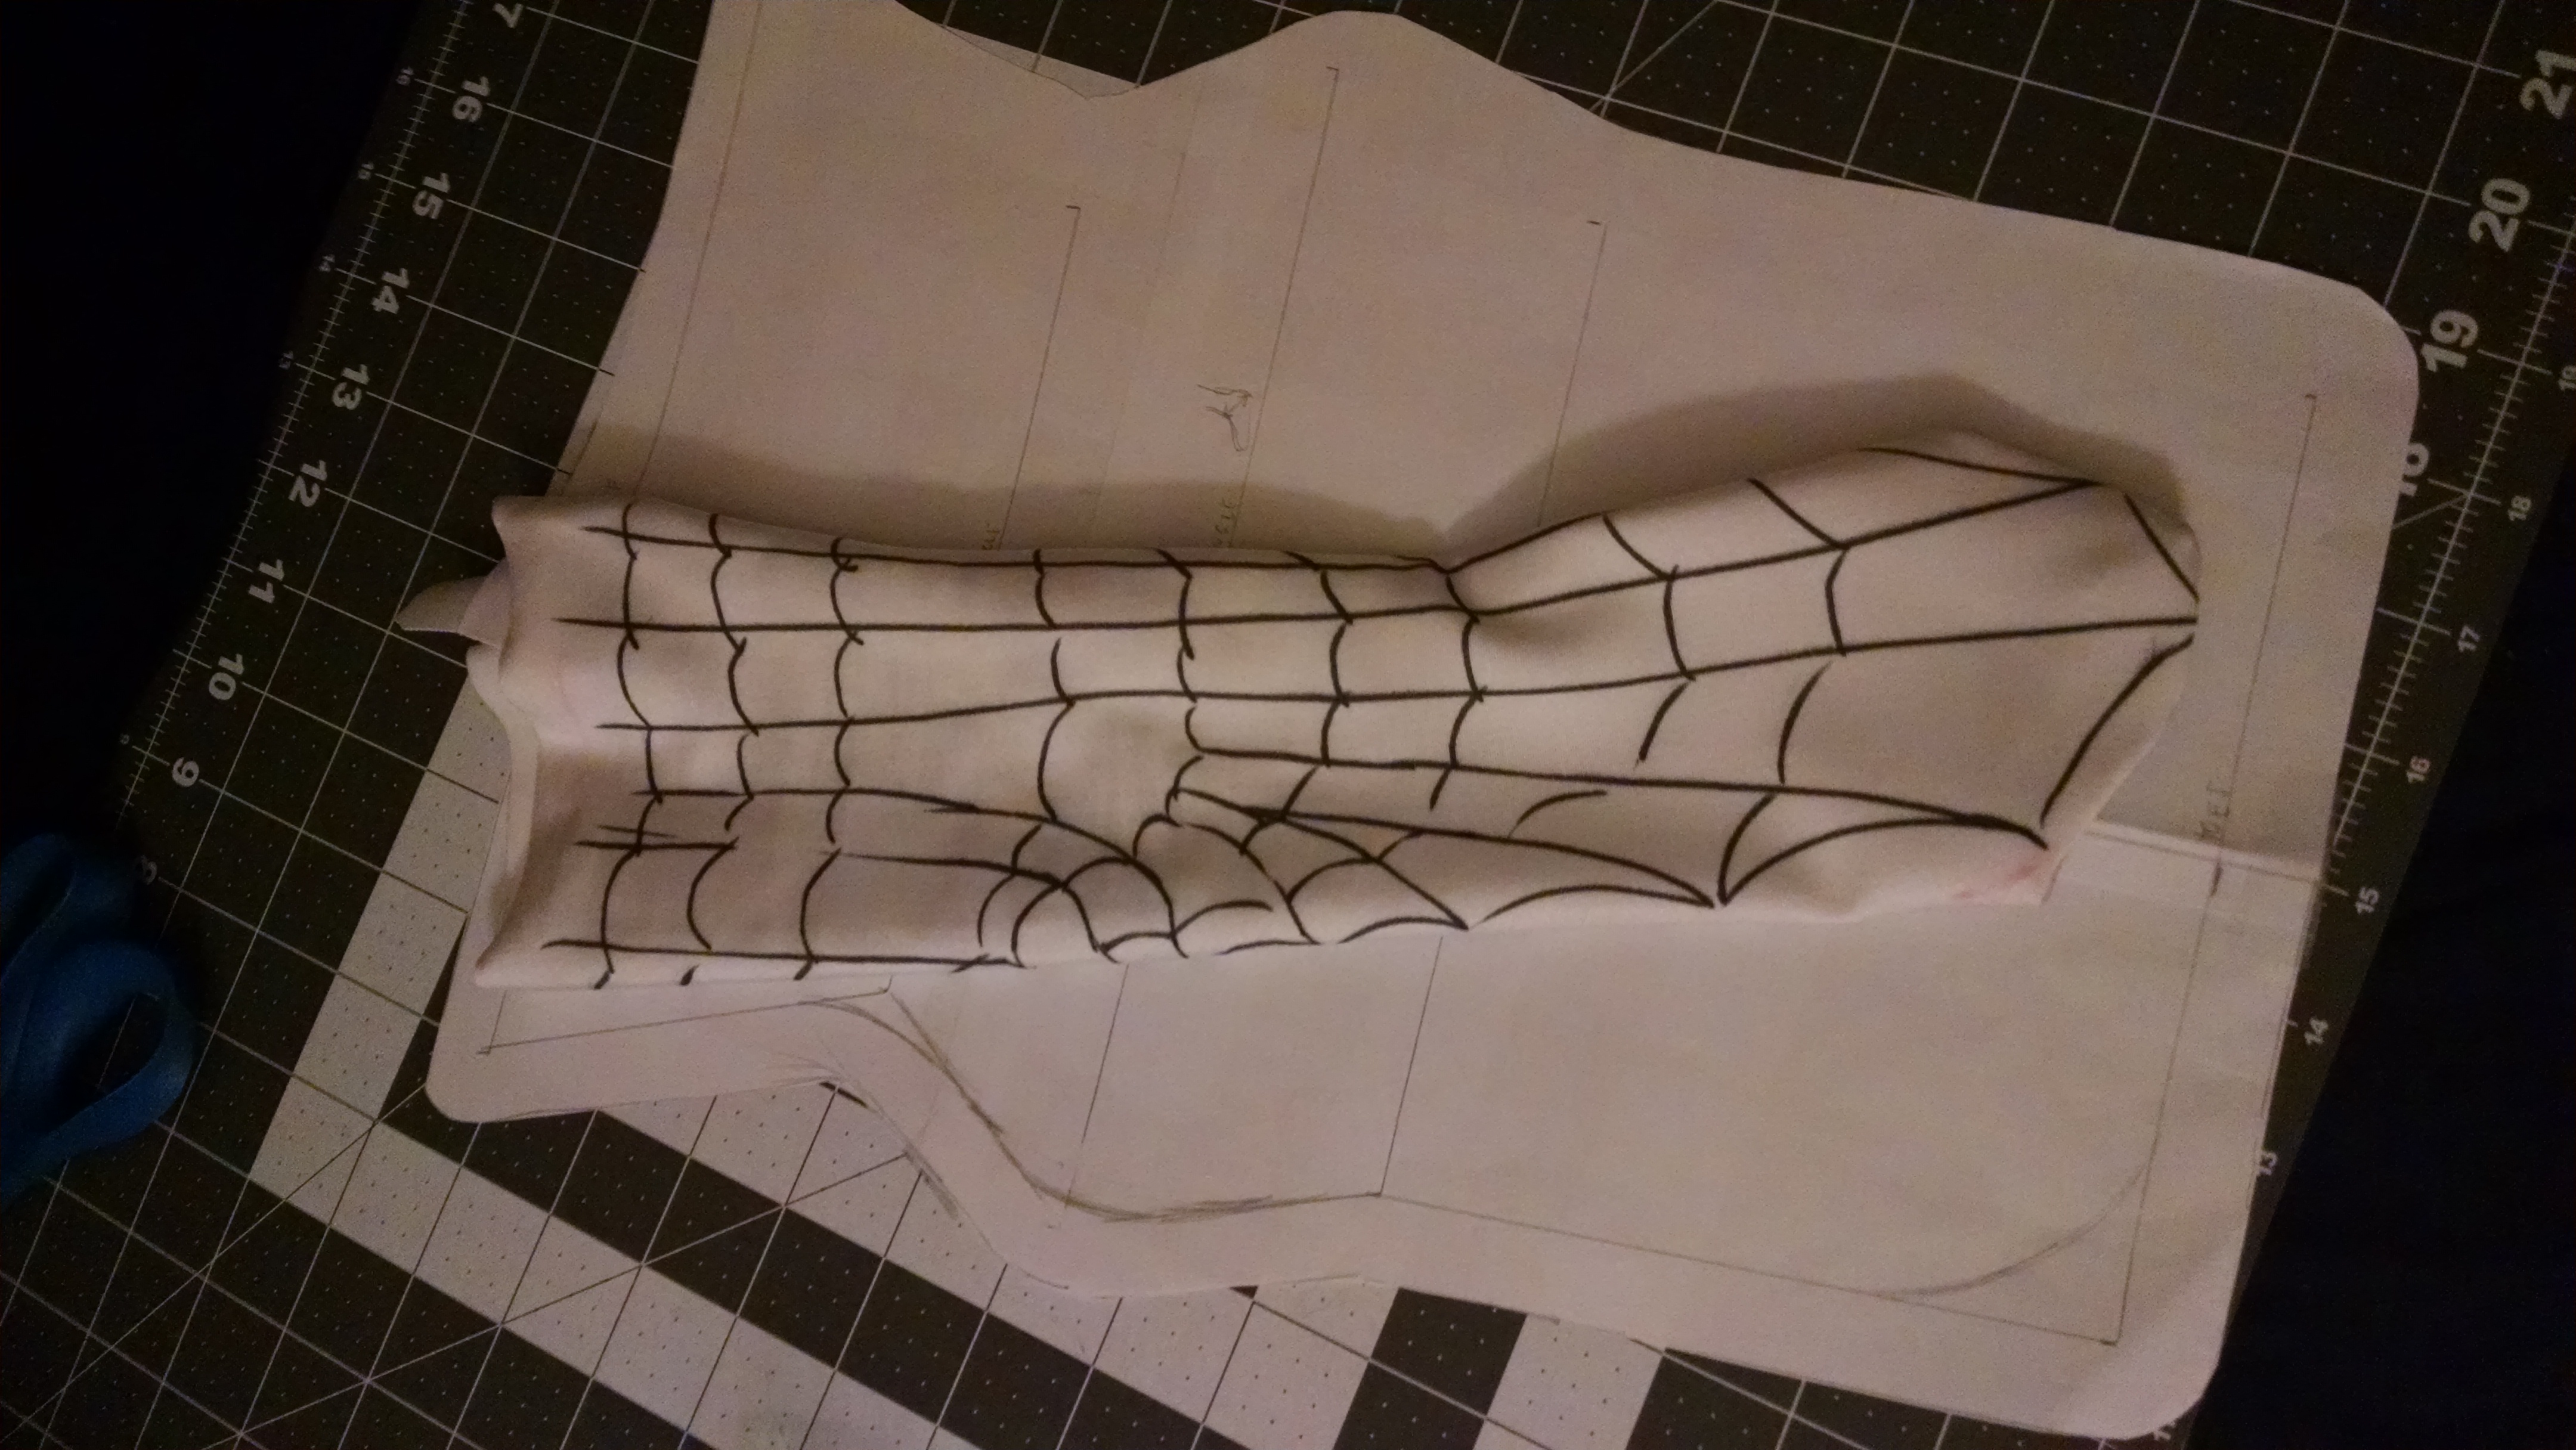
Tape the pattern down to some spandex and trace it with permanent marker (this is just for testing, so whatever). Draw the web lines on the pattern in the way you think will work. You could do just one half, or do a a different attempt on each half to maximize the usefulness of a single test.
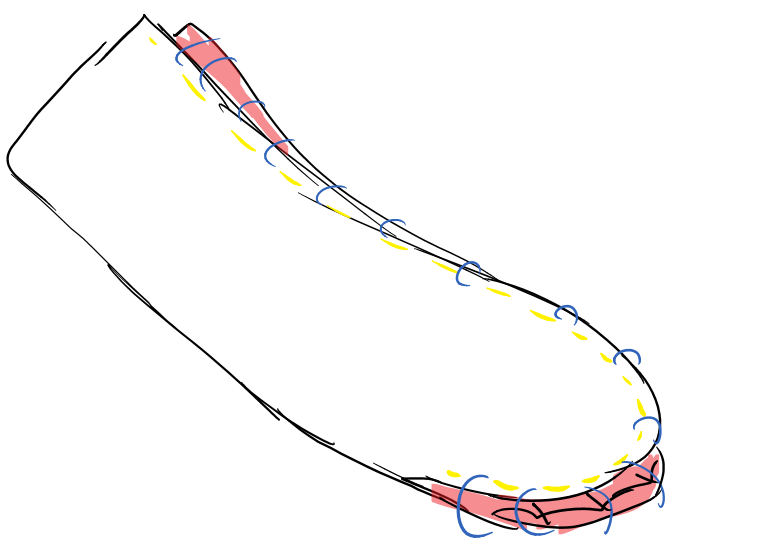
7) Sew it together:
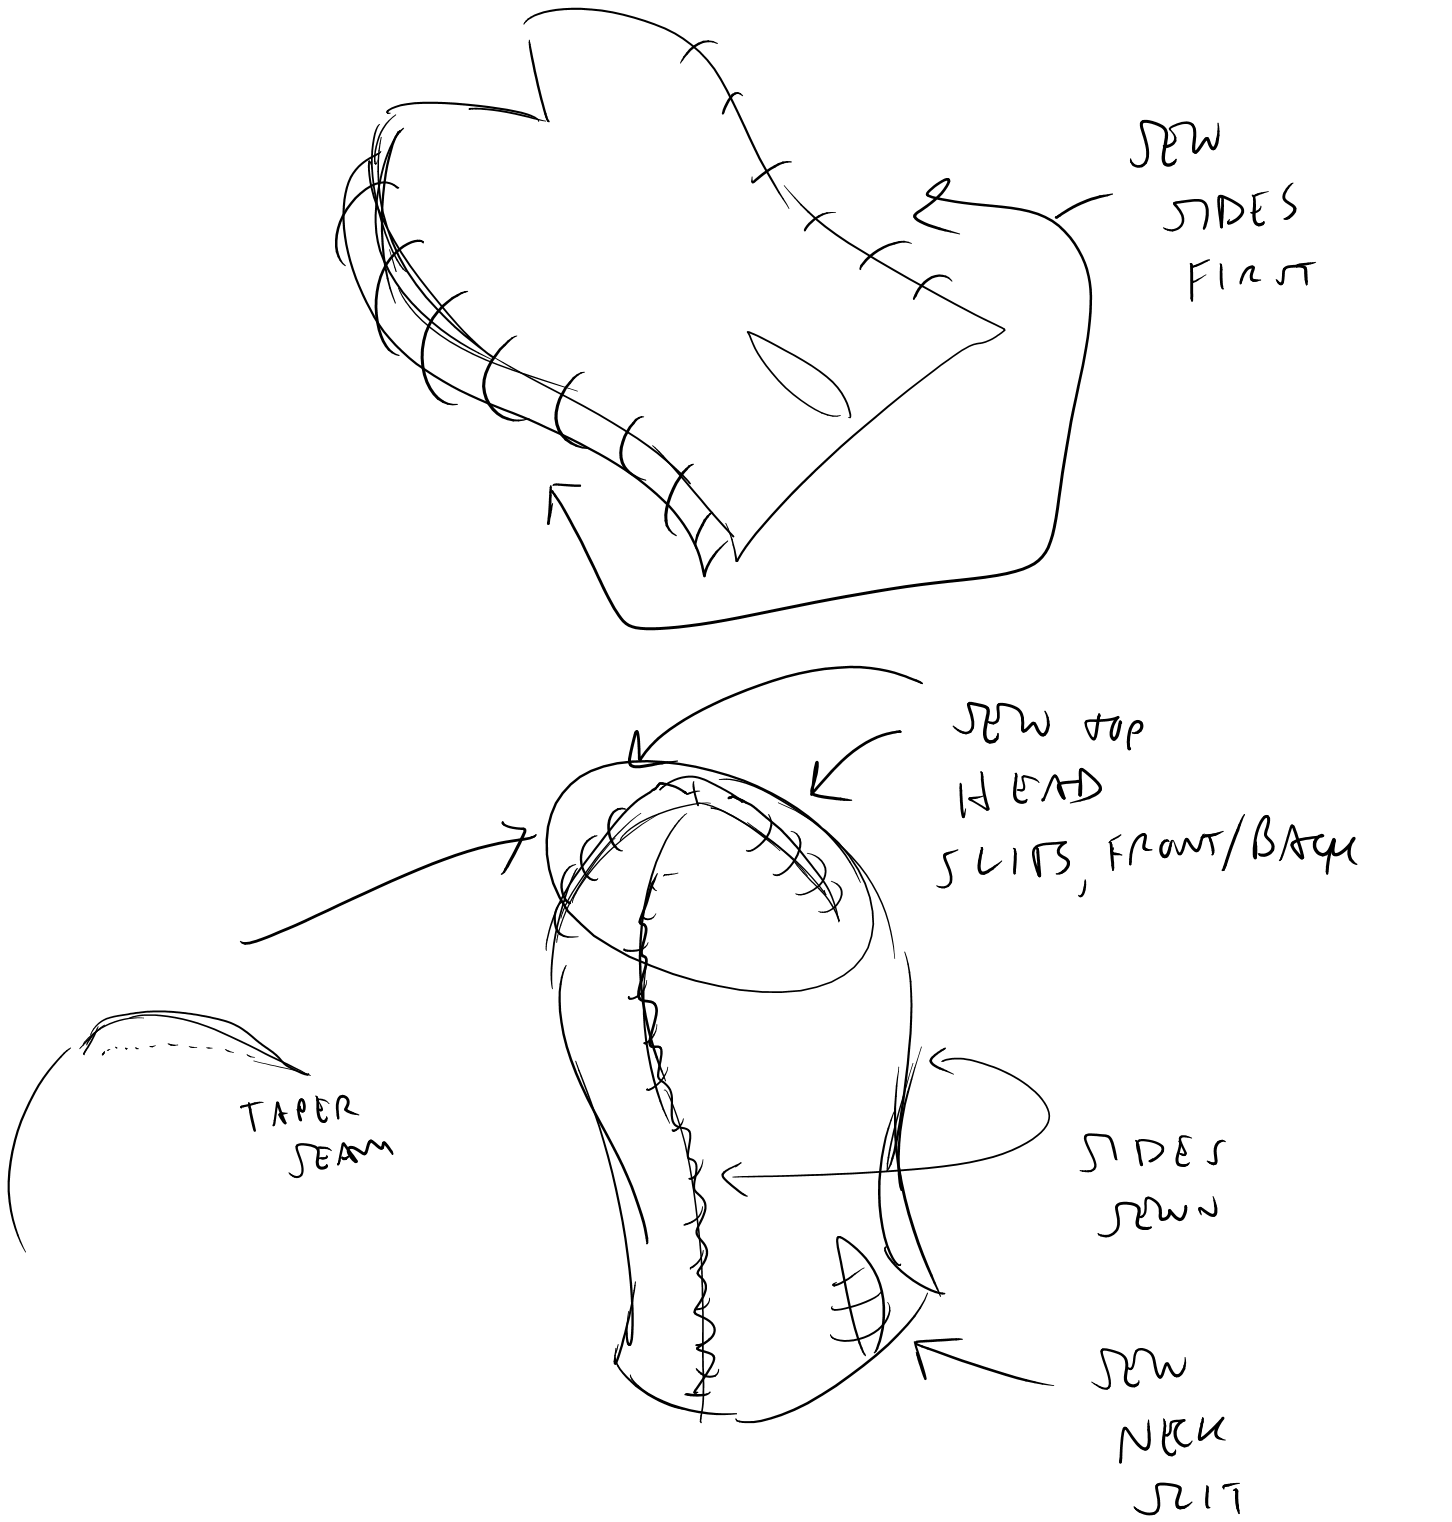
If you play around with this pattern and sewing it enough, you might come up with a passable mask for your needs and want to get a final printing of it. The trickiest part is getting the seams at the top front and back of the head to not bulge out (hence the tapering). If you can get a smoothly sewn surface, then a final printing, with web lines, would probably make the seams less obvious.
I might still revisit making a mask pattern I like at some point, but honestly, I still prefer the purchased version best so far.
Wrapping Up
So, that covers the main costume pieces. I’ll throw in some thoughts on such things as the eye frames/lenses, boot soles, and other details in the next few posts.