Mini Mannequin

Hair and flower accessory credit go to my daughter

Hair and flower accessory credits go to my daughter

I might as well start with a tangent. That’s where I always end up anyway.

I have a nine year old daughter, and would you believe she likes dolls? I know, who saw that coming? Anyway, I’ve always found it slightly exasperating–yet funny and kind of cool–that for almost as long as she’s been getting Barbies and Monster High Dolls, one the first things she does after getting them out of the package is take off the clothes they come with so that she and I can make new clothes for them.

Early on, I had to let go of this particular idea with her toys: “I bought you this, so you take care of it and keep it in its original condition, blah blah…”

For one thing, that seems like kind of a crappy deal. I mean, sure, I pay for most of these things (the ones she doesn’t get from someone else or buy with gift money or whatever). But there was never any statement of “this doll is a loan.” It’s “hey, here’s a doll. It’s yours.” If it’s hers, she can do what she wants with it.

For another thing, that would be kind of hypocritical of me, since I was constantly modifying my action figures. I went through a stage of painting my GI Joes to be super heroes, sometimes adding capes along with the painted-on costumes. It was this thought that, okay, this toy is cool, but I can make it cooler. I can make it the toy I want.

Plus, like me, my daughter likes to do things, to create things. She likes to make things her own. And that’s awesome.

I still get an occasional twinge when I see the dolls with chopped off hair, or missing limbs (the Monster High dolls have limbs designed to be removable, which makes for some cool swapping of limbs, but is also a great design for ending up with partial dolls, limbs removed and never seen again), or whatever. I mean, the things do cost money, and I am turning into a grouchy old man who gripes about money. (But I’m only very selectively frugal. I mean, what I’ve already pumped into this costume/learn to sew thing…And wasn’t I doing this at least partly to save money?) But I love that she has that creative streak in her. And the whole making clothes for the dolls thing has been an off again, on again activity that we do together.

I’ve thought more than once that I should figure out how to make better clothes for her dolls, knowing she would find that pretty cool. I mean, we started this whole thing by just cutting and taping or strapping junk fabric around the dolls, and she thought that was awesome. So to actually make real clothes, with thread and all…

And of course that fits right in to my current project of learning to sew. It’s good practice, requiring some precision on the small pieces of fabric, and allows me to play around with patterns and stitches and measurements without wasting nearly so much time or fabric or thread. So…here I feature my debut Barbie outfit:

barbie_outfit_untuckedbarbie_outfit_side barbie_outfit_back

I thought this turned out pretty well overall, for a first attempt. It could have certainly used some hemming, but I was mainly focusing on the measurements and patterns for the skirt and blouse. Took a couple of attempts for each, and I still didn’t get the blouse measured right around the hips, so I cheated and held it together in the back with the strap. The skirt has a side slit/strap thing to allow it to be put on and tightened. The beg challenge with the Barbie clothes is making them in such a way that they can be put on and still look not too bad.

So, next time I think I will trace patterns from some of the existing clothes that actually came with the dolls, try to duplicate them with some minor changes. But, of course, I don’t want to get too accustomed to the rather different patterns involved in doll clothes. So soon I will be attempting something more in line with my ultimate goal:

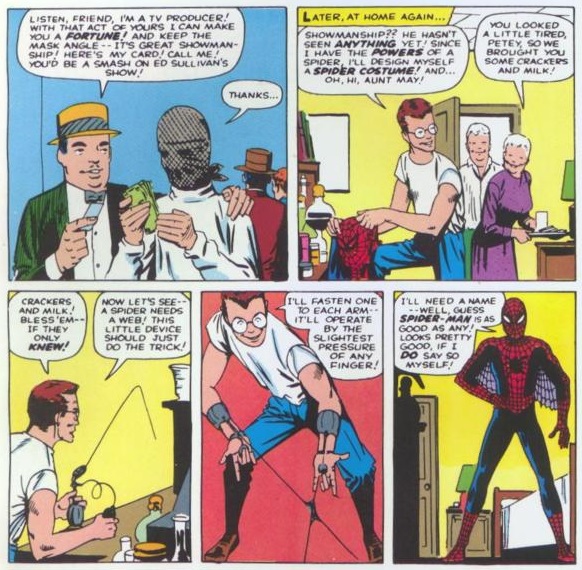
NEXT (or soon, anyway): Sewing made Scarier with Spandex!

The Little-Known Super-Power: Sewing – Part 2

Ultimate Spider-Man Costume Capers

ultimate-spider-man-3-pg1718-proof

The Ultimate Spider-Man comics were a modern reboot of the Spidey story, one of many character/comic title reboots released alongside the still-existing “canonical” characters/titles, but set in a different universe (usually called the Ultimate Universe. Or maybe that’s just what I call it.).

Anyway, in this story, soon after Spidey first attains his powers (in this case from a genetically modified spider rather than a radioactive one), he has a short-lived career as a small-time pro-wrestler with a spider theme. The wrestling organization provides him with a red and blue spandex bodysuit that he then modifies by adding the web pattern and the spider-emblems. A rather convenient approach (see what this guy has to say about it), but more believable than a teen learning to make such a flawless such suit from scratch in such a short time.

But, inevitably, the suit gets ripped and torn and/or completely ruined in the midst of Spidey being Spidey. So, how do the wrtiers deal with the repair needs?

tumblr_n1hp8yYM8j1ser9m9o1_500

In the Ultimate Comics, it was apparently not believable for a teenage boy to be able to repair a spandex costume, so they instead had a teenage girl repair the costume (and make new ones). Is this sexism? Or enlightened feminism? I don’t know anymore. But it did make for some fun scenarios, such as when Petey needed to spring into action only to find out that MJ wasn’t done repairing his suit, or that she wasn’t finished resizing it and it was too baggy.

SPOILER ALERT (Which you might not expect from a blog that is ostensibly about sewing…)

Seriously, if you haven’t read the Ultimate Spider-Man line of comics and plan to (I highly recommend it), stop reading this entry. Of course, if you follow comics, there’s a good chance you know what’s coming anyway.

Ultimate Peter Parker/Spider-Man died. And I mean, really died. Not like, oh, he was dead and now he’s back. He dead. Details here.

But though Ultimate Peter Parker is dead, Ultimate Spider-Man lives on in the form of Miles Morales, a young teen who ends up getting powers similar to Peter’s from one of the handful of genetically modified spiders created by Oscorp and–well, read more here.

miles_morales_spider-man_02

Check out that costume. Sleek. Polished. Nice color scheme.

So, did they officially give this Spidey super sewing powers? No, but Miles does end up strongly tied to the S.H.I.E.L.D. organization (ala the Avengers and Captain America and Nick Fury et al). Nice to have resources. They ultimately (ha. Ultimately. Y’know, like Ultimate…never mind.) provide the above costume for Miles. But he starts out wearing this:

UC-SpiderMan-04-Internal1_thumb[6]

Having decided to honor the memory of Peter Parker by acting as Spider-Man, Miles starts off with a store-bought Spidey costume, with poorly fitting gloves and mask, and weirdo knee pad things. This is a nod to some great early Spider-Man stories where the non-ultimate Peter Parker-Spider-Man ran into some wardrobe malfunctions and had to settle for “off the rack” costumes.

Miles loses at least one suit right before he quits being Spidey for a while, and S.H.I.E.L.D. provides another one. Hey, they can afford it.

Bonus Section

So, for a while, Peter Parker wore a cool black and white suit that he had acquired on an alien world (long story). This suit not only had a much easier to draw pattern, it also responded to Peter’s thoughts (it could flow on and off of him in this liquid-y way), change its appearance to resemble street clothes (or any sort of clothing/outfit presumably), and even generated its own webbing, eliminating the need for Peter’s mechanical web-shooters.

2895930-485658069_81a1448775

The bad news was that it turned out to be a symbiotic creature, leeching off of Peter’s psychic and bio energy and stuff. This discovery came about when he went to the Fantastic Four for help. Reed Richards succeeded in separating the creature from Peter before it was too late, and trapped it (temporarily, but that’s another story–well, about a bazillion stories, really…).

So, Pete was safe from the symbiote, but he was only in his underwear and needed to get home with his secret identity–and his dignity–intact. Johnny Storm aka the Human Torch, ever the “friend” to Peter, took care of this. Or, the secret identity part anyway:

bagman

Ha. Those two.

This little ensemble has become quite a thing in the Spideyverse, and even shows up as an alternate costume in many of the Spider-Man video games.

All right. That concludes my latest side trip on my sewing journey.

NEXT TIME: Back to Sewing: Progress and Projects


The Little-Known Super-Power: Sewing – Part 1

The Martha Stewart of Super Heroes

The Martha Stewart of Super Heroes

When early comic book writers and artists introduced the signature “tights” worn by their super heroes, there was a question–at first largely unanswered–introduced along with those skin-tight suits: who was making these costumes?

Now, I am sure there is a whole history compiled by some comic historian somewhere that addresses how and when different creators addressed this implied question for various super heroes. This guy addresses the same issue with Spidey (more briefly than I do, ’cause he’s concise and I’m not) and mentions other heroes as well.

But I am mainly focusing on the issue of how this issue was acknowledged in the Spider-Man comics–with some mention of how it was addressed in the Marvel Universe at large. This is by no means intended as an exhaustive and deeply researched treatment of the topic.

The Classic Spider-Man Suit Stories

So, back to Spider-Man’s “union suit” as he has been wont to call it. Stan Lee and Steve Ditko didn’t just have ol’ Spidey get powers on one page, and then show up in an unexplained suit on the next. But the explanation offered was definitely a bit glossed over:

makesuitpanels

“I’ll [just] design myself a spider costume…” he says. Yeah. No problem. (As an aside, that panel–the second one in the sequence above–always bothered me. Aunt May and Uncle Ben walk in on him clearly holding what will come to be known as Spider-Man’s costume, and he is saying aloud that he has the powers of a spider and is designing a costume, yet they don’t acknowledgement of any of it. Was this just normal behavior for him?)

Down the road, there are some passing retroactive explanations of him silk screening his design onto a bodysuit, but that still leaves some questions. Where did a teenager get a skintight bodysuit in the sixties (there was no Amazon or eBay then, hard as that is to believe), complete with mask and gloves? I’ll assume that he could build some silkscreening frames and so forth to apply the design, but that would have been quite an operation to perform in the privacy of his bedroom. (And this is all ignoring the creation of his webshooters and the invention/repeated formulation of the web fluid.)

Even allowing for the initial creation of the suit–let’s assume he was able to track down a ready-made bodysuit in his size and silk screen it–in subsequent stories, his suit is consistently getting ripped up and sometimes ruined in fights with bad guys. This was actually one of the things that made Spidey so relateable. He had problems that he had to deal with on his own, without the benefit of wealth like Iron Man and the Fantastic Four, or the support of a larger organization like Captain America or other Avengers. We often see a scene of Peter Parker dealing with the latest decimation of his duds:

tumblr_lyya0fbMDZ1roej9io1_500

He says he’s no seamstress, but Petey successfully repairs his suit again and again, by hand. A spandex suit! (Or a similar material–but apparently spandex was invented in 1959, so this could’ve been spandex I suppose.) Now, maybe Steve Ditko and later artists didn’t care to draw the details of extensive repair stitches, but it seems like there would have been some visible repairs in between Peter making new suits. And yes, he did make many entirely new suits along the way.

Clearly, the bite from the radioactive spider gave our hero powers beyond the “proportionate strength and abilities of a spider” (don’t question it; it’s science). He was also granted the spider’s natural facility with silk. And…spandex.

Years later, Marvel comes up with a very fun explanation not only for Spidey’s costume needs, but for those of the majority of the heroes and, yes, the villains too. A New York tailor named Leo Zelinsky ends up specializing in making costumes for heroes and villains (servicing them on alternate days). Zelinsky owed Spidey a particular debt of gratitude for a little life-saving the webslinger performed. Read more here and here.

So, what about in the modern age, where we demand great deconstruction and “realism” in our super heroes?

NEXT: Ultimate Costume Capers

Digital Design Woes

Son of a--

Son of a–!

A Love-Hate Relationship (about 10% love)

So, mixed progress on the design side of this costume journey. And that was supposed to be the easy part!

Note: if you’re not a computer/graphics type of person, you may or may not want to read this stuff. If you are a computer person, you may want to read it just for the opportunity to scoff at my misunderstanding of the interaction between hardware and software. Feel free to correct me in addition to scoffing.

Anyway, as I mentioned before, I was running into trouble in Photoshop with the full-size template file for the costume design and resorted to using my favorite free image editor–Paint.NET–to create a sort of draft design. Eventually, once I work out the issues with processing the full-sized file, I can convert the key layers of my draft design into vectors that will scale up to full size with no worries. That’s the theory anyway.

I’m working with Adobe CS6 on a Lenovo tablet. It’s a secondhand device, and I mostly use it for web programming in Dreamweaver, including some relatively small, relatively low-res graphics created in Fireworks and/or Paint.NET. I don’t usually need the oomph and abilities of your Photoshop or your Illustrator, so I never gave much thought to processing power. Until now.

I knew the costume template file was big. The original is a 185 MB tiff image, 8700 X 13950 pixels at 150 dpi. I didn’t expect editing it to be lightning fast or anything, but I thought, hey, if this is something meant for your average user to download and edit, how bad can it be?

But I was immediately running into a lot of slowness with opening it, making certain edits… And then 2 out of 3 attempts to save any changes resulted in Photoshop crashing. Certain attempts to place files or make certain changes gave me memory (RAM) errors, etc.

It seemed like a good time to start thinking more about the processing power that I hadn’t been thinking too much about. Turns out I’m on a 32 bit install of Windows, which I kind of knew. But I had forgotten that 32 bit Windows can only use up to something like 4 MB of RAM. My system is using 3.31 of the 8 MB installed (Why is there 8 in there in the first place? Beats me.).

So, no wonder I was having the issues! The 32 bit install of Adobe and the system limits of the 32 bit Windows install were choking on the template file. That sucks. But there is good news.

I am going to be able to migrate to a 64 bit install, and a buddy is even hooking me up with his old Solid State hard drive. So not only should I be able to get the benefits of 64 bit Adobe CS6 and the 8 MB of RAM, the faster access from the SSD should also speed things up nicely.

In the meantime, while I’m getting that sorted out, I’ve been working on an alternate design for the webbing pattern that should be done soon. I’m going to try something that’s less of a random “Shattered Dimensions/Superior Spider-Man” web pattern and more of a dense, classic Ditko pattern. You know what I’m talking about, right?

Also, I need to pick out my next sewing project and get that started, armed with the lessons I learned from my near-Titanic-esque maiden voyage.

NEXT: I am not really sure. 

The Horror…

Meh.

Meh.

Content Warning

Summary of  the first project–A-Line Hemless Skirt–continued…

Based on the above image, you might think I was too hard on myself with the title of this post. But I just wanted to ease you in. What follows is not for the faint of heart. If you have young children–or tailors or seamstresses with you–it might be a good idea for them to leave the room.

Either way, the skirt in the above image might easily be mistaken for the work of a middle school student in a Home Economics class on day 1 who had never touched a sewing machine before and doesn’t know what skirts look like. (Or am I giving it too much credit?) The seams are crooked (made apparent by the use of what was apparently the most noticeable color contrast combination available); the fabric is bunched up around the seams; the edges of the material are unevenly cut. But this hypothetical student would probably not be subject to the teacher telling him that there is no hope and ejecting him from the classroom.

Until…

Glorp!

Glorp!

Okay…yeah. Let’s go ahead and rip off this Band-Aid™ and show the rest… [Deep breath…]

Ooh...

Ouch.

Uuuuhhh....

Uuuuhhh….


At this point, what was originally intended to be a skirt had become more of a piece of practice material. Don’t think that I didn’t know that I was cranking out a horrible abomination. I was just powering through, getting some experience with the machine, with trying to control the stitching and fabric as it moved through. In the process, I got the opportunity to learn to deal with some important issues and obstacles:

* the thread breaking
* the bobbin thread running out
* reloading the bobbin from the spool of thread on top
* learning what happens when you forgot to put down the presser foot
* etc.

We’ll get back to some overall lessons at the end. In the meantime, there is this bit.

That's almost okay...

That’s almost okay…

This is the zipper that I–what’s the word, installed? Anyway, I felt a mixed sort of pride here. On the one hand, I sewed the sides in quite effectively. Minimal bunching. It functions. On the other hand…the top and the bottom.

The gap at the top is obvious. But I left that sort of on purpose because look at that white trim mess. The bottom, I just didn’t plan ahead. (If you can’t see, there’s a gap between the seam of the skirt below the zipper and the zipper itself.) I think I know what to do about that next time.

The Aftermath

So. Yeah. This portion was where I really had to keep reminding myself of what I think was Lesson 2 in my previous post: be prepared to Fail Hard or Fail Hard with a Vengeance (or something like that). And by fail, I mean, produce an unusable item yet learn lessons for subsequent projects. There’s probably a better “Self-Esteem-Friendly” word than “fail,” but just look at the pictures above and try to get another word in your head besides “fail.” Go on. I’ll wait.

Anyway…These will evolve as I learn but for now…

Lessons from a Newbie…

1) Pick Your Projects Carefully: Choose projects with instructions adequate for your sewing knowledge. Read them as if you’re doing the project. If you don’t understand what you’re supposed to do while reading them, you’re probably not going to understand once you get started. But balance this with Lesson 2…

2) Do Your Research: Lesson 1 here was about picking appropriate instructions. But if you feel like the instructions are pretty good and there are just certain general sewing tasks that you need more info on, you could probably supplement with some external research. For example, I could have supplemented this project with research on a-line skirt patterns and putting in zippers. (Though honestly I think I could have used a more suitably detailed set of instructions overall.)

3) Patient Preparation: Take time to get the pattern right, and take time to get the measurements correct and cut the pieces well. If you don’t start with the right shapes and sizes for the fabric components, it’s going to be hard to get it all to turn out right.

4) Use an Iron for Pete’s Sake: I try to avoid admitting when my girlfriend is right, but since she isn’t likely to read this (since very few people are likely to read this), I’ll do it. She passed on a suggestion from her mom (so I guess technically I’m admitting that my girlfriend’s mom is right, which is just good brown-nosing, really) that I use an iron to flatten out seams and such. This is good advice. I think having an iron handy throughout this process would have been good, not only for seams, but for use on the folded pieces of fabric used for the trim on top and bottom. It would have made it easier to work with. As it was, it kept wanting to come unfolded, because, you know, fabric isn’t paper.

5) Choose the Right Fabric: This is something I think will come with experience, but when you pick fabric, don’t just focus on color or price (my two main considerations when purchasing). Think about how easy or hard it might be to work with in terms of stretch and slipperiness, whether the edges look like they might be stringy, etc. In this project, the white fabric for the trim got really stringy on the edges. My understanding was that no hemming would be necessary, but I think I should have hemmed the edges of the white fabric. Is there a type of fabric that wouldn’t get stringy like that? I don’t know. I suppose I will learn as I go.

6) Learn to Undo Things(and be willing to do it): So, being a guy who does most of his work, creative and otherwise, on computers, the one thing I miss in physical creative pursuits such as sewing is an “Undo” button. Lacking that, I need to do research on how to undo stitches and seams, the graceful way to recover from thread breaks and the bobbin running out, etc. And I also need to learn to not “power through” when I know things aren’t going well. But I think that as I start getting better at this, and find myself doing well on a project, I will not be as likely to do that when a reversible problem crops up.

7) Try, Fail, Learn, Repeat: When you’re just starting out, you’re going to produce some sucky stuff. Laughably sucky. I’m even going to go out on a limb and guess that even once I’m better at this, I will still produce some horrible stuff. But that’s natural. Comes with the territory in any task or project, creative or otherwise. Just be ready to fail. And if you learn from it, it’s not really a failure. Well, that’s not entirely true. I mean, again, this is not an image of success:

Ooh...

But you know what I mean. Fail. Learn. Fail less. Learn more. Etc.

NEXT: Digital Design Woes

Part 2b: Sewing is Hard

The Fall

My girlfriend is strangely interested in this whole process, and I’m pretty sure it is similar to why people watch the beginning of a season of American Idol. (Is that still on?)

Anyway, my girlfriend suggested that I could start with a simple project, like a skirt. She sent me some links, and I thought that the “hemless A-Line skirt” sounded like a good one to try. So, I made a list of basic sewing supplies and accessories that we didn’t have around the apartment, a list of the fabric and such that I needed for the project, and made a trip to the fabric store before rushing home and immediately getting started.

Let me go a little out of order by skipping ahead to the lessons I learned from this project before I show you anything I actually did.

The Lessons

1) Read the instructions carefully ahead of time and make sure that they are sufficient for your knowledge of sewing.

2) Don’t try to use the stitching as decoration when you suck at sewing a straight line, especially if you’re just doing it because you’re too lazy to change the thread.

3) Be ready to fail and fail hard on your first project. (Unless you’re some kind of sewing prodigy, in which case I hate you.)

4) Consider it a learning experience. The frustration is normal, but take the lessons you’ve learned and keep going.

The Gory Details

So, the instructions were, for my needs, inadequate. Maybe for someone who has at least some experience sewing, and who knows how sewing patterns work… {shrug}. The instructions just did not do a very good job describing in words what to do, which would be fine with some good pictures to make up for that lack. I mean, this kind of thing is hard to describe in words. But there were only maybe four or five pictures, and most of them were pictures of a lady standing and showing off the finished skirt. I think those were just included to taunt me later.

Anyway, my bad for not reading carefully and realizing there was not enough for where I am in terms of sewing experience. (See Lesson 1.)

Vaguely skirt-like.

Vaguely skirt-like.

I took my girlfriend’s measurements, made the pattern on wax paper, following the  instructions as best I could. But what I needed was an image of the final pattern and fabric pieces for comparison, and maybe more of a method to be sure it was proportioned. I am not a fan of math and numbers and such, but this would have been a good place for more of that.

I cut the fabric for the front ad back, pinned it on one side for sewing (as pictured above), and it seemed okay to me. In fact, this is probably the most okay it was for the rest of the project.

skirtfull_stitched_border

I sewed the halves together. It was tricky, as the fabric was kind of heavy and unwieldy, which made it hard to sew straight. But I got it done. I think the inside seam will be uncomfortable (assuming this is ever wearable), but it wasn’t too horribly done.

Above is pictured the stage where things started getting a bit confusing. The instructions call for a strip of accent fabric for the waistband and the bottom edge, to eliminate the need for hemming (hence the “hemlessness” of this particular skirt). I did not understand how the straight strip of fabric was to be attached to the curved waistline of the skirt fabric without one or the other getting severely scrunched in the process.

So I did what seemed like a logical thing, and cut the waistline straight across.

I have yet to learn whether or not that was a really bad thing to do. It’s really kind of a moot point considering how things went from there.

hmmm...

hmmm…

Things just got sloppy. For one, the cut edge of this fabric was all stringy. I should have hemmed it, but that would ruin the point of a hemless project, right? And then there is the dark stitching. I thought, “hey, a zig-zag stitch will look clever and decorative contrasted against the white. And I really don’t want to change the thread.” Maybe it would have looked clever, if it were sewed straight. (See Lesson 2.) Plus, I should have maybe ironed the strip to keep it neatly folded along it’s length, pinned it more securely, etc. Point is, this looks like crap. (See Lesson 3.)

I was tempted to abandon this project and move on to another, but I am way too stubborn for that. Plus, there is a lot more to learn here. I still need to sew on the bottom border:

bottompinned

And then I will need to sew in a zipper on one side. All of that will be good practice, more lessons learned. (See Lesson 4. Which is kind of a Meta-Lesson about lessons, I suppose. ‘Cause I’m deep like that.)

NEXT: More Digital Design Woes. Or maybe more Scary Sewing Woes. I haven’t decided yet. But you can count on some kind of Woes.

Part 2: Sewing is Scary

sewingmachine

Largely Irrelevant Background Info

Technically speaking, I can’t say that I have never sewed. In 8th grade, I had to take a vocations class where we rotated through different “job stations” every week or so. The stations gave us the opportunity to do tasks from a variety of vocations, such as wood burning, brick laying, drafting, and sewing.

The task at the sewing station was to cut the pattern for and sew together a slipper on a sewing machine. What I came up with certainly qualified as more than one piece of fabric connected together by strands of thread in stitch-like configurations. If that qualifies as sewing, then yes, I have sewed.

Otherwise my experience includes messily hand-sewing portions of ripped seams in my daughter’s clothes once or twice, and some very messy attempts to help her hand-sew clothes for her dolls. I mean, messy, like, we actually do better when we just tape together the fabric than when I try to sew it.

My point is, I suck at sewing. So do not be shocked by what you may see here.

The sewing machine pictured above is on long-term loan from my friend and colleague Angie, who is awesome (and not just because she loans me things). She says she and her partner only own it for Angie’s mom to use when she visits, so she is glad to see it get some use. My girlfriend has some interest in getting back into sewing, and my daughter would really like to learn to sew. So (is it just me who’s very conscious of every use of the words “so” and “sew?”)  if this all goes well, we might just end up getting a machine of our own. We’ll have to see how traumatizing the whole experience is.

Pride

I decided to start with sewing a stitch, because that seemed logical. But first, there was the obligatory “how does this thing work” period, where I fussed with getting it threaded properly, messed around with the bobbin (Googled “what the Hell is a bobbin?”), and finally got things set up right. Then I produced the following masterpiece:

Does this look crooked to you?

Does this look crooked to you?

But I had gotten my “sew legs” as it were (Like “sea legs.” No? Doesn’t work?) and dove in, cranking out this little doodad:

You keep your shivs in it.

You keep your shivs in it.

Not too shabby. I was unreasonably proud of myself. In fact, I’m gonna go out on a limb and call it hubris, that whole “pride cometh before the fall” sort of thing.

NEXT: The Fall

Part 1: Designing the Costume

Choices, Choices…

So, seeing that Spidey has been around since the 60’s, and seeing that comics are what they are, there is not just one Spider-Man costume to choose from. There’s classic red and blue, black and white symbiote, Secret Invasion, Future Foundation, Ben Reilly as Scarlet Spider, Ben Reilly red and blue… If you don’t know what any of that means, then that means you’re not a Spider-Man geek. And that’s okay. If you’re interested in a very brief overview…

http://mightymega.com/2014/04/25/spider-man-and-his-amazing-threads-infographic/

Anyway…I want to do a costume that is recognizable to the general public as Spider-Man, but I want it to be somewhat unique.  That means I need to a version pretty close to the classic red and blue that people know from the cartoons and movies (And maybe from the original Electric Company. (Bonus! Watch this video to see a young Morgan Freeman playing a New York cop!)).

Some versions of the Red and Blue are actually Red and Black, and I like that look. A bit different than the mainstream portrayals, but still recognizable. Then there are the various styles of his webbing, his chest emblem, and the emblem on his back. And the eye lenses. So many choices!

The Semi-Final Design…

So, I ultimately decided to go with:

1) Red(dark) and Black (possibly subtly bluish-black)

2) A “randomized” webbing pattern rather than a uniform pattern. This is as much for having more “play” in matching up the pieces of the costume pattern as for aesthetic reasons.

3) Eye lens shapes that are based on the “Hammond” version of Spidey from the gloriously horrible Spider-Man TV movies of the 70’s.

4) The back emblem from the “Classic Superior Spider-Man” (long story)

5) A chest emblem that is, I think, from the original Tobey Macguire movie costume.

Here is the basic idea:

designpreview

So, probably a good time to give credit to this site: http://www.4neodesigns.com/

Here you can find and purchase what are basically bodysuit patterns with various comic and other character designs, or you can do what I did, and purchase the “Male Muscle Base.” In the above image, the muscle shading is the base showing through the semi-transparent red and black color layers. I did not do that shading. I might not even use it. It looks cool on the final product, but I don’t know if it’s the look I want.

The Horrible Technical Difficulties…

So, I have the basic design. But from there, things are getting a bit annoying. The actual file for the template is a MASSIVE .tiff image file, and either my computer is too sluggish to handle it, or there is something wrong with my Photoshop install. It kept locking up and shutting down. I had to make a 25% version of the image to do the draft design work above in a separate program (a free image editor called Paint.NET, which I highly recommend as a free image editor).

I have been able to create larger versions of the layers to move to the full size file using another free program, a layout program similar to Illustrator (though admittedly not as powerful). I actually created an SVG (vector path) version of the webbing layer to try and play around with the line styles and thicknesses on the fly, but that has made my processing power issues even worse, trying to handle that many paths at once. Even the PNG version bogs down Photoshop, which, again, keeps choking, even on the base file.

I will hopefully have access to a more powerful machine in the near future. Otherwise, not sure how to proceed. I might try reinstalling my Adobe Suite. I feel like there are some other behaviors going on that suggest this is not just a memory/processing power issue.

UP NEXT: My progress in the Scary World of Sewing!

Something to Obsess Over…

Two things:

1) I have been a Spider-Man fan since I was 7 or 8 years old.

2) I always need some project to obsess over. Preferably something that gets me in over my head.

I got it into my head that I need to update my Spider-Man costume. (What? Of course I have a Spider-Man costume. Don’t you?) The one I have I bought for $40 bucks from a China-based eBay store. It’s passable, but not exactly “canon.” I mainly got it to wear at the library handing out candy for Halloween, where I worked as a Youth Services Librarian.

Anyway, I want a cool new Spider-Man costume. So I started researching. I didn’t want to buy one pre-made. I wanted to have some say in the design. I looked at some different options, starting with the process this guy used, which was basically…

a) Purchase template for a costume design

b) Send it to a fabric printer to pay to have it screen printed on Lycra

c) Send the printed fabric to a seamstress (this talented lady did this dude’s) and pay for her to assemble/sew it and add zippers and so on

d) Pay for a custom face shell and lenses from this guy (very cool stuff).

e) Cannibalize some lightweight shoe soles to attach to the otherwise sock-like feet of the costume.

But you’ll notice a couple of things here. One, there is a lot of purchasing there: $50-80 for pre-designed templates, $300 for the sewing, and I haven’t looked at how much for the lenses/face shell. Two, there is only a little bit of “in over my head” type making of things there.

Now, no offense to anyone who pays for the services! There is a very good chance I am going to wish I had gone that way. But I decided that I do want to get in over my head. But not financially. So I am going to strike a balance between paying for this and doing it myself. Here’s the scary plan…

a) Order a base “Muscle Template” for the pattern, and design my costume on top of that (I may or may not allow some of the muscle shading to show through my colors and pattern)

b) Send it to a fabric printer to pay to have it screen printed on Lycra (I really can’t do that part.)

c) Learn to sew

d) Learn to sew Lycra

e) Practice sewing a lot of Lycra

f) Sew the costume together, including the sleekly hidden zippers.

g) Lenses: I haven’t decided yet, but I want to try to make them myself.

h) Cannibalize some shoes for the soles, etc.

So…yeah. This is gonna be kind of crazy. And I decided to keep a record of it. Don’t know if anyone will generally care, but it will make it easier to share with my friends and family. Who also might not care. But since they’re friends and family, I expect them to at least pretend to care a little bit.

Thanks for reading (or at least skimming)!