

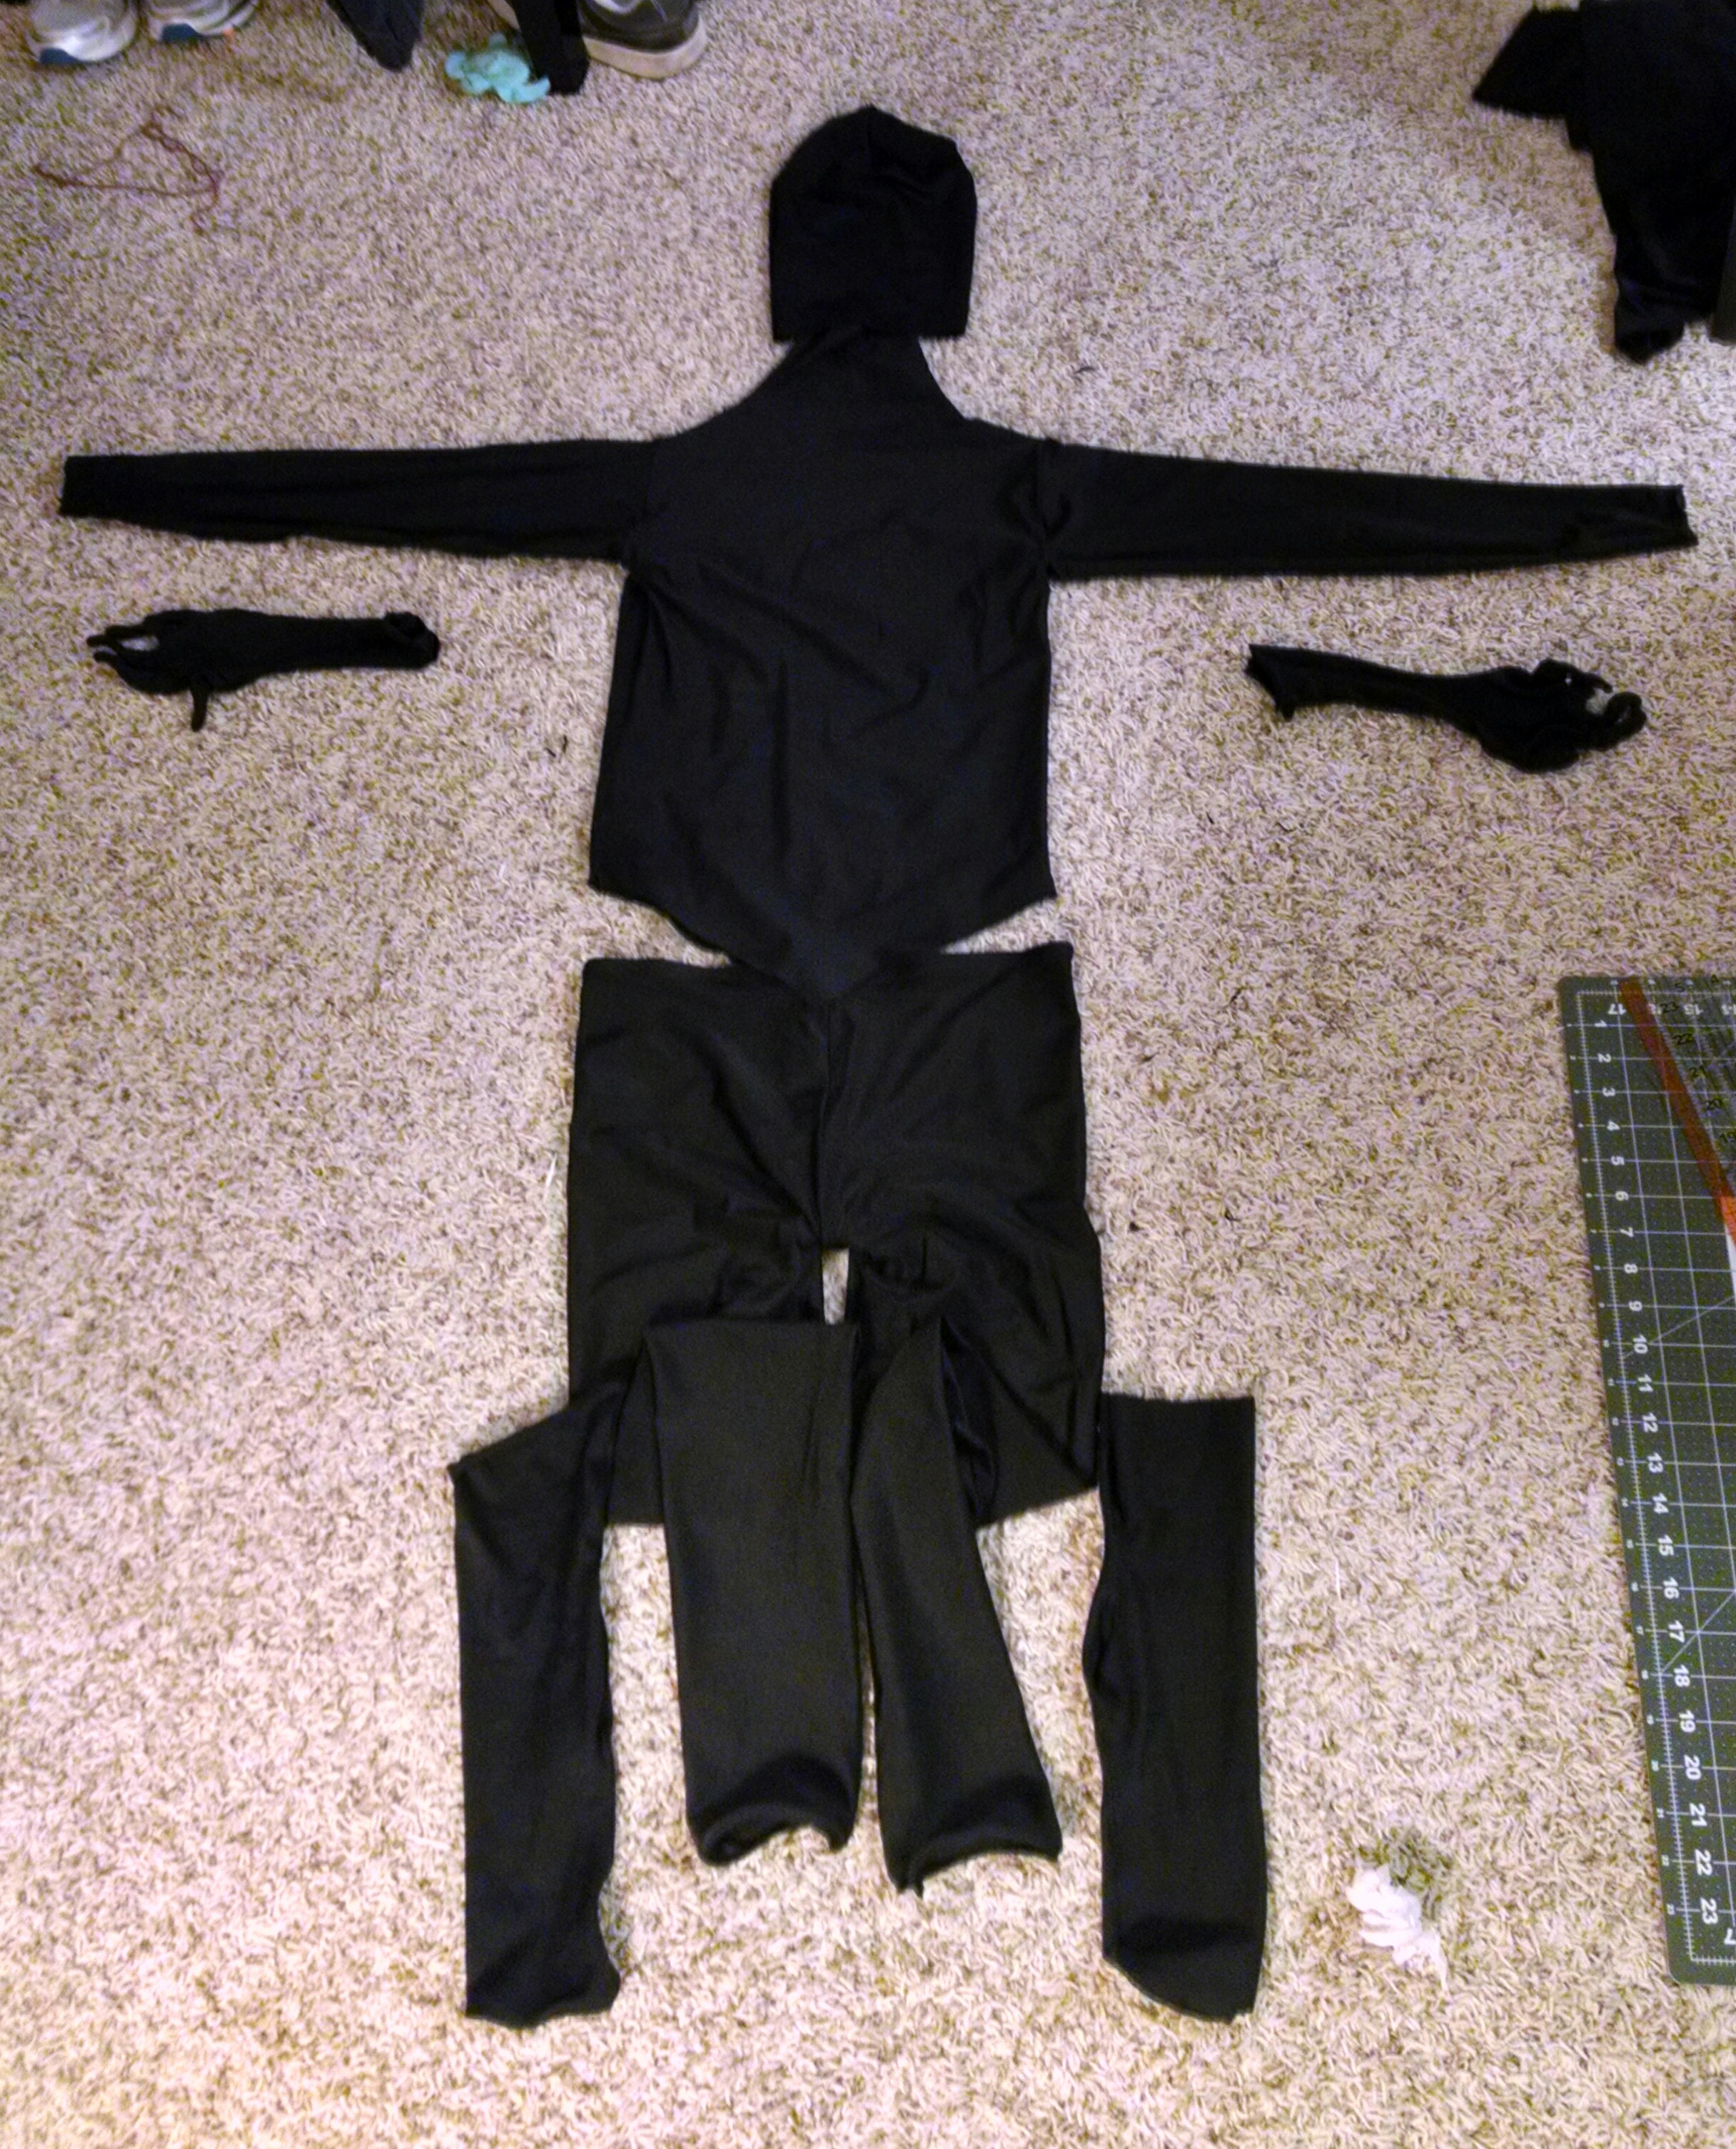
So, I’ve done all the pieces, but I am definitely not done. Back to that in a minute.
The Gloves
I had originally imagined that these would be the hardest to pattern out and sew. Turns out that they were just the hardest to sew. But the patterning part was not bad at all, thanks to what I think is a rather ingenious little “Instructable” post.
I used chalk instead of a Sharpie to trace my hands, and that worked fine. It got a little faded out during sewing, but I just re-sketched the lines as needed.
Sewing was a pain! I knew that the ends of the fingers would be crazy turns to make, but it was even harder than I imagined. For each finger, I ended up doing a seam on one side that curved in toward the tip as best I could, then a seam on the other side that curved in as best I could, ending up in pointy fingers. After I finished a whole hand, I went back and sewed straight lines across the tips to square off the points. Not ideal, but it worked okay once I trimmed the fabric around the seams.
To do different next time (besides getting better at the fingertip curves): I will spread my fingers out more. I ended up with funky areas between the fingers. Plus, I will not trace quite so close around the wrist/forearm, maybe. It’s a pretty big stretch to get my hands in through the wrists!
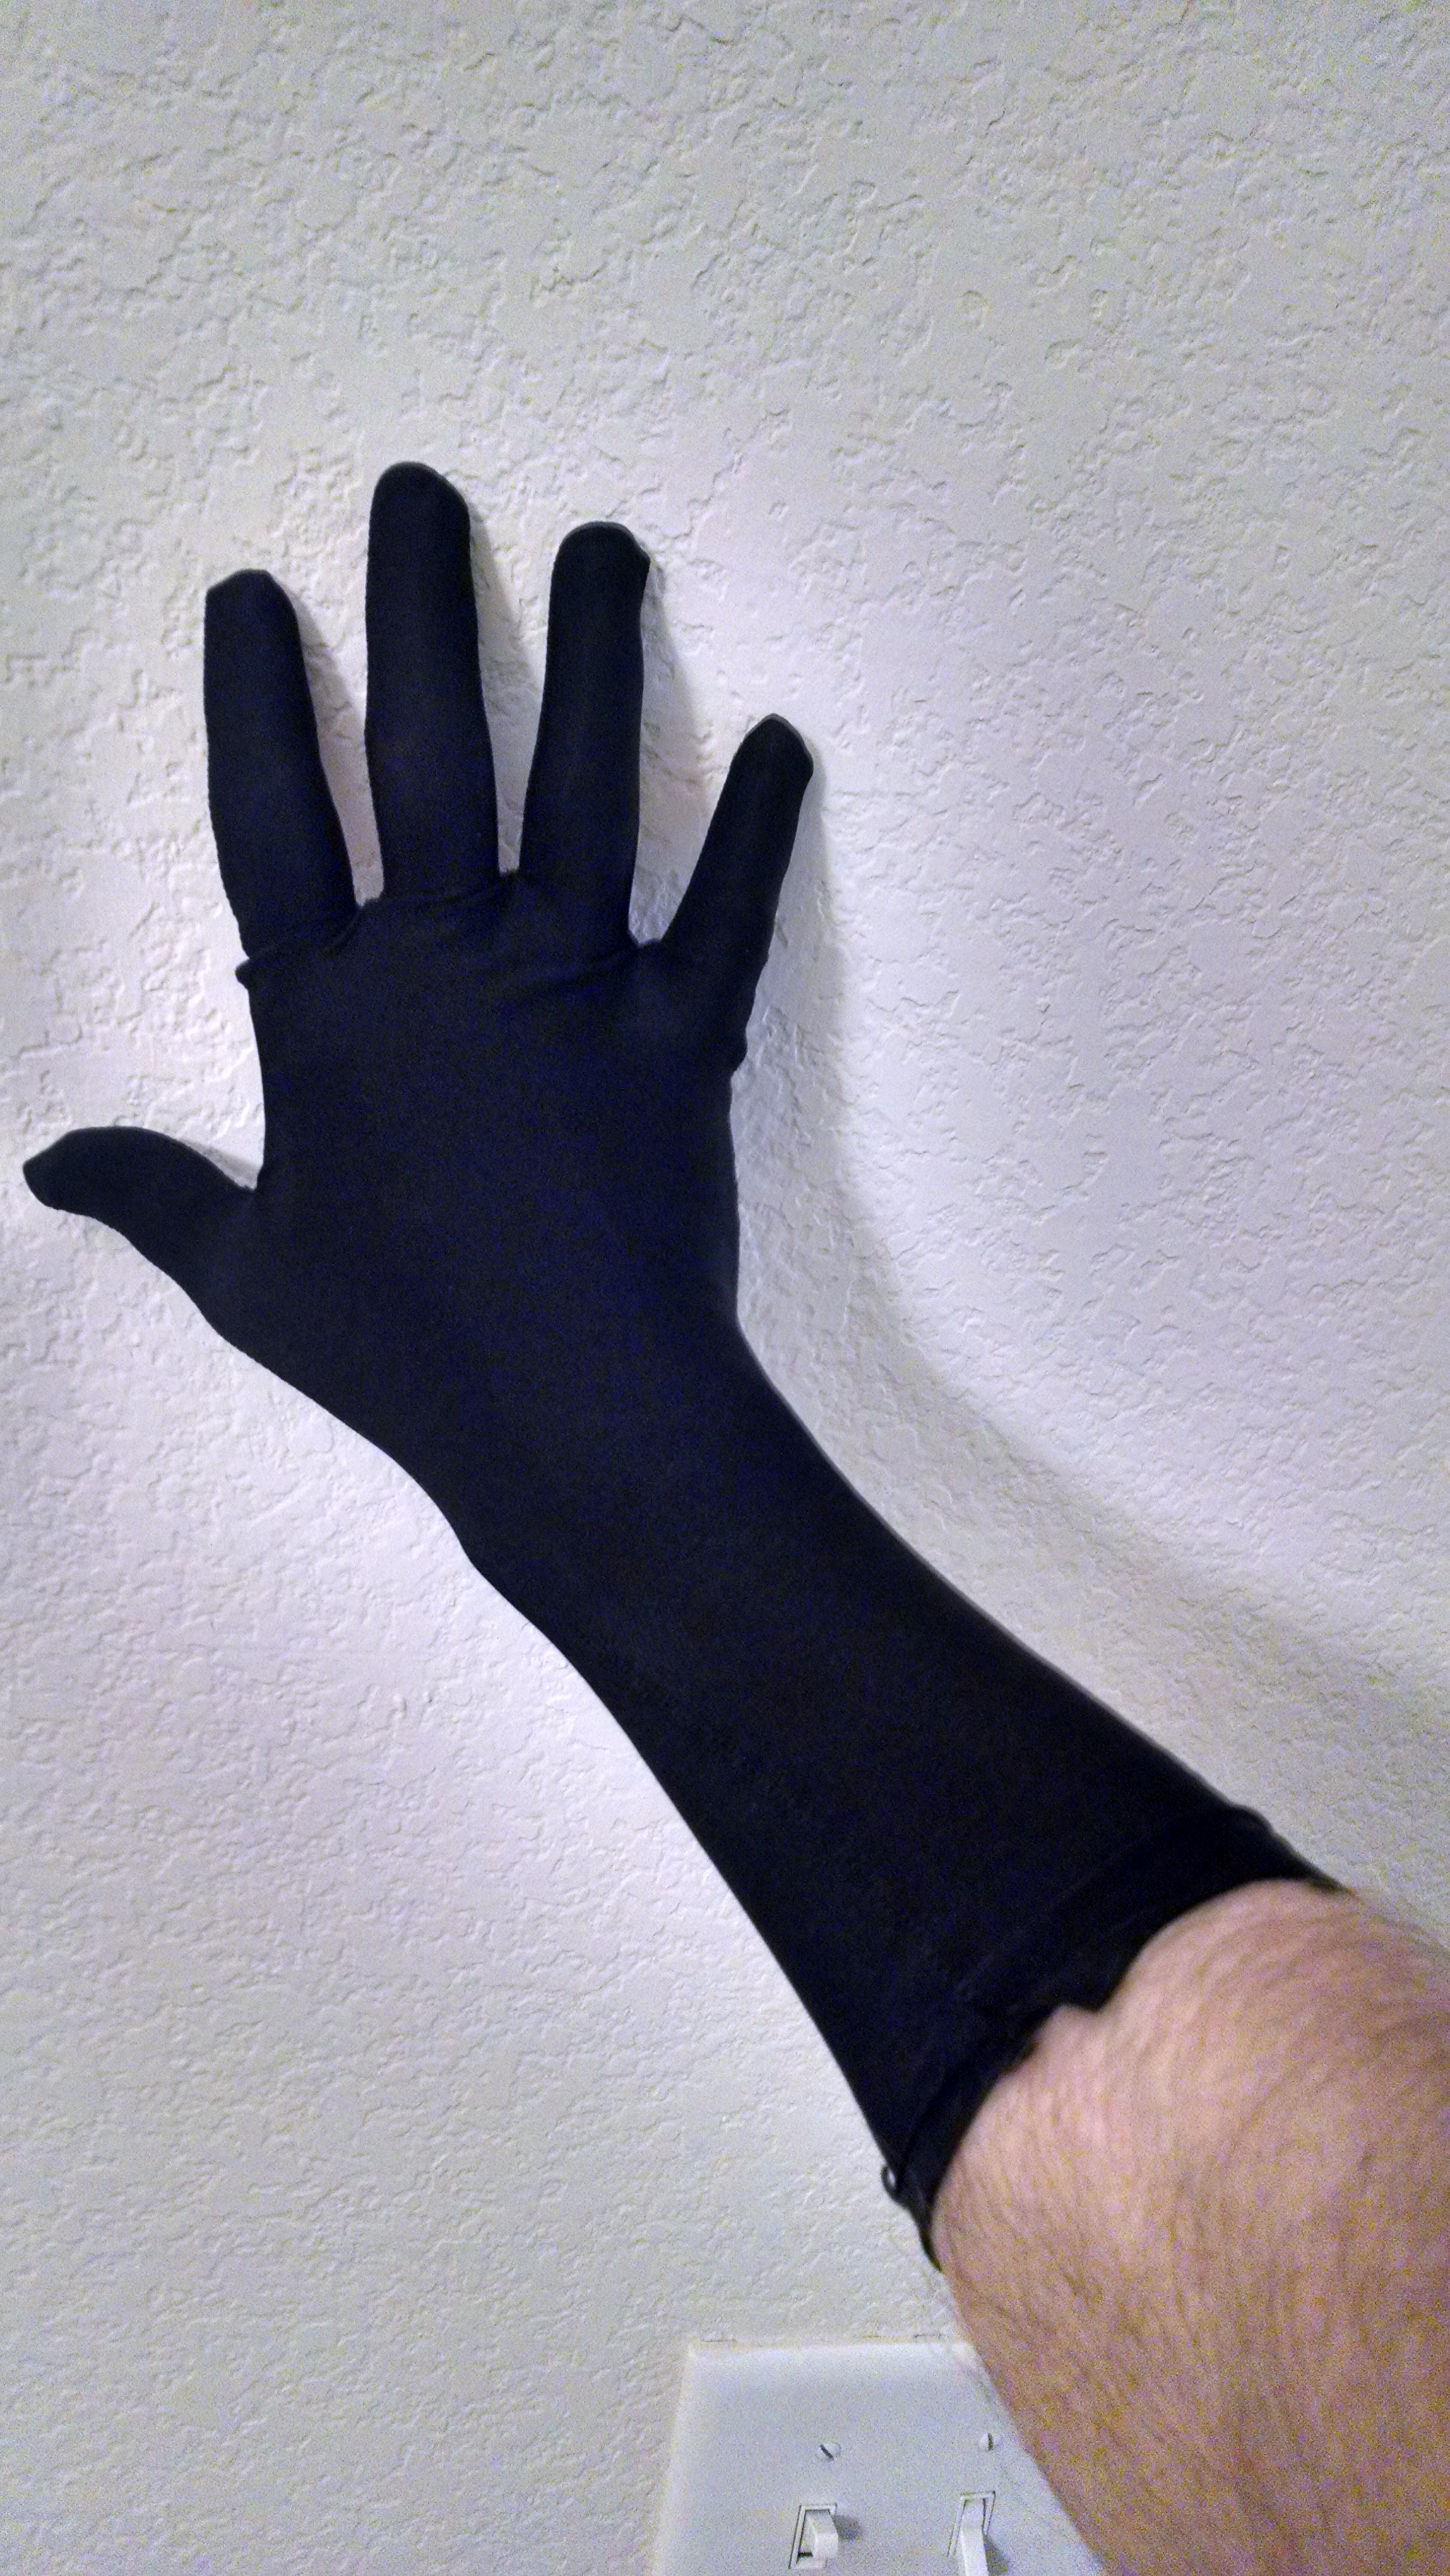
Anyway, the result:
The Mask
I said above that I originally thought that the gloves would be the hardest to pattern and sew. But if I had even thought about it for three seconds, I would have reserved that fear for the mask. I had it last on my list of parts to make, and when I got to it, I suddenly thought: “Wow. That’s gonna be kind of hard, isn’t it?”
I started by looking up the way to do measurements. The Somewhat Stretchy guy I’ve mentioned before has this page about hoods on his site, including the following images:

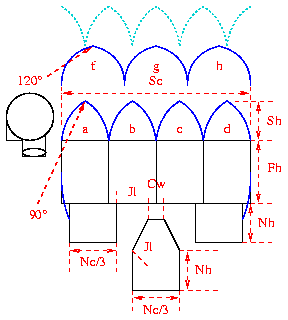
My first thought was “Uuuuhhhhh…” I think I might have drooled a bit.
Actually, now that I have stumbled through doing the mask another way, the above pics make a lot more sense, and i will likely revisit that method later. But at the time, I thought, yeah, there has to be another way.
And actually, this is how I learn. I have to suffer through cobbling together my own understanding via reverse-engineering, make a few mistakes, and then start having those “ah-ha!” moments. That’s how I have learned–and continue learning–a lot of my web programming skills.
In the case of the mask, I started with my existing Spider-Man costume’s mask. I had every intention of literally cutting it apart and tracing the shapes, but I couldn’t bring myself to do it. So I mentally deconstructed it instead. (I used paper too):
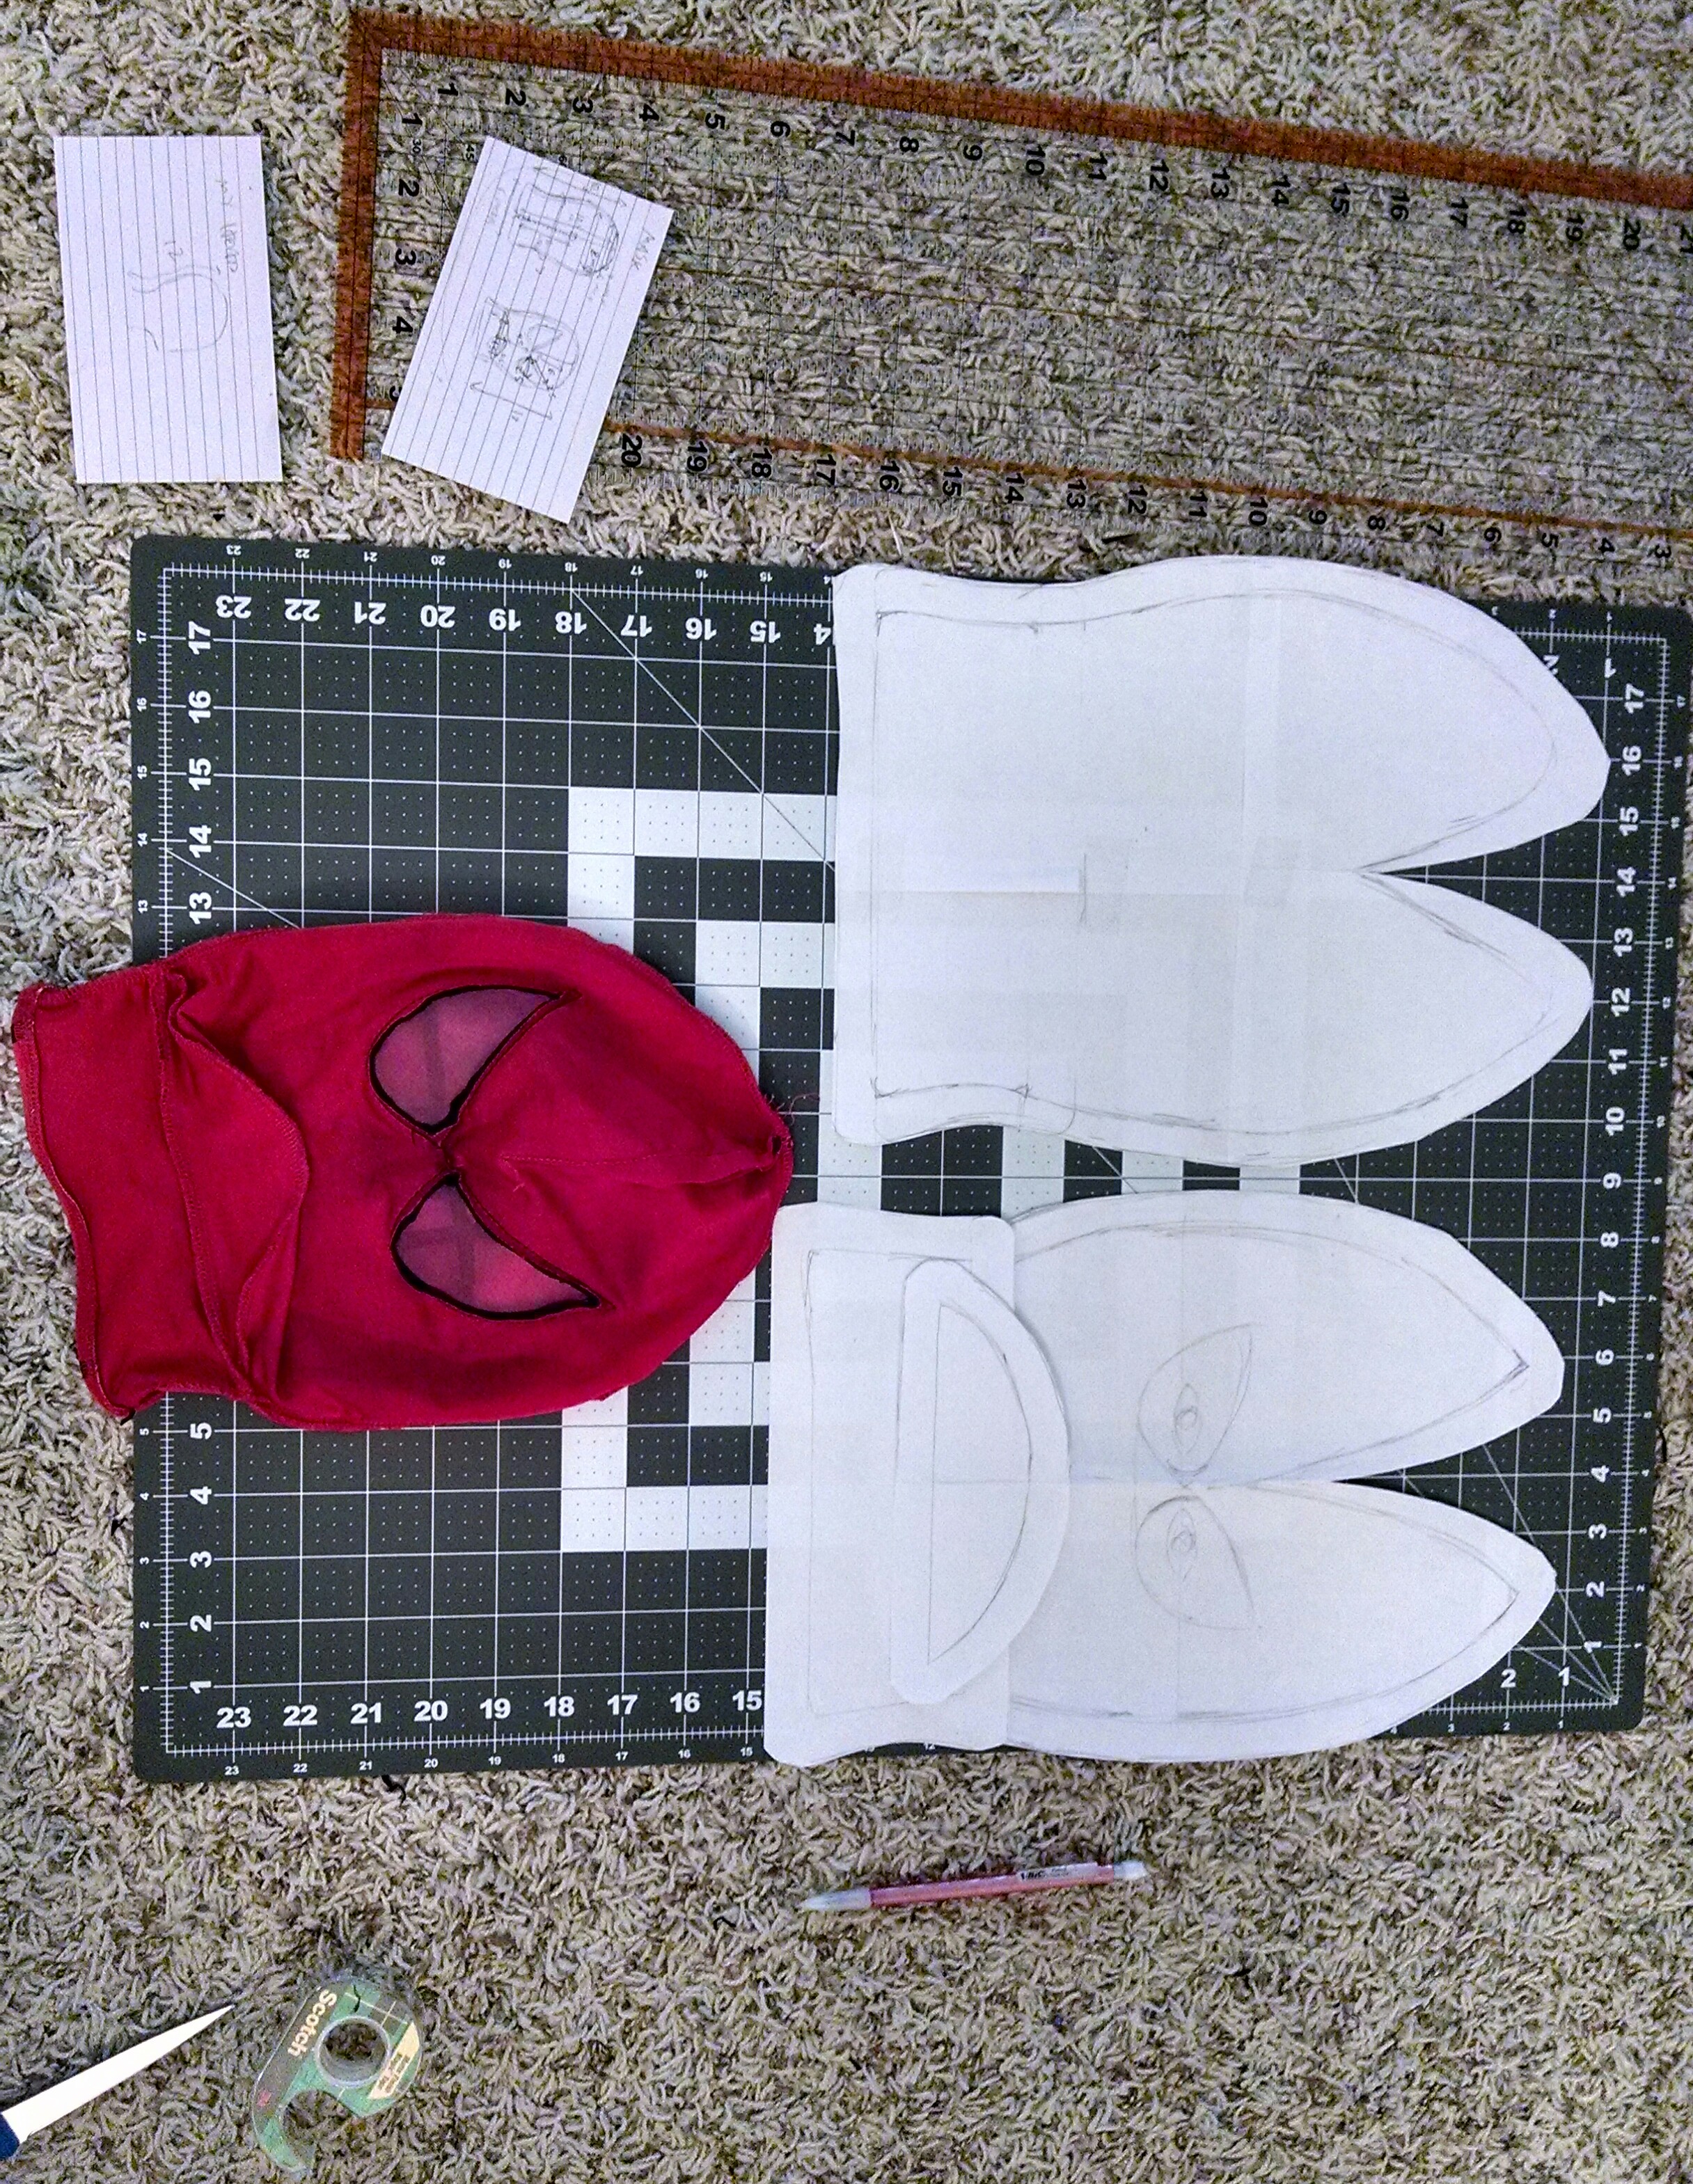
You can see the superficial, crude resemblance to the math-y diagrams above. And if you’re more perceptive than I am (which is pretty likely) you can see a couple of silly oversights that will come back to bite me.
But I cut it out and started figuring out how to sew what to what (I feel like I’m getting better at that part, which was not intuitive to me as a non-sewer).
And here we go…
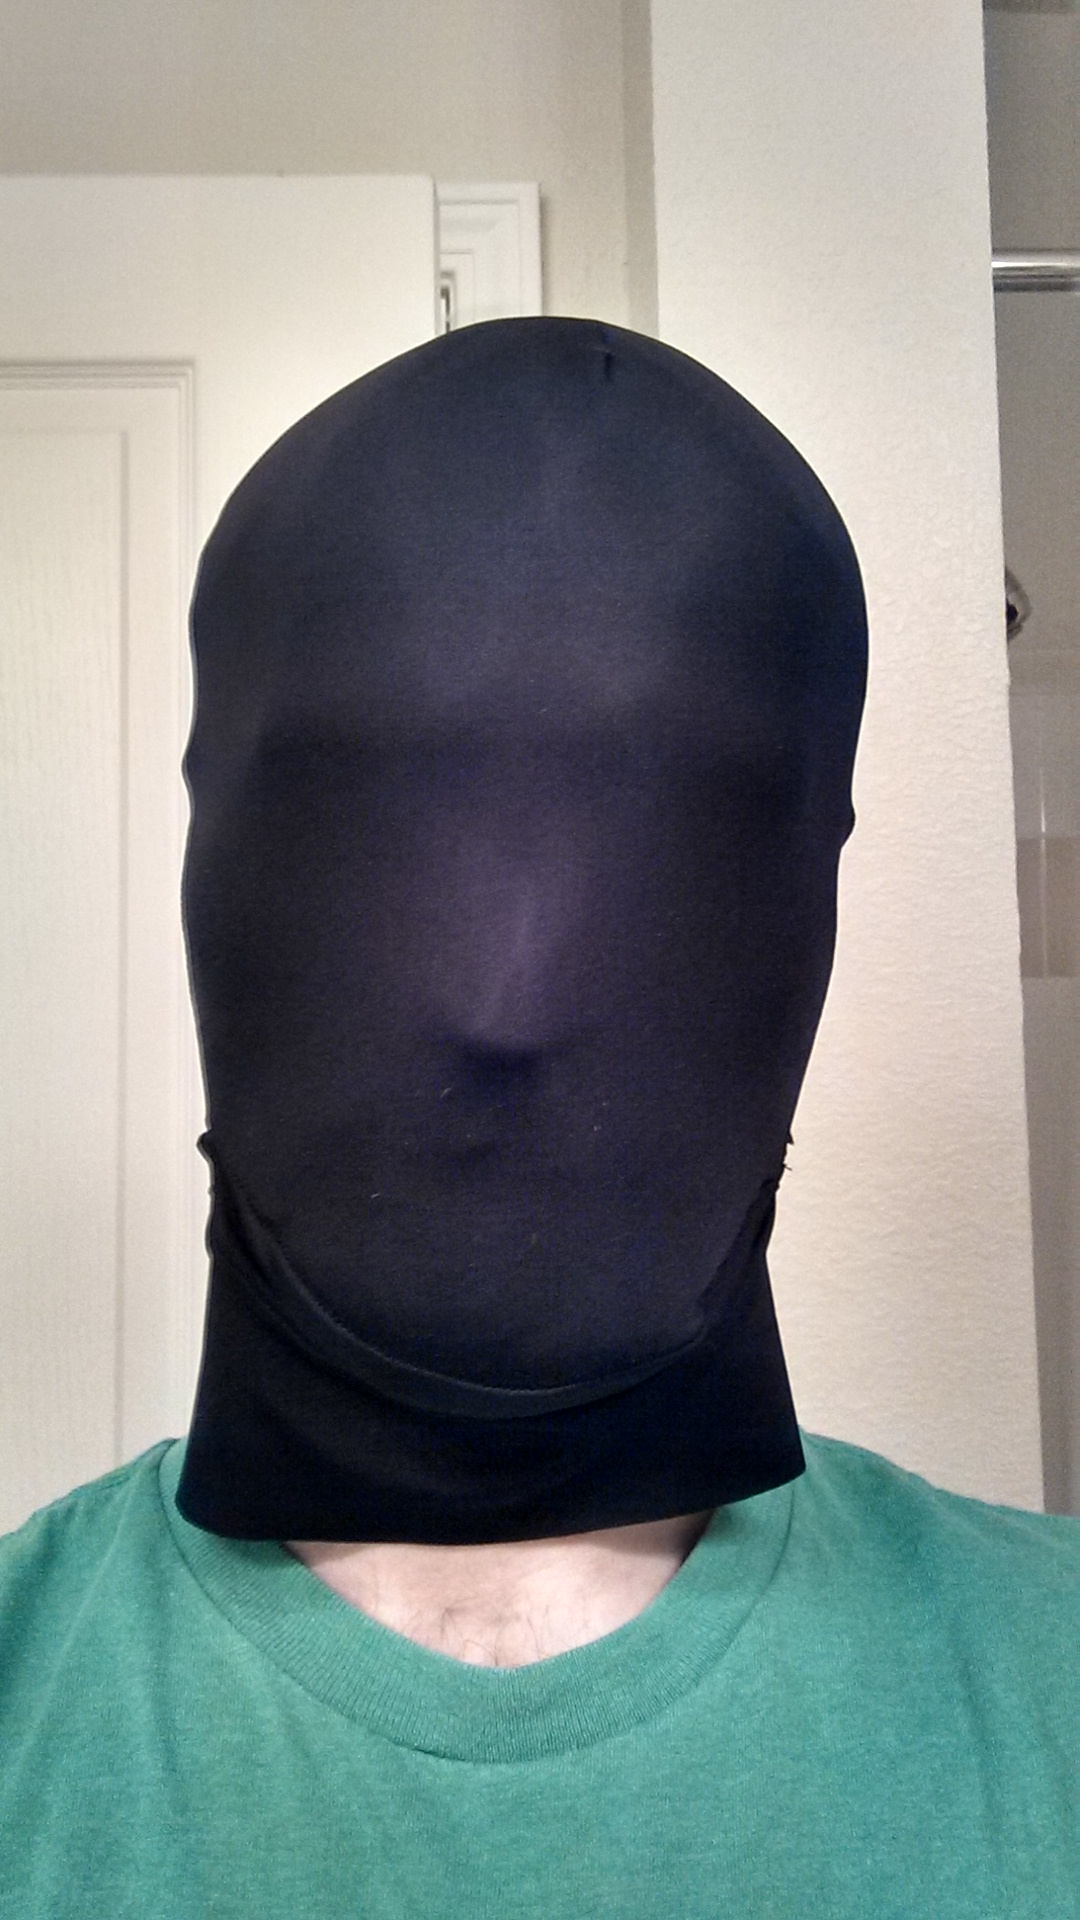
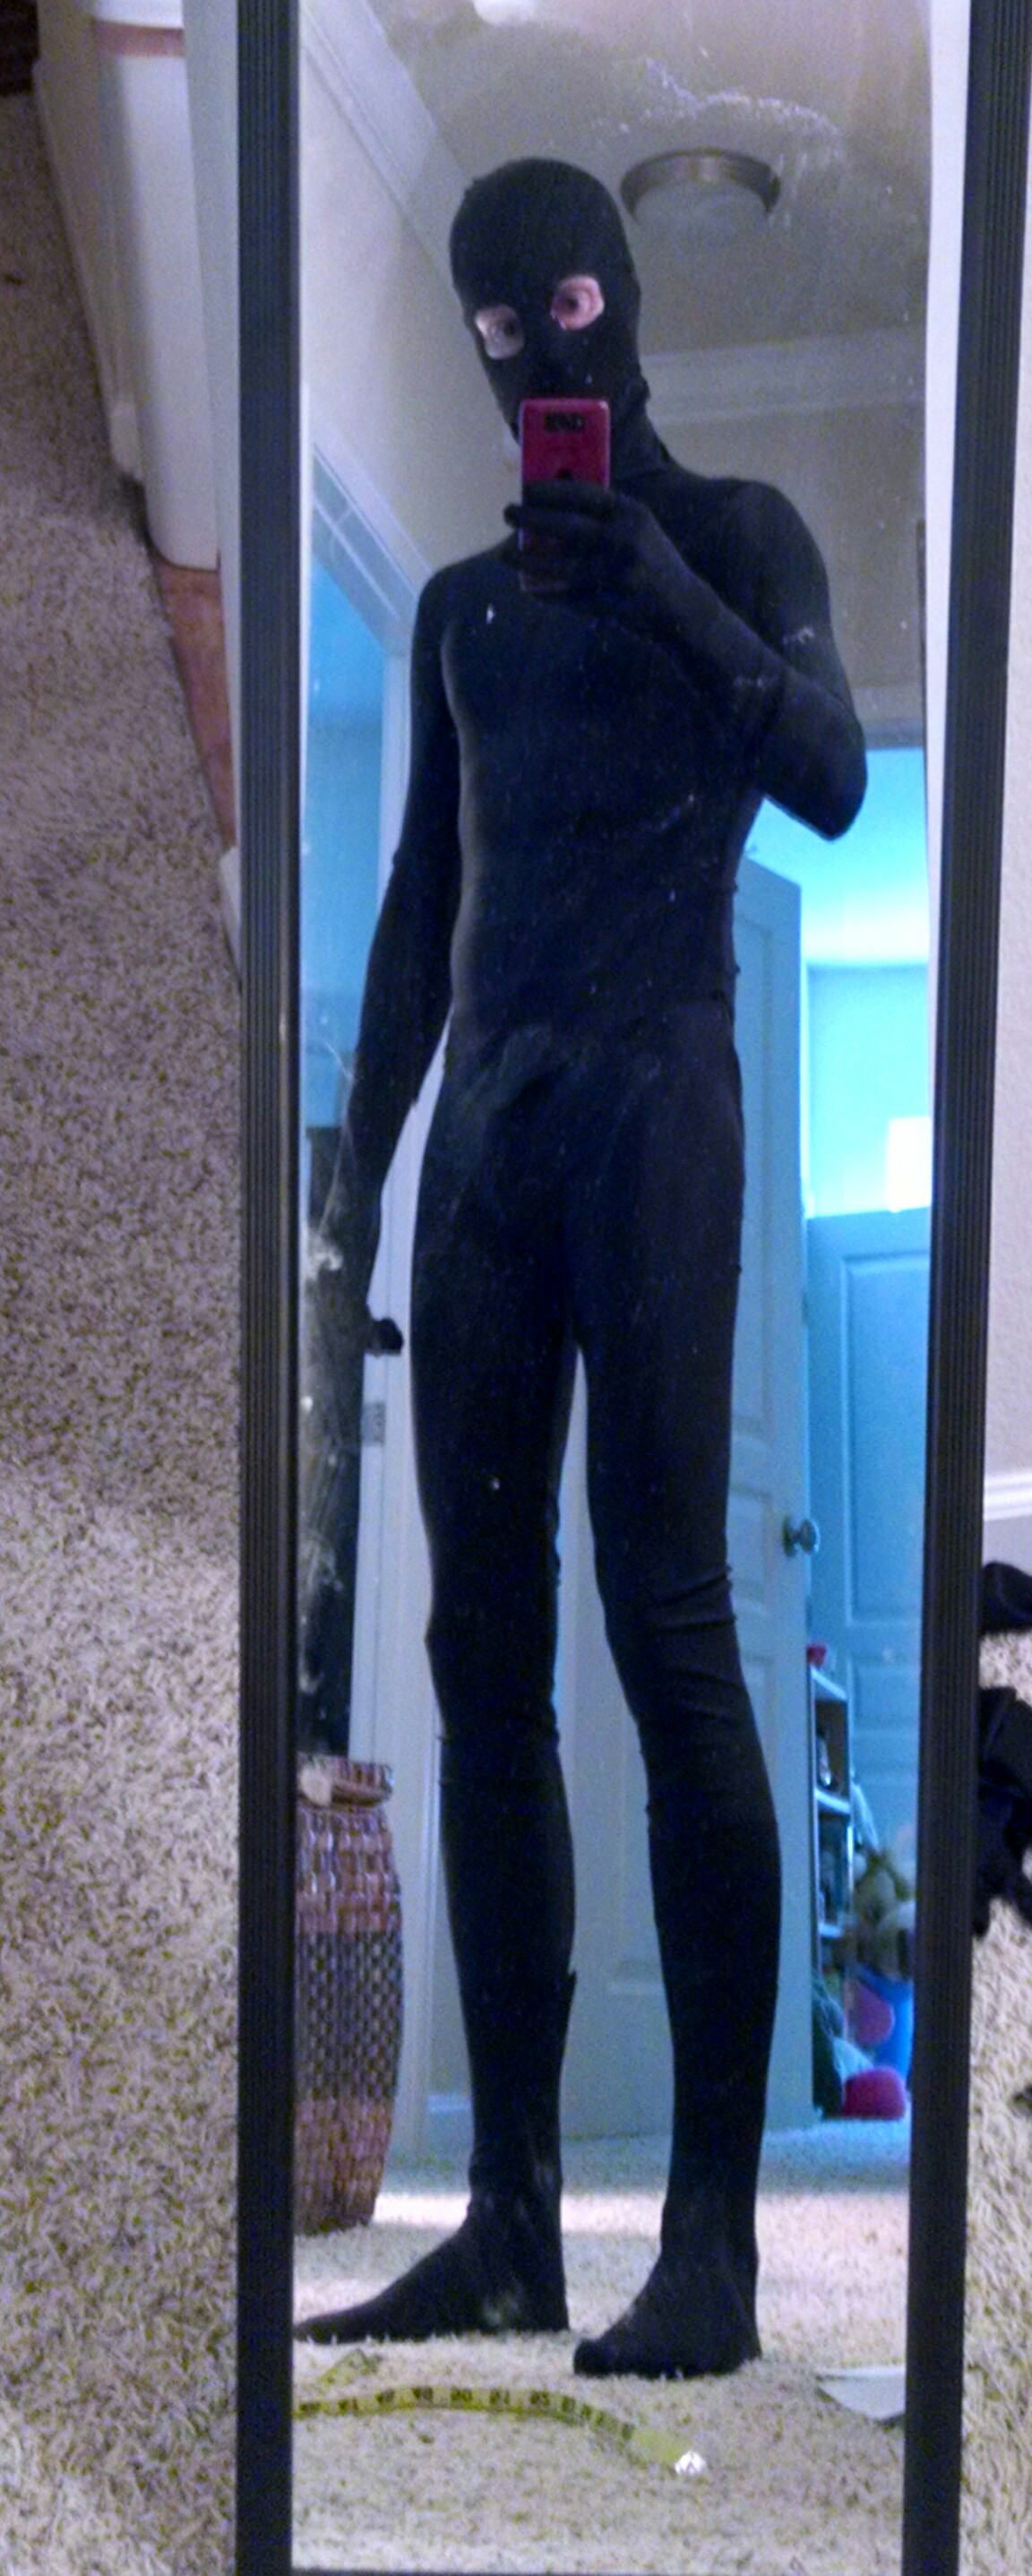
Call 911!There’s a creepy masked man in the house!
Not horrible, considering this was my first try, and the relative complexity of the patern. The problem areas are the chin and the front of the neck. Looking back at the pattern, it’s obvious that my inexplicable flaring of the base of the neck in the pattern would would produce the–well, flared neck in the finished mask. How about that? Also, the under-chin piece was obviously too narrow to span the gap, resulting in weirdness and bunching.
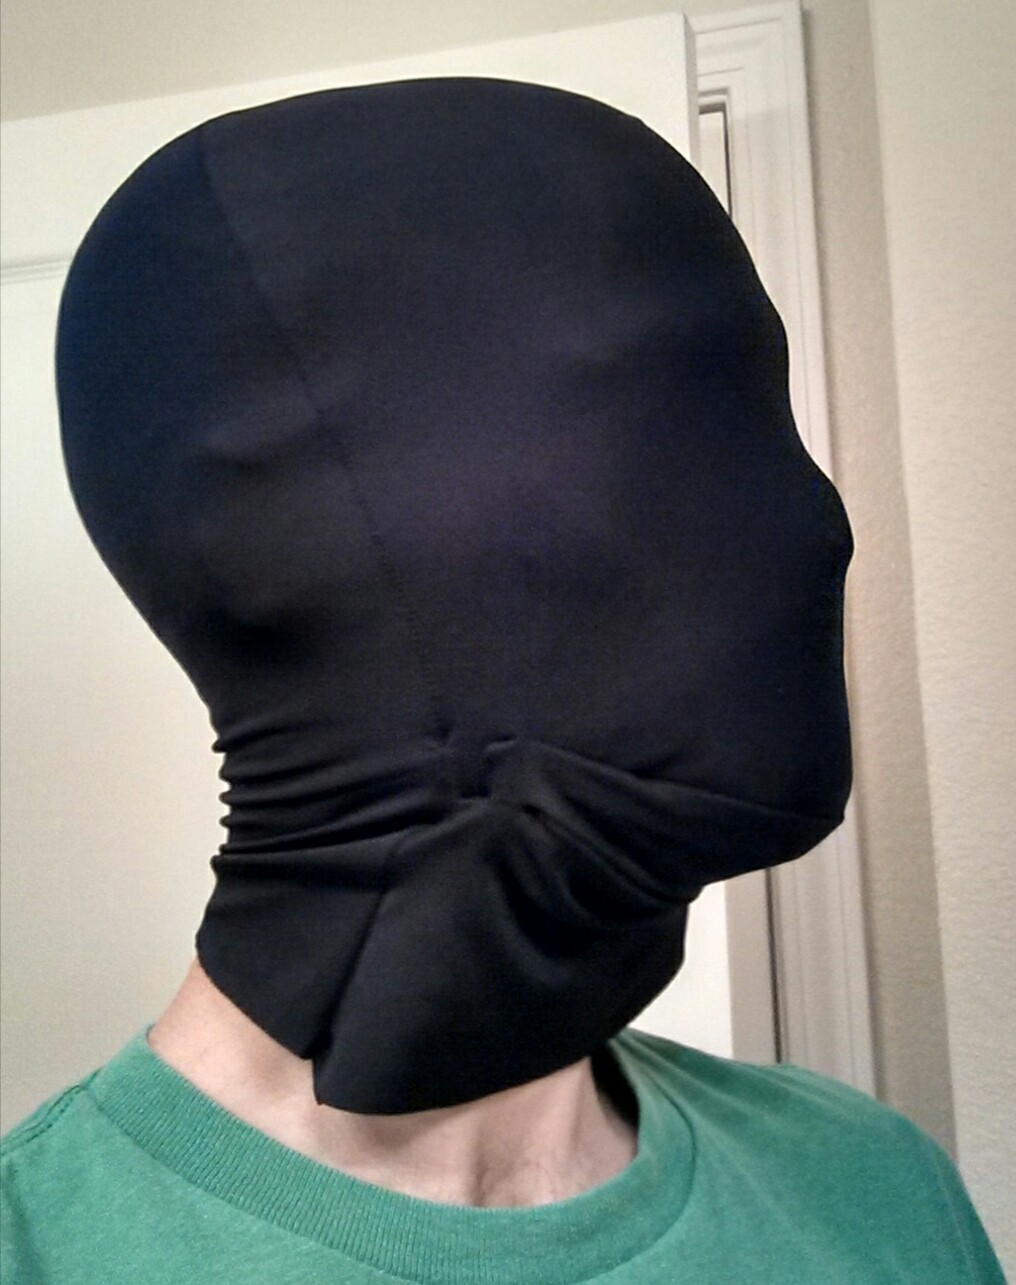
I tried to salvage this mask by adding a center seam on the neck front, thereby taking it in some:
A little better, but not good.
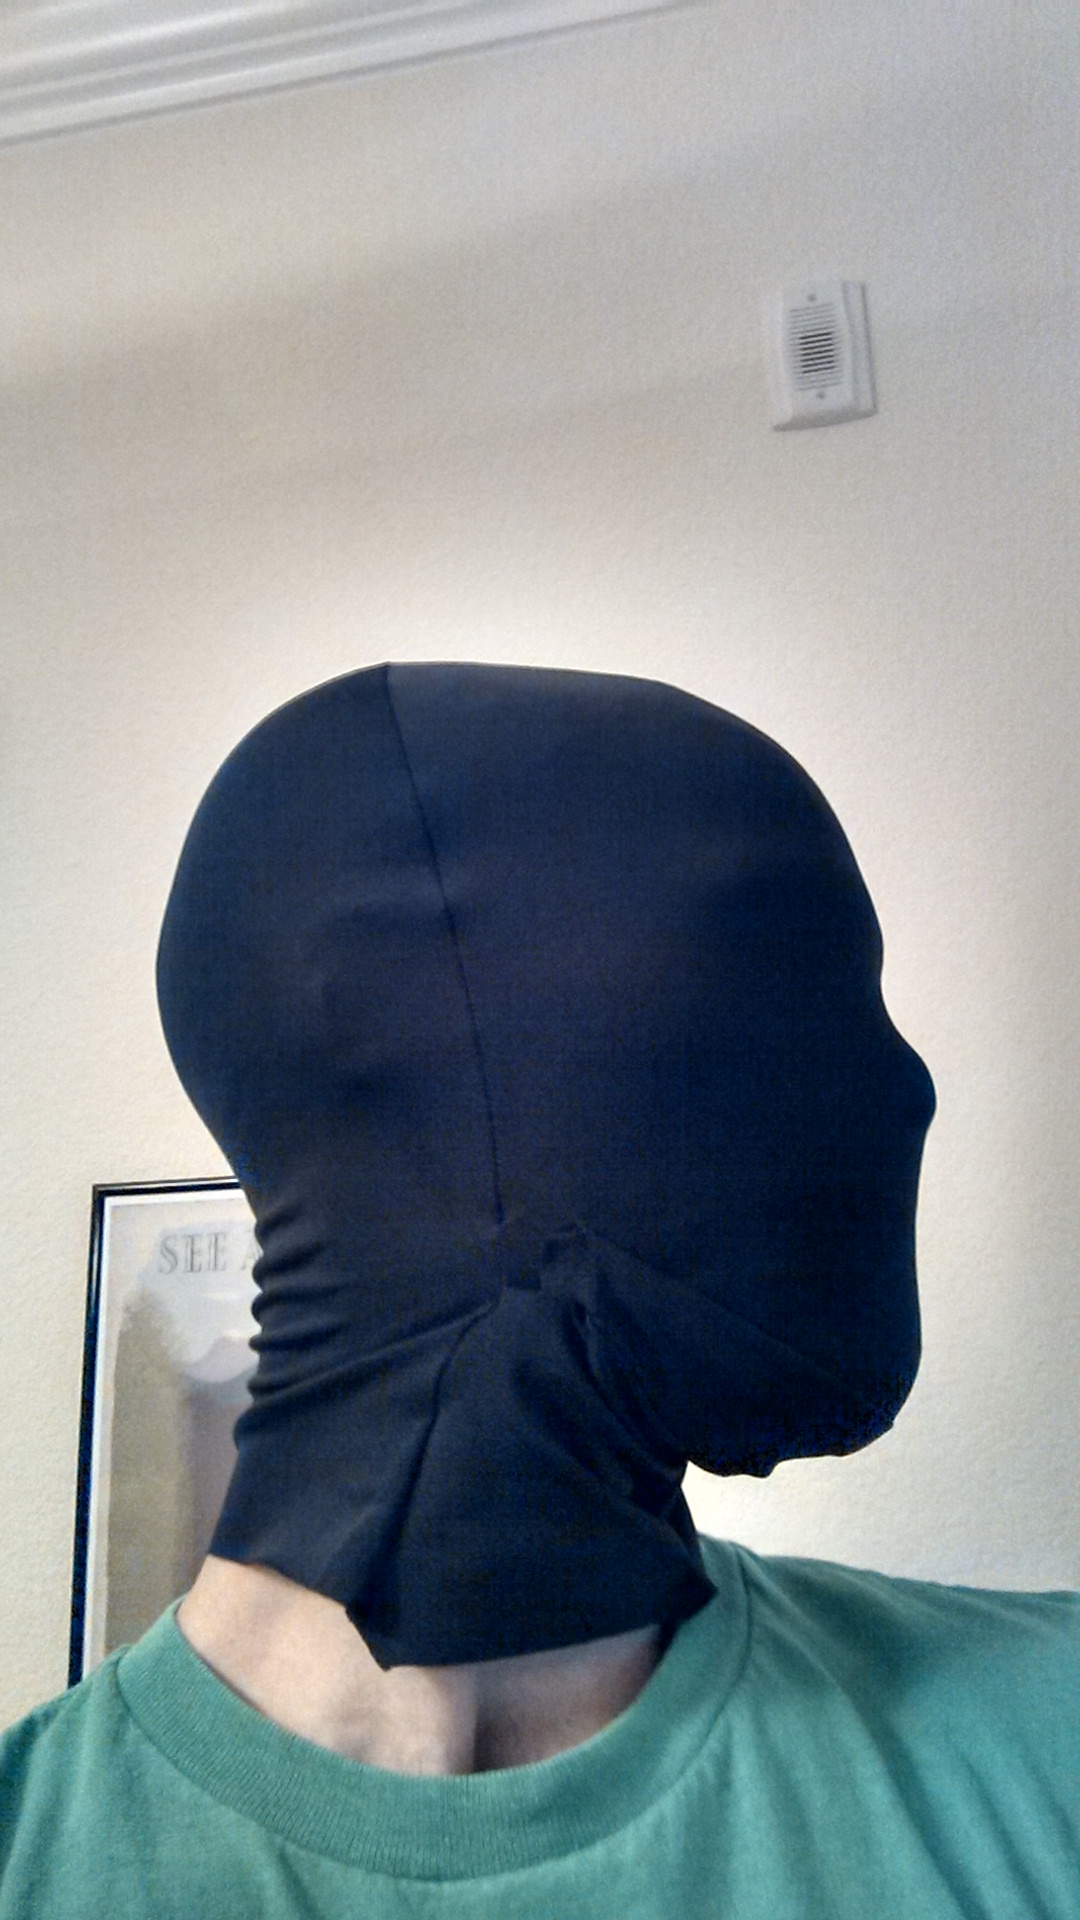
At that point, I thought I was done for the day, as in, “let me set this aside and revisit it tomorrow.” But I ended up going back and refining, wondering if maybe simplicity was the answer.
I cut out two pieces of fabric based on the “back of the head” piece of the pattern–eliminating the under-chin piece–and cut off the flaring sides.
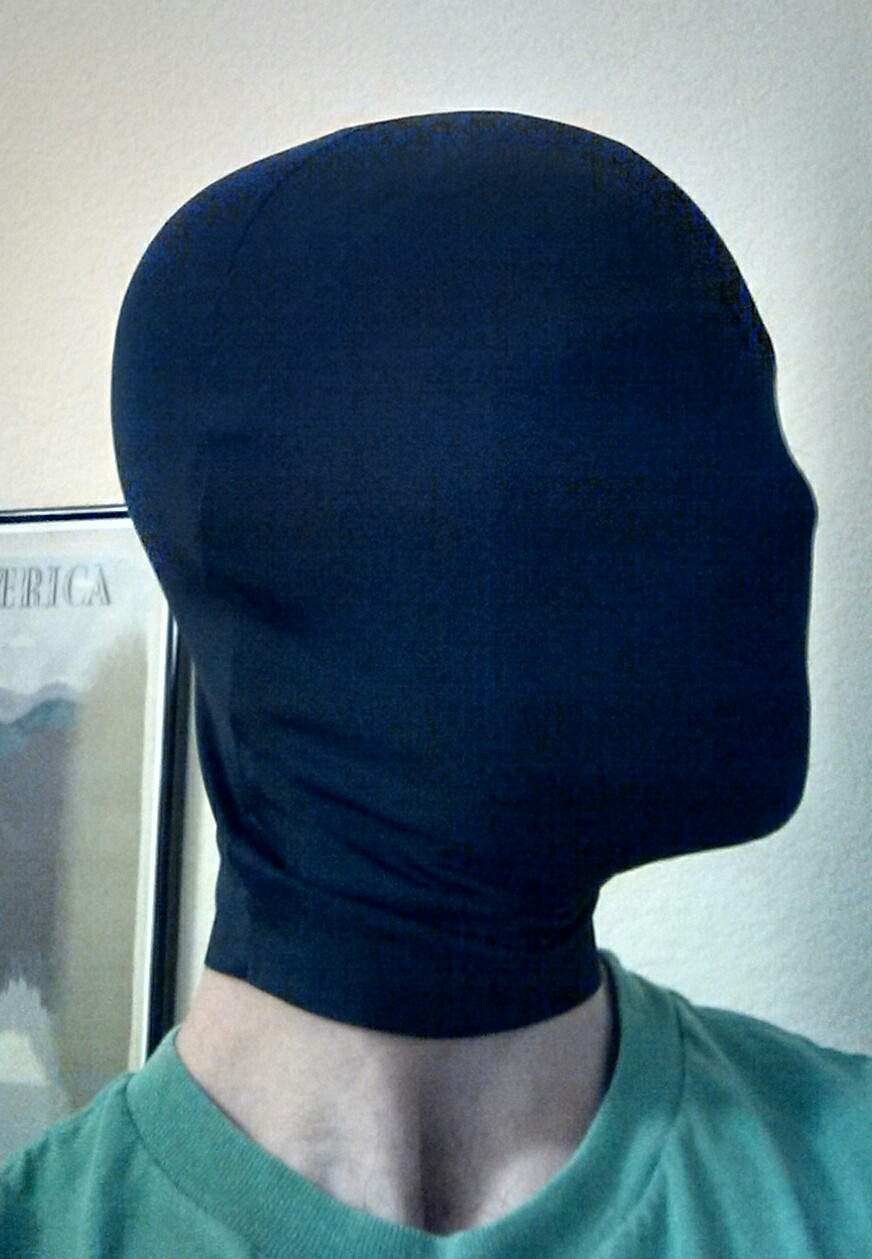
Much better. And much easier to sew! Just a full length seam on each side of the head, and a not-quite half-length seam on the forehead and top of the back of the head.
I stopped short of cutting out eyes for now. I want to plan that out, think about how to properly hem around them, add lenses, and so on.
Taking Stock of the Practice Costume
So…all the pieces have been made, but there’s the question of whether to push on to the finishing work with hems and elastic and eyes and fabric paint and so on. I think that I might actually consider re-doing all of these pieces before feeling like it’s worth adding the finishing work and colors.
I am Justice, I am the Night, I am…the Black Beanpole
What to do different for each piece:
1) Leggings: Do I need to rehash the “Crotchening” here? No, I really don’t. But I have sketched up an idea for a pattern to accommodate the issues, which also include a somewhat higher waist.
2) Shirt: Came out surprisingly well considering, but the fit is tight enough around the shoulders/underarms that torn seams are a concern. Plus, it could be a smidge longer on the sides of the waist, which probably means a less exaggerated “point” in the middle of the center and back (part of the ultimate colored design).
3) Sock-Boots: Actually, 95% happy with these. Just need to add a curve to one side of the toe seam to make it less square.
4) Gloves: re-trace with more finger-junction room. A bit less tight around the wrists. Improve fingertips.
5) Mask: Again, 95% happy with the simplified design. Maybe some accurate measurements to achieve less nose-smushing.
6) Overall: Improve seam junctions; try to avoid sewing too far into my seam allowances (this is likely where the tightness comes from in some cases); practice adding elastic (ugh!) and hemming before doing the final work on the “real” pieces; somewhere along the way, I also need to practice adding “hidden” zippers, which will be a definite part of the “final suit”; practice, practice, research, and practice.
The “Real” Goal:
Of course, this is all supposedly about working toward the successful assembly of the suit pattern from the professionally screen-printed fabric. I definitely need more practice before then. So maybe re-starting the construction of my multi-piece practice suit is a good way to achieve that. And if it means I end up with two finished suits, well, that’s cool too.
UP NEXT: I Need More Spandex!

One thought on “Scary Sewing of Spandex Part 5: Gloves & Mask & Everything Else”